 bluename
How to Transplant Young Sarracenia Seedlings Into Individual Small Starter Pots
If you've ever stared at a crowded tray of tiny pitcher plant babies and felt that cold sweat of panic, you're in the right place. I've killed more Sarracenia seedlings than I care to admit, and most of those losses happened because I waited too long to separate them or I handled the roots like a caveman. The answer upfront: transplant young Sarracenia seedlings into individual small starter pots when they have at least two or three true pitchers and the roots are about 2 to 3 inches long, using a 50/50 mix of peat moss and perlite, keeping the soil consistently wet but not stagnant, and giving them bright indirect light for the first two weeks. That's it. No magic. No secret sauce. Just timing, soil, and patience.
I've been growing carnivorous plants on a windowsill in Oregon for about six years now, and I still remember my first batch of Sarracenia seedlings. I sowed them in a community tray, let them get cozy, and then one spring I looked down and realized the roots were tangled into a single soggy knot. Pulling them apart felt like performing surgery on a spiderweb. Half of them died within a week. That's when I learned that "young Sarracenia seedlings" don't forgive rough handling.
Why Timing Matters More Than You Think
Sarracenia seedlings are not like tomato seedlings. You can't just yank them apart and shove them into new pots. Their roots are fragile, almost hair-like, and they break if you look at them wrong. I learned this the hard way after losing an entire tray of S. leucophylla crosses because I tried to separate them too early. The seedlings were barely an inch tall. Their roots were maybe half an inch long. I thought I was being proactive. I was being impatient.
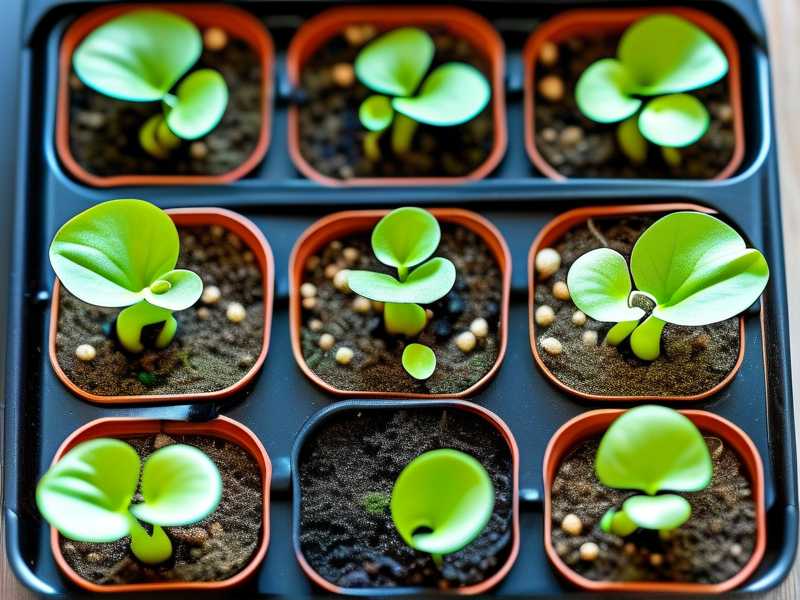
The sweet spot for transplanting young Sarracenia seedlings is when they've developed at least two true pitchers beyond the seed leaves. That usually happens about 8 to 12 weeks after germination, depending on your light and temperature. The roots should be long enough to hold a little plug of soil when you lift them. If the soil falls away and the roots look like tiny threads, wait another week or two.
I keep a cheap LED shop light about 6 inches above my seedlings for 14 hours a day. That keeps them compact and sturdy. Stretchy, leggy seedlings are a nightmare to transplant because their stems snap. If your seedlings look like pale spaghetti, lower your light or increase the duration before you even think about repotting.
The 3 Deadly Mistakes That Kill Most Sarracenia Seedlings
Let's get this out of the way because I've made every single one of these mistakes. Multiple times.
Mistake #1: Overwatering After Transplant
This is the big one. You'll hear it everywhere: "90% of indoor plants die from overwatering." That stat gets thrown around a lot, and while it's originally about houseplants, it applies to Sarracenia seedlings in a specific way. Yes, Sarracenia love wet feet. But seedlings in fresh pots with disturbed roots cannot handle stagnant, sour, anaerobic soil. I've lost more seedlings to root rot in the week after transplanting than to any other cause. I used to think "more water equals more better." Wrong. I drowned a whole batch of S. purpurea seedlings because I kept their pots sitting in a deep tray of water right after I moved them. The soil went sour. The roots turned to brown mush. Game over.
The fix: After transplanting, water from the top gently until the soil is evenly moist, then let the pots sit in a shallow tray with just a quarter inch of water. Refill only when the tray dries out. You want damp, not swampy. I use a turkey baster to water individual pots. It sounds ridiculous, but it gives me precise control and keeps me from flooding everything.
Mistake #2: Light Shock
Sarracenia seedlings that have been under a gentle humidity dome or in a shaded tray will absolutely fry if you move them straight into full sun. I did this two summers ago with a tray of S. flava seedlings. I was so proud of my little green babies that I put them outside on a sunny afternoon to "harden them off." By dinner, half of them looked like burnt matchsticks. The pitchers were crispy. The growing points were cooked.
The fix: After transplanting, keep them in bright, indirect light for at least 7 to 10 days. If they were under artificial light, keep them there but maybe raise the light an inch or two for the first few days. If you want to move them outside, do it gradually. One hour of morning sun on day one. Two hours on day two. Build up over a week. I now use a piece of 40% shade cloth over my outdoor seedling trays for the first two weeks. It looks ugly. It works.
Mistake #3: Using the Wrong Pots
I tried using standard 4-inch nursery pots once. The seedlings looked lost in all that soil. The roots couldn't reach the moisture at the bottom, and the top dried out too fast. Then I tried those tiny peat pellets. The netting strangled the roots. I've also tried terracotta. Terracotta wicks moisture away from the soil, which is the opposite of what Sarracenia want.
The fix: Use small plastic starter pots that are about 2 to 3 inches deep and 2 inches wide. I like the square ones because they save space. Make sure they have drainage holes. I've had good luck with 2.5-inch square pots that you can buy in bulk online. Avoid anything glazed, terracotta, or biodegradable. Plastic is boring but it works. Also, don't use clear pots unless you want algae growing on the inside. Algae doesn't hurt the plants directly, but it looks gross and can harbor fungus gnats.
My Step-by-Step Transplant Process
Okay, here's exactly what I do. I've refined this over about a dozen batches of seedlings, and it works for me in a humid climate with indoor and outdoor growing. Adjust slightly for your own conditions.
Step 1: Gather Your Supplies
You'll need your small plastic pots, a bowl of premixed soil, a spray bottle with distilled water, a pair of fine-tipped tweezers, and a shallow tray. For soil, I use a 50/50 mix of Canadian sphagnum peat moss and perlite. Some growers add a little silica sand. I've tried that and didn't notice a difference. Skip the fertilizer. Sarracenia seedlings burn easily. The Royal Horticultural Society notes that carnivorous plants like Sarracenia should be grown in nutrient-poor, acidic media, which is exactly what peat and perlite give you.
Step 2: Moisten the Soil First
Dry peat moss is hydrophobic. It repels water. If you pot up seedlings in dry soil and then water from the top, the water channels around the roots and you'll think you've watered when you haven't. I mix my peat and perlite in a bucket, then add distilled water and stir until it feels like a wrung-out sponge. It should clump in your hand but not drip. Let it sit for 10 minutes to absorb evenly.
Step 3: Pop the Seedlings Out Gently
This is the scary part. I use a butter knife or a plastic plant tag to loosen the soil around the edge of the community tray. Then I lift the whole clump out and set it on a plate. I use my fingers or the tweezers to gently tease the roots apart. If they're really tangled, I'll dunk the root ball in a bowl of water and swish it gently. The roots separate more easily in water. Don't pull. If a root snaps, it's not the end of the world, but try not to snap many.
Step 4: Make a Hole and Tuck Them In
I use a pencil to poke a hole in the moist soil of the new pot. Then I lower the seedling's roots into the hole and gently backfill. I press the soil down just enough to hold the seedling upright. Don't compact it. You want air spaces. The crown of the seedling, where the pitchers emerge, should sit right at the soil surface. If you bury it, it rots. If you leave it too high, it dries out. I've done both. Burying is worse.
Step 5: Water From the Top, Then Bottom
After all the seedlings are potted, I give each pot a gentle squirt of distilled water from the spray bottle to settle the soil around the roots. Then I set the pots in a tray and add water to the tray until it's about a quarter inch deep. That's it. No misting. No humidity dome. Sarracenia seedlings don't need high humidity once they're potted. In fact, poor air circulation plus high humidity equals mold. I learned that after a batch of seedlings got fuzzy gray mold on their pitchers. I had to toss the whole tray.
What I Observed Over Two Weeks
I transplanted a batch of 24 Sarracenia seedlings this past March. Here's what happened, day by day, roughly.
Days 1 to 3: The seedlings looked sad. A few pitchers yellowed and shriveled. That's normal. The roots are recovering. I resisted the urge to fuss. I kept the tray water at a quarter inch and the light indirect.
Days 4 to 7: New growth started to show. Tiny green nubs appeared at the center of the rosettes. That's the sign that the roots have established. I did a little happy dance. I also noticed that the pots on the edges of the tray dried out faster, so I rotated the tray every couple of days.
Days 8 to 14: The pitchers started to color up. The S. leucophylla seedlings showed white patches on their pitchers. The S. purpurea seedlings stayed green but got wider. I began giving them a little more light, about 30 minutes of direct morning sun through a window. No burning. I also started adding a tiny amount of Maxsea fertilizer at 1/4 strength to the pitchers of the larger seedlings. I use a syringe to put a drop in each pitcher. This is controversial. Some growers never fertilize seedlings. I've found that a very dilute dose after two weeks speeds up growth without burning. But if you're nervous, skip it.
One seedling died. It was the smallest one, and I think I nicked its root during separation. The other 23 are still alive and growing. That's a 96% success rate, which is way better than my early attempts.
Frequently Asked Questions
How do I know if my Sarracenia seedlings are ready to transplant?
Look for two or three true pitchers beyond the seed leaves. The roots should be at least 2 inches long and hold a small plug of soil when you lift the seedling. If the roots are shorter or the seedlings are still tiny, wait.
Can I transplant Sarracenia seedlings into regular potting soil?
No. Regular potting soil has fertilizer and lacks the acidity Sarracenia need. Use a mix of peat moss and perlite. The American Horticultural Society recommends avoiding any soil with added nutrients for carnivorous plants.
What if my seedlings look wilty after transplanting?
That's normal for the first few days. Keep the soil moist, keep the light indirect, and don't fertilize. If they're still wilty after a week, check the soil moisture. You might be overwatering. Remember that 90% of indoor plants die from overwatering, and seedlings are even more sensitive.
Final Thoughts
Transplanting young Sarracenia seedlings is not hard. It just requires timing, gentle hands, and the right soil. I've made every mistake in the book, and I still lose a seedling here and there. That's fine. These plants are tougher than they look once they're established. The key is to give them a good start in those little starter pots. Keep the water shallow, the light bright but indirect, and your hands off for the first week. You'll be rewarded with happy little pitchers that grow into beautiful plants. And if you lose one? Learn from it. That's what I did.





