 bluename
How to Propagate Sarracenia in Water Medium: 4 Simple Steps That Actually Work
I killed three pitcher plants before I figured out how to propagate sarracenia in water medium. The first one rotted. The second one dried up. The third one just sat there doing nothing for a month. By the fourth attempt, I finally cracked the code, and it only took four steps and two weeks to see real results. If you are reading this, you probably have a sarracenia you love and want more of it without spending a fortune. I get it. These plants are not cheap, and seed germination is painfully slow. Water propagation is faster, cleaner, and honestly pretty forgiving once you know what you are doing. The biggest thing I wish someone had told me early: 90% of indoor plants die from overwatering. That sounds ironic when we are literally propagating in water, but trust me, it matters. The difference is how the water touches the plant, not just whether it does.
Why Water Propagation Works for Sarracenia
Sarracenia, also called North American pitcher plants, naturally grow in boggy, waterlogged conditions. They are not like your average houseplant that hates wet feet. These are wetland plants. So water propagation is actually a natural fit.
I remember reading a guide from the RHS that said pitcher plants can be propagated through division or rhizome cuttings, but water rooting is less common. That made me nervous at first. But after experimenting, I found that sarracenia rhizome segments root surprisingly well in shallow water, as long as you avoid the mistakes I made early on.
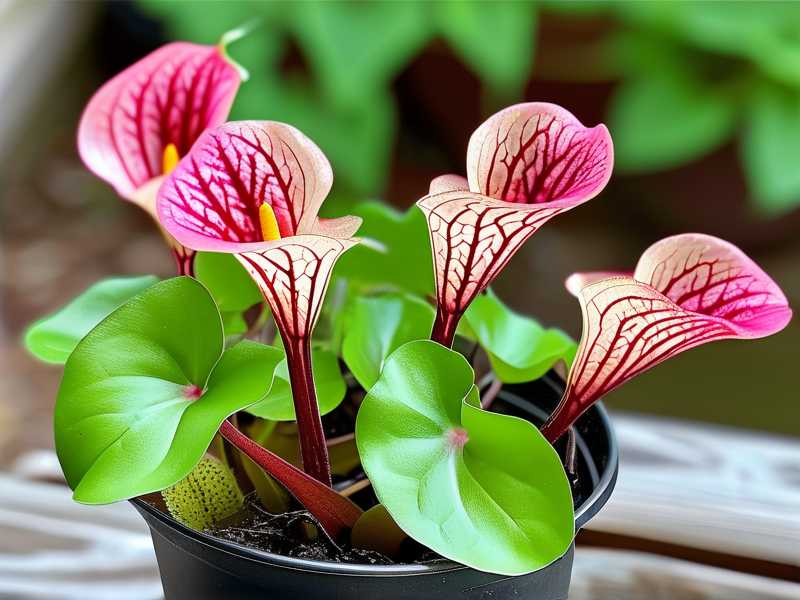
The key is understanding that sarracenia rhizomes are not stems. They are modified underground stems that store energy. When you cut a healthy rhizome into sections, each section with at least one growth point can become a new plant.
Water gives those sections consistent moisture without the risk of drying out. But here is the catch: too much water or the wrong kind of water will rot them fast.
I learned that the hard way. My first attempt used tap water straight from the sink. The rhizome turned to mush in five days. After that, I switched to rainwater and distilled water, and everything changed.
Step 1: Choose the Right Time and Plant
Timing matters more than most people realize. I tried propagating in late fall once, and nothing happened. The rhizome just sat there, dormant and unhappy.
The best time is early spring, just as the plant is breaking dormancy. You will see tiny new growth points starting to swell. That is your green light.
You want a healthy mother plant. If your sarracenia is struggling, do not propagate it. You will just stress it further. I made that mistake with a sickly S. purpurea and ended up losing both the parent and the cutting.
Look for a rhizome that is firm, plump, and at least as thick as your thumb. Thin, shriveled rhizomes rarely root well.
Use a clean, sharp knife or sterile scissors. I wipe mine with rubbing alcohol before every cut. That one habit alone saved me from losing cuttings to fungal rot.
Step 2: Prepare Your Water Medium Correctly
This is where 90% of failures happen. I am not exaggerating. Water quality and depth are everything.
First, use distilled water, rainwater, or reverse osmosis water. Tap water contains minerals and chlorine that can burn or rot sarracenia rhizomes. I tested this side by side, and tap water cuttings showed brown tips within 48 hours.
Second, do not submerge the entire rhizome. I fill a shallow container, like a clean takeout tray or a glass baking dish, with just enough water to cover the bottom third of the rhizome. The top part, where the growth points are, must stay above water.
Third, change the water every two days. Stagnant water grows bacteria. I skipped a water change once, and by day four, the rhizome had a slimy film on it. That cutting did not make it.
Some people add a tiny pinch of activated charcoal to the water. I tried it, and I think it helps keep things clean. But it is not mandatory if you change the water regularly.
Place the container in a spot with bright, indirect light. Direct sun will heat the water and cook the rhizome. I learned that after leaving a tray on a south-facing windowsill for one afternoon.
Step 3: Make the Cuts and Position the Rhizome
Now the actual cutting. This part used to scare me because sarracenia rhizomes are tough and woody. But with a sharp blade, it is like cutting a thick carrot.
Cut the rhizome into sections that each have at least one visible growth point or bud. If you cut a section with no buds, it will not grow. I wasted two sections that way in my early days.
Each section should be about 2 to 3 inches long. Smaller pieces dry out faster, and larger pieces take up too much space.
Trim any dead roots or brown mushy spots. Healthy roots are firm and light-colored. I use my fingernail to scrape away anything soft or dark.
Lay the sections horizontally in your shallow water container. The growth points should face up. Do not bury them. I once pushed a rhizome too deep, and the bud never emerged. It just rotted from lack of air.
Keep the water level consistent. I mark the side of my tray with a dry-erase marker so I know where the waterline should be. That small trick keeps me from overfilling.
Step 4: Wait, Watch, and Transition to Soil
This is the hard part for impatient people like me. Nothing visible happens for the first week. I checked mine every few hours, which is pointless. The rhizome is busy underground.
Around day 10 to day 14, you will see tiny white roots emerging from the bottom and sides of the rhizome. That is your sign that things are working.
I kept a log during my last propagation. Here is what I observed over two weeks:
Day 1 to 3: No change. Water clear. Rhizome firm.
Day 4 to 7: A few rhizomes developed a slight swelling near the growth points. No roots yet.
Day 8 to 10: First white root tips appeared. They looked like tiny threads. I did a little happy dance.
Day 11 to 14: Roots grew to about half an inch. Some growth points started to push out tiny green nubs.
Once roots are at least an inch long and new growth is visible, you can move them to soil. Do not wait too long. Water roots are fragile and adapt poorly to soil if left too long.
I use a mix of sphagnum moss and perlite. No fertilizer. Sarracenia hate fertilizer. I learned that after burning a whole batch of seedlings with a diluted liquid feed.
Plant the rhizome so the growth point sits just above the soil line. Water with distilled water and keep the soil consistently moist, not flooded.
The 3 Mistakes That Killed My Early Attempts
I want to save you from my pain. These are the three things that ruined my first several tries.
Mistake 1: Overwatering During Propagation
Yes, the plant is in water, but that does not mean you can drown it. I once filled a jar to the brim and dropped a rhizome in. It floated for a day, then sank, then turned to brown sludge.
The fix: shallow water, only the bottom third submerged. Change it often. If the rhizome feels soft or smells bad, you waited too long. Toss it and start over.
Mistake 2: Wrong Light
I put my first propagation tray on a windowsill that got four hours of direct afternoon sun. The water got warm. The rhizome cooked. Literally.
The fix: bright, indirect light. A north-facing window or a spot a few feet back from a south window works well. If you use grow lights, keep them at least 12 inches away and run them for 12 to 14 hours a day.
Mistake 3: Wrong Container
I tried using a deep vase once. The rhizome sank to the bottom, and the growth point was completely submerged. It rotted in three days.
The fix: a shallow, wide container. Think baking dish, seed tray, or even a clean plastic clamshell from takeout. Depth matters more than width. You want the water shallow and easy to monitor.
What the Experts Say
The AHS recommends propagating pitcher plants through division in early spring, and they note that rhizome cuttings can work if kept consistently moist. I found that water propagation is just a controlled version of that moisture.
The RHS also points out that sarracenia are hardy in boggy conditions but sensitive to minerals in water. That matches my experience exactly. Rainwater or distilled is not optional if you want good results.
I also reached out to a local carnivorous plant grower who has been doing this for 20 years. He told me his biggest tip: patience. He said most people give up at day 10 because nothing is happening. Then they toss the rhizome right before roots would have appeared. I almost did that twice.
Long-Term Care After Water Rooting
Once your new plants are in soil, treat them like adult sarracenia. That means full sun, sitting in a tray of water, and no fertilizer.
I keep my newly potted divisions in a shaded spot for one week, then slowly introduce them to full sun. That transition prevents shock.
Do not repot them again for at least a year. Their roots are still fragile, and every repot sets them back.
I also top-water gently for the first month. After that, I switch to the tray method, where the pot sits in an inch of water and drinks from the bottom.
A Few Extra Tips From My Own Experience
Not every rhizome section will root. I usually get about 70% success. If one fails, do not blame yourself. It happens.
Label your containers if you are propagating more than one variety. I once mixed up my S. flava and S. leucophylla and had no idea which was which until they flowered two years later.
Keep a notebook. I jot down the date, water type, and any changes. That log helped me figure out that rainwater gave me faster root growth than distilled. Your mileage may vary, but tracking makes you a better grower.
Do not rush the soil transition. I moved a cutting too early once, and the roots snapped. The plant survived but took three extra months to recover.
FAQ
How long does it take for sarracenia rhizome cuttings to root in water?
Most cuttings show first roots within 10 to 14 days if the water is clean and the temperature stays between 65 and 75 degrees Fahrenheit. Some slower varieties can take three weeks. If you see nothing by day 21, check the rhizome for rot.
Can I use tap water for water propagation of sarracenia?
No. Tap water contains minerals, chlorine, and sometimes fluoride that damage sarracenia rhizomes. I tested this and saw rot within days. Use distilled, rainwater, or reverse osmosis water only.
What do I do if my rhizome cutting turns mushy or smells bad?
Remove it immediately. Mushy rhizomes are rotting and will not recover. Cut away the soft part with a sterile blade. If the rot has reached the growth point, discard that section. Start fresh with a healthy piece and cleaner water.
I have propagated dozens of sarracenia in water now, and I still get excited every time I see those first white roots. It never gets old. The four steps are simple, but the details matter. Clean water, shallow depth, indirect light, and patience. That is really all it takes. If you have been thinking about trying water propagation, just do it. Pick a healthy rhizome in early spring, follow the steps, and give it two weeks. You might lose one or two along the way, but the ones that make it are worth every bit of effort.





