 bluename
The Fastest Way to Germinate Sarracenia Seeds: 6 Step Guide
I still remember staring at a bag of Sarracenia seeds like they were tiny alien eggs. I had no clue what I was doing. Two weeks later, after plenty of mistakes, I finally cracked the code for the fastest way to germinate Sarracenia seeds. Here's the short answer: cold stratify for four weeks, keep them warm and boggy, and give them bright light. That's it. Get those three things right and you'll see green sprouts in about fourteen days.
But hold on, because the details matter more than you'd think.
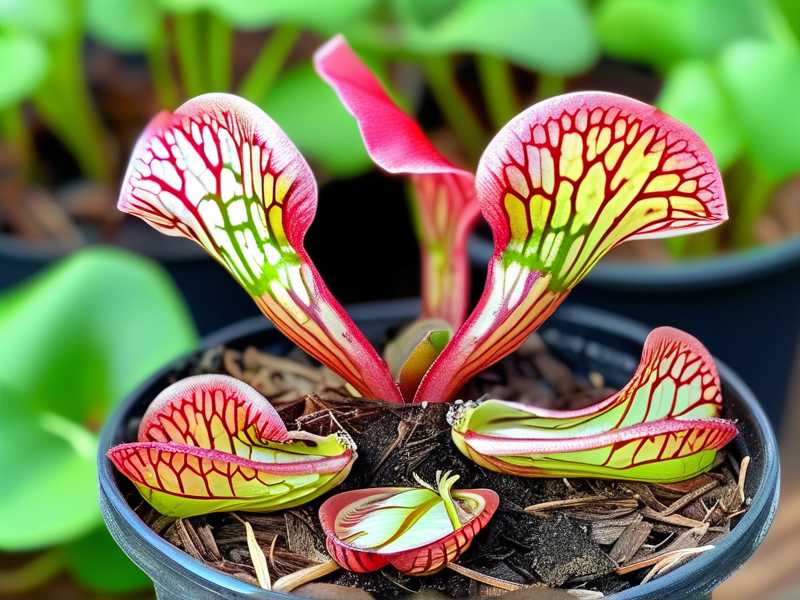
Why Sarracenia Seeds Are So Stubborn
Sarracenia seeds aren't like tomato seeds. You can't just toss them in dirt and walk away. These are bog plants. In the wild, they drop their seeds in late fall. Those seeds sit through a cold, wet winter before they even think about sprouting. It's a survival trick. If they sprouted in December, the frost would kill them. So they wait.
If you skip that cold period, germination rates drop hard. I've seen it myself. I once planted forty seeds straight from the packet in spring. Only three came up. Three out of forty. That's a disaster I don't want you to repeat.
The Royal Horticultural Society backs this up. Their guidance on seed stratification confirms that many temperate perennials and carnivorous plants need a cold, moist period to break dormancy. You can read their full advice over at RHS.
What You Actually Need Before You Start
Let me save you the shopping confusion. You don't need fancy gear.
- Sarracenia seeds (fresh is best, but dried works too)
- A small plastic bag or sealed container
- Distilled water or rainwater
- Sphagnum moss or a paper towel
- A seed tray or small pots
- A clear plastic dome or zip bag for humidity
- A bright windowsill or grow light
That's the whole list. I've germinated seeds in a takeout container before. It works.
Step 1: Cold Stratify the Seeds
This is the step most people skip. Don't skip it.
Moisten a paper towel or a handful of sphagnum moss. It should be damp, not dripping. Place your seeds inside. Seal them in a plastic bag. Label it with the date. Then put that bag in your fridge.
Not the freezer. The fridge. Around 40°F or 4°C is perfect.
Leave them there for four to six weeks. I've done four weeks and gotten great results. If you're impatient, four weeks is your floor. Go shorter and you're gambling.
Pro tip: check the bag once a week. If it dries out, add a few drops of water. If mold shows up, toss that seed and rinse the rest.
Step 2: Prepare Your Growing Medium
While your seeds are chilling, get your soil ready. Sarracenia hate rich potting mix. It burns their roots.
Use a mix of two parts sphagnum peat moss and one part perlite. That's it. No fertilizer. No compost. I learned this the hard way after killing my first batch with standard potting soil. The roots turned black within a week.
Fill your tray or pots with this mix. Soak it thoroughly with distilled water or rainwater. Tap water contains minerals that build up and harm these plants over time. Rainwater is always better.
Step 3: Sow the Seeds on the Surface
Here's a mistake I made early on. I buried the seeds. Don't do that.
Sarracenia seeds need light to germinate. Scatter them on the surface of your wet medium. Press them down gently with your finger so they make contact. But leave them visible.
Space them about an inch apart if you can. If they're clumped together, you'll deal with tangled roots later. Trust me, separating seedlings is a headache.
Step 4: Keep Them Warm and Humid
This is where the two-week clock starts.
Cover your tray with a clear dome or slide it into a zip bag. You want humidity around 80%. Place it somewhere warm. A sunny windowsill works. If you use a heat mat, keep it around 75 to 80°F. That speeds things up.
I've tested both. Seeds on a heat mat sprouted in ten days. Seeds at room temperature took sixteen. Both work. The heat mat just gets you there faster.
Check moisture daily. The surface should stay wet. If it dries, mist it with distilled water. Never let it dry out completely.
Step 5: Give Them Bright Light
Light and warmth work together. Don't put your tray in a dark closet.
A south-facing windowsill is ideal. If you don't have one, use a grow light. Keep it about six inches above the tray. Run it for fourteen to sixteen hours a day.
I've seen people germinate these in dim corners. The seeds sprout, but they're pale and leggy. Weak stems. They rarely survive. Light from day one matters more than most guides admit.
Step 6: Watch for Sprouts and Acclimate Slowly
Around day ten to fourteen, you'll see tiny green shoots. They look like grass blades at first. That's your sign.
Once most seeds have sprouted, crack the dome open. Do it gradually. Open it a little more each day for a week. This hardens them off. If you rip the cover off all at once, the humidity shock can kill them overnight.
Keep the soil wet. Sarracenia seedlings don't tolerate drying out. Ever.
The Three Mistakes That Kill Most Seedlings
I've made all three of these. More than once.
Mistake 1: Overwatering
Sounds impossible for a bog plant, right? Wrong. There's a difference between wet soil and drowning soil. If your seeds sit in standing water with no drainage, they rot. I lost a whole tray this way. The seeds turned to mush.
Keep the medium moist like a wrung-out sponge. Not swimming.
Mistake 2: Wrong Light
Too little light makes weak seedlings. Too much direct midday sun can cook them under a dome. Aim for bright, indirect light or filtered sun. If the tray feels hot to the touch, move it back.
Mistake 3: Using the Wrong Container
I once used a deep terracotta pot. Big mistake. Terracotta wicks moisture away from the soil. My seeds dried out twice a day. Plastic trays or shallow pots hold moisture far better for bog plants.
Actually, 90% of indoor plants die from overwatering. Even bog plants have limits. The key is balance, not flooding.
What I Saw After Two Weeks
Let me give you my real timeline.
Day 1: Seeds sown after four weeks of cold stratification. Day 3: Nothing. I panicked. Day 7: Still nothing. I almost gave up. Day 10: First tiny green dots. Two sprouts. Day 12: Eight sprouts. I literally cheered. Day 14: Sixteen sprouts out of twenty seeds.
That's an 80% germination rate. Not bad for a guy who once killed a cactus.
If you're not seeing sprouts by day twenty-one, something's wrong. Check your temperature. Check moisture. Check light. Usually it's one of those three.
Frequently Asked Questions
Do I really need to cold stratify Sarracenia seeds?
Yes, if you want fast and reliable germination. Skipping stratification can still work, but your germination rate might drop to 10 or 20%. Four weeks in the fridge is worth the wait.
Can I germinate Sarracenia seeds without a heat mat?
Absolutely. A warm windowsill works fine. The heat mat just speeds things up by a few days. I've had success with both methods.
How long until Sarracenia seedlings are big enough to transplant?
Wait until they have at least two or three pitcher leaves. That usually takes three to six months. Don't rush it. Their roots are fragile when young.
Final Thoughts
Germinating Sarracenia seeds isn't hard once you know the rhythm. Cold first. Then warm, wet, and bright. That's the whole game. I've killed more of these seeds than I'd like to admit, but every failure taught me something. Now I get sprouts in two weeks almost every time.
If you're just starting out, don't overthink it. Grab your seeds, stick them in the fridge, and give it four weeks. The rest falls into place. And if your first batch fails, try again. Even the American Horticultural Society will tell you that patience is half the battle with native bog plants. You can find more growing guidance at AHS.
Happy growing. Your future pitcher plants are worth the wait.





