 bluename
How to Split Sarracenia Clumps: 5 Simple Division Tips
If your pitcher plant is busting out of its pot like mine was last spring, learning how to split Sarracenia clumps is the single best thing you can do for it. I pulled mine apart on a Sunday morning, potted up four divisions, and within two weeks the new growth points were already pushing up. The mother plant looked happier than it had in a year. Honestly, the whole job took under an hour.
Sarracenia, the North American pitcher plant, grows from thick rhizomes that branch underground. Left alone, those branches pack tighter and tighter until the center of the clump dies out and pitchers get smaller. Dividing reverses that decline. It also gives you free plants, which never hurts.
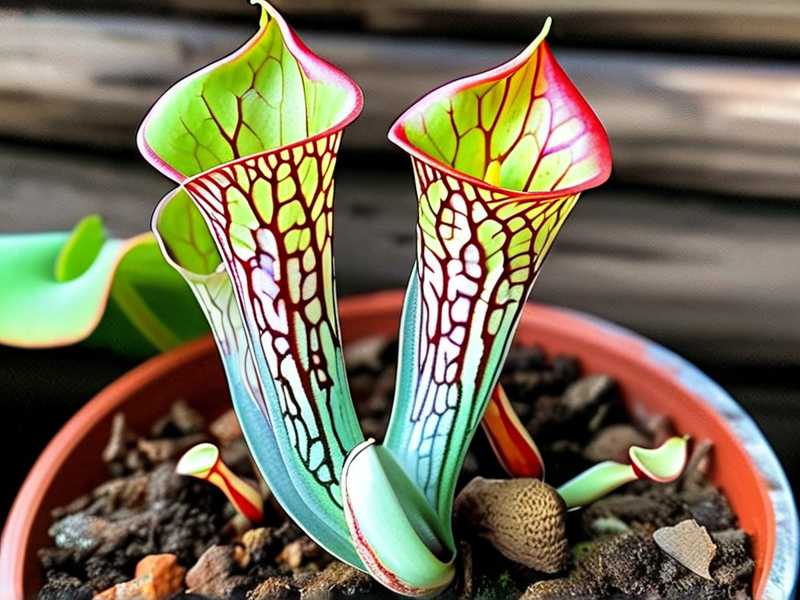
I have killed my share of carnivorous plants over the years, so let me save you some pain before we start.
Why I Bother Dividing Sarracenia At All
I used to think disturbing a healthy plant was asking for trouble. Then I watched my three-year-old S. flava stall out. Pitchers came in thin and short. When I finally unpotted it, the rhizome was coiled like a rope with almost no soil left.
Splitting solves three problems at once. It renews the soil, gives each rhizome room to grow, and improves airflow around the crowns, which cuts down on rot. The RHS notes that congested clumps of herbaceous perennials lose vigor over time, and Sarracenia behaves the same way even though it is a bog plant, not a border perennial.
Do it every two to four years. For most home growers, early spring just as growth resumes is the sweet spot.
When To Divide, And When To Wait
Timing matters more than technique here. I have divided in summer before and spent six weeks babying stressed plants back from the brink.
The best window runs from late winter to early spring, right before new pitchers emerge. In the US and Canada that is usually February into April depending on your zone. In the UK, late March works well. Australian growers should aim for late winter, around August.
Avoid dividing in the middle of active pitcher production. The plant is spending energy on traps and has less to spare for root recovery.
One more thing. If your plant is about to flower, that is fine. Division will not stop it.
The 5 Division Tips That Actually Work
1. Soak First, Pull Second
Dry rhizomes snap. Wet ones bend.
I fill a bucket with rainwater, dunk the whole root ball, and let it sit for ten minutes. The peat loosens and the tangle of roots relaxes. Then I work the clump apart with my hands before reaching for any tool.
If the rhizome refuses to separate, a sterilized knife or old kitchen scissors finishes the job. I wipe them with rubbing alcohol first. Rot spreads easily on open cuts, so clean tools are not optional.
2. Find The Natural Break Points
Sarracenia rhizomes are not solid logs. They are segmented, and there are visible growth points along the top.
Run your thumb along the rhizome until you feel a narrower section where two branches meet. That is your cut line. I aim for divisions with at least two to three growth points and a decent chunk of root.
Single-eye divisions work too, but they sulk. My first attempt gave me eight tiny pieces and half of them never rooted properly. Fewer, beefier divisions recover faster.
3. Trim Roots And Old Pitchers Hard
This felt brutal the first time. It is not.
I cut brown, mushy roots right back to firm tissue. Healthy roots are pale and stiff. I also snip off every dead pitcher and any old brown leaf base. Leaving them on just traps moisture against the crown.
A clean division should look almost bare. That is normal. You are removing baggage, not weakening the plant. The AHS AHS makes the same point about perennials: pruning top growth at division time reduces water loss while new roots form.
4. Use The Right Pot And Mix
Here is where a lot of people go wrong. They reuse old soil, grab a pot that is too big, and the division rots.
I mix fresh sphagnum peat with perlite at roughly three to one. No fertilizer, ever. Sarracenia get nutrients from their pitchers, and commercial mixes will burn the roots.
Pot size matters. Pick a container that gives the rhizome about an inch of space on each side. A too-large pot holds water the plant cannot use and turns into a swamp. I learned that after losing a division to rot in an oversized tub.
Terracotta is fine if you water often. Plastic holds moisture longer, which suits most indoor and greenhouse growers.
5. Water From Below And Skip Fertilizer
After potting, I water from the base and let the pot sit in a tray with an inch of rainwater. Tap water is a bad idea in most areas. The minerals build up and slowly poison the plant.
Rainwater, distilled, or reverse osmosis water only. I keep a rain barrel for exactly this reason.
Then I leave the plant alone. No fertilizer for at least a full season. No repotting. Just sun and wet feet.
What Happened Over Two Weeks
This is the part I actually watch closely every time.
Days 1 to 3: Nothing. The divisions look like sad sticks in wet peat. I keep the tray topped up and fight the urge to fiddle.
Days 4 to 7: The cut edges callous over. No new growth yet, but the rhizomes firm up. If anything is going to rot, this is when it shows. Squishy brown patches mean the mix stayed too wet or the pot is too big.
Days 8 to 14: Tiny green nubs appear at the growth points. On my last batch, three of four divisions showed new pitcher buds by day eleven. The fourth lagged a week behind but eventually caught up.
That two-week mark is my honest benchmark. If you see nothing by then, check moisture before panicking. Sometimes you just need to wait.
Three Mistakes That Kill New Divisions
I have made all of these. Learn from my dead plants.
Overwatering. This is the big one. 90% of indoor plants die from overwatering, and bog plants are not immune just because they like wet conditions. There is a difference between sitting in a tray of water and being drowned in a swampy pot with no drainage. Let the tray dry for a day between refills.
Wrong light. Sarracenia are full-sun plants. New divisions need the same bright light as the mother plant, but pushing them straight into blazing afternoon sun after surgery stresses them. I give fresh divisions bright filtered light for the first week, then move them into full sun.
Wrong pot. Too big, too deep, or no drainage holes. Any of these will rot a division fast. Shallow, wide pots that match the rhizome size are ideal.
A Few Extra Things I Have Picked Up
Do not divide into single small pieces unless you have to. Bigger divisions root faster and flower sooner.
Label your pots if you grow several species. Sarracenia hybridize easily and it is easy to lose track of what is what.
Keep divided plants out of heavy rain for the first couple of weeks. A downpour can dislodge a rhizome that has not anchored yet.
And if you are dividing a rare or expensive cultivar, take photos before you cut. It helps you track which division came from where.
Questions I Get Asked A Lot
Can I divide Sarracenia in summer?
You can, but recovery is slower and the risk of rot is higher. Spring division is much safer. If summer is your only option, keep the plant shaded and skip fertilizer entirely.
How small can a division be?
One growth point with a few roots will survive, but it takes longer to establish. Two or three growth points is a much better target for beginners.
Do I need to let the cuts dry before potting?
I pot immediately into fresh mix. Some growers let cuts air-dry for an hour to callous. Both work. What matters more is clean tools and fresh soil.
Dividing Sarracenia is one of those jobs that sounds intimidating and turns out to be easy. Split them, pot them in fresh peat, keep them wet with clean water, and give them sun. They do the rest. My clump went from one tired pot to four thriving plants in a single morning, and yours can too.





