 bluename
If you've ever watched a pitcher plant sit there looking miserable for months, the problem is almost never the plant. It's the soil. I learned this the hard way after killing three Sarracenia before I figured out that a proper Sarracenia soil mix recipe is the single most important thing you can get right.
Here's the short answer: equal parts peat moss and perlite, nothing else. No fertilizer. No compost. No miracle potting blend from the big box store. That simple two-ingredient mix is the base of every formula I'll share below.
I've been growing North American pitcher plants for about seven years now, and I've tested more soil combinations than I care to admit. Some worked great. Some were disasters. This guide is everything I wish someone had told me when I started.
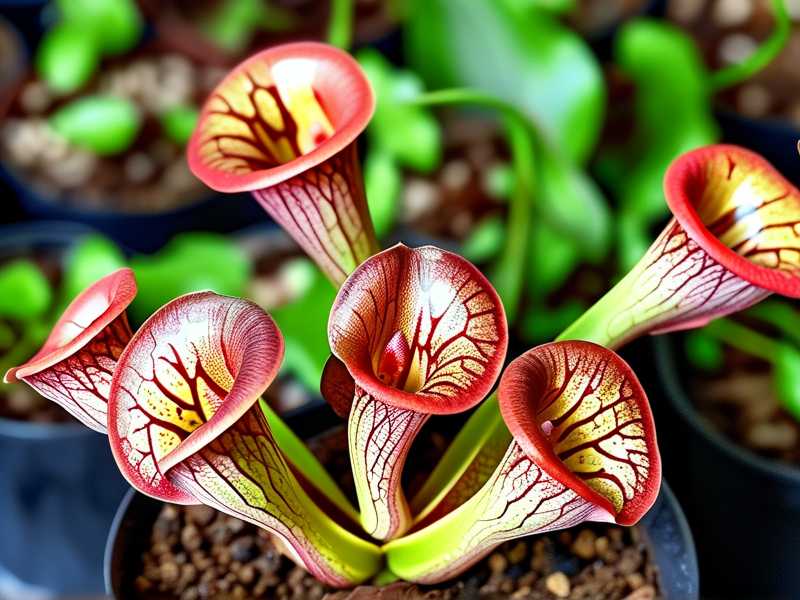
Why Sarracenia Soil Is Nothing Like Regular Potting Mix
Sarracenia are bog plants. In the wild, they grow in nutrient-poor wetlands across the southeastern United States. The soil they sit in is acidic, waterlogged, and basically devoid of the rich organic matter you'd put in a vegetable bed.
That matters because regular potting mix will kill them.
Most commercial mixes contain fertilizer, compost, or moisture-control additives. For a Venus flytrap or a pitcher plant, that's poison. The RHS notes that carnivorous plants need nutrient-poor, lime-free growing media, and that's exactly what we're building here.
The AHS takes a similar line, recommending that bog plants be grown in media that mimics their natural conditions rather than standard garden soil.
So the rule is simple. If it feeds the plant, it doesn't belong in the pot.
The Two Ingredients That Do 95% of the Work
Before I get into the five formulas, let me explain what each ingredient actually does. Once you understand these, you can tweak any recipe to suit your climate and watering habits.
Peat Moss
Peat moss is the backbone of almost every Sarracenia mix. It holds moisture, it's acidic, and it contains essentially no nutrients. That's a good thing here.
Look for plain sphagnum peat moss with no added fertilizer or wetting agents. The cheap bales at garden centers usually fit the bill, though you should always read the label.
I've tried coir as a substitute. It works okay, but it breaks down faster and doesn't hold the same acidity over time. I use it only when I can't find good peat.
Perlite
Perlite is volcanic glass that's been heated until it pops. It's white, lightweight, and it does one job: drainage and aeration.
Without perlite, peat moss compacts into a soggy brick. Roots suffocate. You'll notice the plant stalls out and stops producing new pitchers.
I use coarse perlite, not the fine stuff. The chunky grade keeps air pockets open much longer.
Optional Add-Ins
Sand, pumice, and orchid bark all show up in various recipes. Each has a purpose, and I'll mention them where they matter. But you don't need any of them to grow a healthy plant.
5 Sarracenia Soil Mix Recipes I've Actually Tested
These aren't theoretical. I've run each of these in my own collection, usually for at least one full growing season.
Formula 1: The Classic 50/50
This is my default. If you're a beginner and you just want something that works, start here.
- 1 part peat moss
- 1 part coarse perlite
Mix them dry in a bucket. Add distilled water slowly until the mix is damp but not dripping. Pot your plant, water from the top once, then switch to the tray method.
I've used this for Sarracenia purpurea, S. flava, and several hybrids. Growth has been consistent every single time.
One note: in very humid climates, you may want slightly more perlite. I bumped mine to 60% perlite during a wet summer in the Pacific Northwest, and the roots thanked me.
Formula 2: The Humid-Climate Blend
If you live somewhere muggy, this one's for you.
- 2 parts peat moss
- 3 parts coarse perlite
That extra perlite keeps the root zone from staying saturated. Sarracenia like wet feet, but not drowned feet. There's a difference.
I switched to this ratio for one growing season after losing a plant to rhizome rot. The difference was obvious within two weeks. New growth came in greener and sturdier.
Formula 3: The Dry-Climate Blend
Opposite problem, opposite fix.
- 3 parts peat moss
- 1 part perlite
- 1 part sand
The sand adds weight and helps the mix retain moisture during hot, dry spells. It also stops the peat from floating when you water from the top.
I used this in a greenhouse setting with temps hitting 95°F. The plants stayed hydrated between waterings without any issues.
Use silica sand or horticultural sand. Never use builder's sand or sand with limestone in it. That'll wreck your pH.
Formula 4: The Seedling and Division Mix
Young plants and fresh divisions need lighter, airier media.
- 1 part peat moss
- 2 parts perlite
- 1 part milled sphagnum moss
The milled sphagnum holds moisture around delicate roots without smothering them. It also has mild antifungal properties, which helps prevent damping off.
I've started dozens of seedlings in this mix. Germination rates went up noticeably compared to straight 50/50.
Formula 5: The Long-Term Container Mix
If you're growing in a large planter and don't want to repot every year, try this one.
- 2 parts peat moss
- 1 part perlite
- 1 part pumice
- 1 part orchid bark
The pumice and bark break down slowly, so the mix stays open longer. I've had plants go three years in this blend before needing a refresh.
Fair warning, orchid bark can raise the pH slightly over time if it's not aged properly. I only use bark that's been sitting in a bag for at least six months.
2 Weeks of Observation: What I Actually Saw
I kept notes when I first switched my entire collection over to Formula 1. Here's what happened in the first two weeks.
Days 1 to 3: Nothing visible. The plants looked the same. I panicked a little, honestly.
Days 4 to 7: The first signs showed up. Leaves that had been drooping started to perk up. The color on older pitchers deepened slightly.
Days 8 to 11: New growth tips appeared on three of my plants. One S. leucophylla pushed up a tiny pitcher that hadn't been there before.
Days 12 to 14: The new pitchers were clearly taller than anything the plants had produced in months. Roots were visible at the drainage holes, which told me the plants were settling in fast.
The takeaway? Sarracenia respond quickly to proper soil. If your plant isn't showing new growth within two to three weeks of repotting, something else is wrong.
The 3 Mistakes That Kill Sarracenia for Beginners
I've made all three of these. Multiple times. Learn from my pain.
Mistake 1: Overwatering
Yes, Sarracenia like wet soil. No, that doesn't mean you should drown them.
Here's the thing. 90% of indoor plants die from overwatering. That stat applies to carnivorous plants too, just in a slightly different way. Sarracenia want consistently moist soil, not swampy, stagnant, rotting soil.
The tray method is your friend. Stand the pot in a shallow tray of water, about an inch deep, and let the plant drink what it needs. Refill when the tray dries out.
Do not leave the pot sitting in six inches of water for weeks. That's how you get rhizome rot.
Mistake 2: Wrong Light
I once put a Sarracenia on a north-facing windowsill thinking "bright indirect light" would be fine. It died in about six weeks.
Sarracenia need full sun. Six or more hours of direct light every day. Outdoors is best. If you're growing indoors, you need a strong grow light.
If your plant is stretching, losing color, or refusing to pitcher, it's probably a light problem, not a soil problem.
Mistake 3: The Wrong Pot
Terracotta pots look great. They're also a terrible choice for Sarracenia.
Unglazed terracotta wicks moisture away from the soil and can leach minerals into the mix over time. Both are bad.
Use plastic pots with drainage holes. Or glazed ceramic if you want something prettier. I use plain black nursery pots, and they've never let me down.
Also, avoid pots that are too big. A pot that's two inches wider than the root ball is plenty. Oversized pots hold too much water, and that brings you right back to mistake number one.
Mixing Your Soil the Right Way
How you combine the ingredients matters almost as much as the ingredients themselves.
Start with dry peat and dry perlite. Mix them in a big bucket or wheelbarrow with your hands or a trowel. Get it thoroughly blended before you add any water.
Then add water slowly. Distilled water, rainwater, or reverse osmosis water. Never tap water if your tap water is hard.
You want the mix to be damp like a wrung-out sponge. Not dripping. Not bone dry.
Let it sit for an hour before potting. This gives the peat time to absorb moisture evenly.
Where to Source Your Ingredients
Peat moss is easy to find at any garden center. Look for brands that don't add fertilizer.
Perlite is sold in bags alongside potting soil. Buy coarse grade if you can find it.
Pumice is trickier. I order mine online from bonsai suppliers.
Orchid bark is available wherever orchids are sold and at most nurseries.
Sand should be silica-based. Pool filter sand works well.
Avoid anything labeled "potting mix," "garden soil," or "compost." None of those belong anywhere near a Sarracenia.
Frequently Asked Questions
Can I use Miracle-Gro potting mix for my pitcher plant?
No. Miracle-Gro and similar products contain fertilizer, which will burn and eventually kill your Sarracenia. Stick with plain peat moss and perlite.
How often should I repot my Sarracenia?
Every one to two years for most mixes. Peat breaks down over time and becomes compacted. If you notice the soil staying soggy after watering, it's time for a refresh or a full repot.
Do I need to sterilize my soil mix before using it?
I don't, and I've never had a problem. If you're worried about pathogens, you can bake the mix at 200°F for 30 minutes, but honestly, fresh peat and perlite are pretty clean to begin with. Just make sure your pots and tools are clean.
Final Thoughts
Getting the soil right is the foundation of everything else with Sarracenia. You can have the perfect watering schedule and the brightest windowsill in the house, but if your mix is wrong, the plant will struggle.
Start with the 50/50 peat and perlite blend. Adjust based on your climate and how your plants respond. Watch them closely for the first two weeks after repotting. And whatever you do, keep the fertilizer far, far away.
I've killed more pitcher plants than I'd like to admit. Every single one of those losses taught me something. The recipe that finally worked for me is the same one I've shared here, and it's the one I still use today.





