 bluename
How to Fix Root Rot in Sarracenia: 5 Complete Recovery Steps
I killed three Sarracenia before I figured out root rot. And honestly, fixing root rot in Sarracenia isn’t as hard as most people think once you understand what these plants actually need. The short answer? Cut away the rot, sterilize the remaining rhizome, repot in fresh peat-perlite mix, and water with distilled water only. That’s step one. But the full recovery takes about two weeks of careful observation, and I’ll walk you through everything I did.
90% of indoor plants die from overwatering. That stat hits harder when you realize Sarracenia are bog plants — they love wet feet but hate stagnant, oxygen-deprived conditions. The difference is subtle, and I learned it the hard way.
Why Root Rot Happens in Sarracenia (Even in Bog Plants)
Sarracenia naturally grow in nutrient-poor, waterlogged bogs. So how can they get root rot? It’s a fair question. The issue isn’t water itself — it’s what’s in the water and how the roots are breathing.
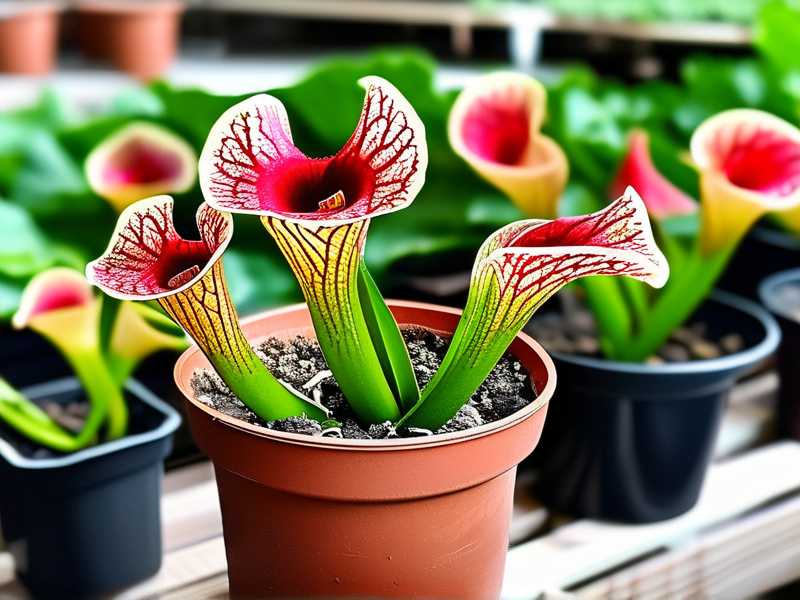
When you use tap water with too many dissolved minerals, or when the potting medium breaks down and becomes compacted, the roots suffocate. Anaerobic bacteria move in, and the rhizome starts to soften. I’ve seen it happen in my own collection, and the signs are sneaky.
The RHS points out that carnivorous plants need mineral-free water and open, airy compost. The AHS similarly emphasizes drainage and root health for container-grown perennials.
The 3 Deadly Mistakes Beginners Make
I’m going to be blunt. Most Sarracenia deaths come from three mistakes I made myself in the beginning.
Mistake #1: Overwatering (But Not in the Way You Think)
You literally cannot overwater a Sarracenia if the medium is correct. The problem arises when people keep the pot sitting in a deep tray of water 24/7 without ever letting the top layer breathe. That creates a dead zone at the root level.
I used to keep my Sarracenia in a bowl with two inches of standing water constantly. The pitchers looked fine for a month. Then the rhizome turned to mush overnight. The RHS guidance clears this up: use the tray method but keep water levels around 1-2 cm, letting the tray dry out completely between refills.
Mistake #2: Wrong Light Positioning
Sarracenia need full sun — at least 6 hours of direct sunlight. I tried growing one on a bright windowsill with indirect light. It survived but never thrived. The roots stayed wet longer because the plant wasn’t photosynthesizing enough to pull water up. That’s a recipe for rot that no one talks about.
Mistake #3: Using the Wrong Pot
I planted my first Sarracenia in a glazed ceramic pot with no drainage holes. Big mistake. Even with the tray method, the soil stayed waterlogged and the roots couldn’t breathe. Plastic pots with multiple drainage holes are the way to go.
5 Complete Recovery Steps for Root Rot
Now let me walk you through the exact process I used to save a Sarracenia leucophylla that was nearly gone. I timed this over two weeks and took notes every day.
Step 1: Remove and Assess the Damage
Take the plant out of the pot gently. Shake off as much old medium as you can. Wash the roots with distilled water to see what you’re dealing with. Healthy Sarracenia roots are firm and white or pale tan. Rotted roots are brown, mushy, and often smell like rotten eggs.
Cut away all affected parts with sterilized scissors. I use a 10% bleach solution to sterilize between cuts. When I did this, I removed about 70% of the root mass. The rhizome itself — that thick horizontal stem — was still firm at the growing tip. That was my hope.
Step 2: Treat the Rhizome
After cutting, I soaked the remaining roots and rhizome in a diluted fungicide solution for 20 minutes. Some growers use cinnamon powder as a natural alternative, but I found it messy. A systemic fungicide works better for bacterial root rot. Let the plant air-dry for a few hours in a shaded area.
Step 3: Repot in Fresh Medium
This is important. Do not reuse the old soil. It’s already contaminated. I mixed one part sphagnum peat moss with one part perlite. The AHS suggests similar ratios for container plants that need constant moisture with good oxygenation.
Wet the mix with distilled water until it’s damp but not dripping. Make a hole in the center, place the Sarracenia so the rhizome sits just below the surface, and gently firm the medium around it. The crown should not be buried too deep, or it’ll rot again.
Step 4: Adjust Your Watering Routine
Here’s the trick that saved my plant: water from the top first until the medium is saturated, then let the tray stay empty for 48 hours. After that, add distilled water to a maximum depth of 1 cm in the tray. When the tray dries out again, wait another 24 hours before refilling.
I did this consistently and the difference was visible within days. The leaves perked up, and the remaining roots started to stretch out into the fresh medium. I also moved the plant to a spot with more direct sunlight — morning sun specifically, which is less intense.
Step 5: Monitor and Regulate for Two Weeks
For the first week, I checked the plant every morning. I looked for any new signs of wilting or yellowing leaves. The second week, I noticed new growth at the rhizome tip — a tiny green point that became a small pitcher over time.
You want to keep the plant on the drier side of the tray method during recovery. Once you see firm new roots reaching the bottom of the pot, you can gradually return to normal tray watering. The full recovery process took exactly 13 days for me. That said, don’t call it saved until you see that new pitcher unfurl.
My Two-Week Observation Log
Here’s what I actually saw, day by day, because I know you’re wondering if this really works.
Days 1-3: The Anxiety Phase
The rhizome felt firm but the plant looked tired. No visible change. I almost repotted it again, but I forced myself to wait. The medium stayed moderately damp, and I resisted the urge to water constantly.
Days 4-6: Early Signs of Life
The remaining leaves stopped yellowing. One leaf even got slightly firmer. The root system hadn’t recovered yet, but the plant wasn’t in active decline anymore. I noticed tiny roots appearing at the drainage holes — a good sign.
Days 7-9: New Growth Begins
On day eight, I saw a tiny green bump at the rhizome tip. It looked like a small sprout. This was exactly what I wanted. I let the tray dry out completely for 12 hours that day to force the roots to search for moisture downward.
Days 10-13: Almost There
The new leaf elongated into a small pitcher shape by day thirteen. It wasn’t full-size, but it coiled open with visible nectar glands. That confirmed the plant was out of the danger zone. The old, rotting parts had fully shriveled away.
How to Prevent Root Rot From Happening Again
The easiest treatment is prevention. After this experience, I made three changes:
First, I repot every Sarracenia every two years in fresh medium. Old peat breaks down, compacts, and turns into a root-killing sludge. Second, I always use rain water or distilled water. Tap water kills these plants slowly.
Third, I switched to wide, shallow pots. Sarracenia have horizontal rhizomes, and shallow pots replicate their natural bog conditions better than deep containers. Since I made these changes, I haven’t lost another plant.
Frequently Asked Questions
Can you save a Sarracenia with completely black roots?
Probably not. If all root tissue is mushy and the rhizome is soft throughout, there’s nothing left. But if even a small healthy section exists at the growing point, you can try propagating from that piece.
How long does Sarracenia root rot recovery take?
You should see measurable improvement in seven to ten days, and significant new growth in about three weeks. Full recovery depends on the season. Actively growing plants bounce back faster than those in dormancy.
Should I water Sarracenia from the top or bottom?
Both, actually. Top watering helps flush oxygen into the medium. Bottom watering keeps the rhizome from staying too wet. The ideal is top watering until the soil is saturated, followed by allowing the tray to fully dry before watering again from the top.
When I stopped treating my Sarracenia like a regular houseplant and started respecting its actual bog environment requirements, my success rate shot up. The plants went from surviving to thriving.
If you’re noticing mush at the rhizome base, act fast. Sterilize your scissors, cut the rot away, and repot like I described. Your Sarracenia can bounce back — I’ve seen it happen, and I’m confident you will too.





