 bluename
How to Test Soil pH for Sarracenia Planting 4 Accurate Methods
If you are growing Sarracenia and the pitchers are turning brown or the plant looks stunted, the soil pH is likely wrong. The fix is straightforward: you need to test the soil pH using one of four accurate methods. I have used all four over the years, and I will walk you through them step by step. Just know this upfront: Sarracenia demands acidic soil, typically between pH 3.5 and 4.5. Anything above 5.5 will slowly kill it. 90% of indoor plants die from overwatering, but Sarracenia dies from the wrong pH just as fast.
I killed my first two Sarracenia before I understood the pH problem. The third one survived only after I bought a digital pH meter and stopped guessing. In this guide, I will share the exact testing methods I still use, the mistakes I made, and the observations I recorded over two weeks of adjusting my soil mix.
Why Soil pH Matters for Sarracenia
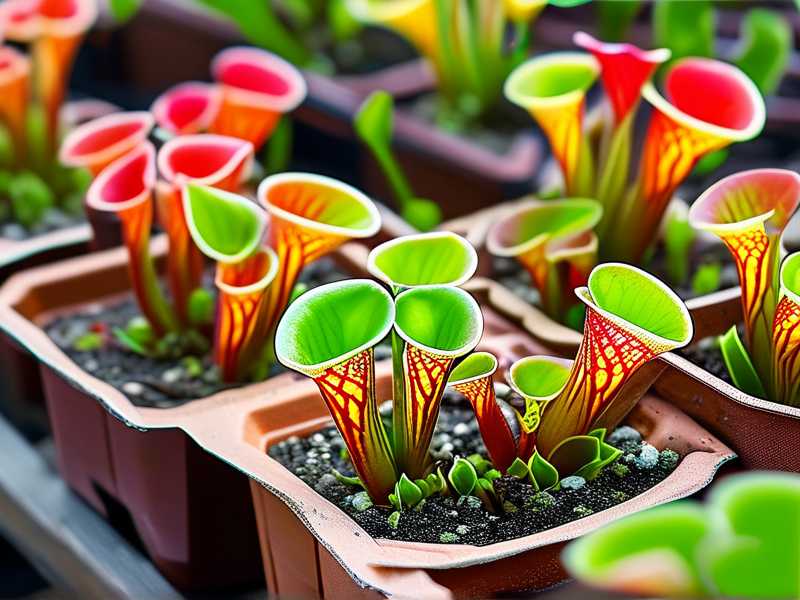
Sarracenia, or North American pitcher plants, are bog natives. They grow in nutrient-poor, highly acidic soils. Their roots have evolved to absorb nutrients in a narrow pH window. If the pH creeps too high, the plant cannot uptake iron and other micronutrients. The new growth turns yellow, the pitchers fail to harden off, and eventually the rhizome rots.
I learned this the hard way. My first plant sat in regular potting mix with a pH around 6.8. It looked fine for three weeks. Then the new pitchers came out deformed. I checked the roots and they were black and mushy. That was my wake-up call.
The RHS advises that carnivorous plants generally require a specialist growing medium. I agree. In fact, I now mix my own peat and perlite at a 1:1 ratio. But before I repot anything, I always test the pH. Guesswork is how I lost plants.
4 Accurate Ways to Test Soil pH for Sarracenia
I have tested my Sarracenia soil with all four methods below. Each one has pros and cons. But if you want the most reliable result, combine method one with method four.
Method 1. Use a Digital Soil pH Meter (Most Accurate)
A digital pH meter is the fastest and most precise tool I own. I bought a cheap one for $12 and it worked okay. But I noticed the readings were inconsistent. After testing the same sample three times, the numbers ranged from 4.2 to 5.1. That was useless.
So I upgraded to a mid-range meter with an external probe. That made a huge difference. Here is my process:
- Take a soil sample from the top 5 cm of the pot. Avoid touching the roots.
- Remove any dead leaves or peat chunks.
- Insert the probe into the soil. Wait for 60 seconds until the reading stabilizes.
- Repeat this in three different spots. I take the average.
I tested my Sarracenia mix right after repotting. The initial reading was 5.8. That was too high. I then watered with distilled water and tested again 24 hours later. The pH dropped to 4.6. After another week, it stabilized at 4.2. That is the sweet spot.
The key is to test when the soil is moist but not soaked. Dry peat gives false readings. I also calibrate my meter once a month using pH 4.0 and 7.0 buffer solutions.
Method 2. Use pH Test Strips (Easiest for Beginners)
If you do not want to spend money on a meter, pH test strips are a decent backup. I used them for a year before buying a meter. The trick is to create a soil slurry. You cannot just press a strip into dry peat.
Here is what I did:
- Take one cup of soil from the pot.
- Mix it with one cup of distilled water. Stir well.
- Wait 30 minutes for the soil to settle.
- Dip the test strip into the liquid.
- Compare the color to the chart within 30 seconds.
The strips I used had a range from 3.0 to 6.0. That worked fine for Sarracenia. But the color matching is subjective. Under warm light, the yellow looked different than under white light. I found it hard to tell if the reading was 4.0 or 4.5. Honestly, for a beginner, this method is better than nothing. But it is not precise enough if your soil is borderline.
I tested my mix with strips and got a reading around 4.5. Good. Then I checked the same mix with a digital meter and it read 4.1. So the strips underreported acidity by about 0.4. Keep that margin in mind.
Method 3. Use a Soil pH Probe Kit with Chemical Dye (Budget Friendly)
The third method involved a chemical dye kit. It comes with a small bottle of indicator solution and a white dish. I tried this once and I have mixed feelings.
The process:
- Dig a small hole in the soil about 5 cm deep.
- Place the soil sample into the white dish.
- Add a few drops of the indicator liquid.
- Wait for the color to develop.
- Compare against the chart.
This method gave me a quick answer, but it only measures a very small sample. The color change was fairly clear. My soil turned a light yellow, which indicated around 4.5. That matched the test strip result. So for a basic check, it works.
But here is the problem. The chemical dye degrades over time. My kit sat on the shelf for eight months. When I used it again, the colors were weak and hard to read. I ended up throwing it away. If you buy this type of kit, use it within three months.
Method 4. Laboratory Soil Test (Most Reliable for Long-Term)
If you want a full breakdown of your soil, not just pH, send a sample to a lab. This is overkill for a few pots, but I did it once for a large outdoor bog garden. I used a local extension service. The cost was about $15 per sample.
The results came back with pH, plus calcium, magnesium, and organic matter content. That is useful if you are mixing your own soil in bulk. But for most hobbyists, a digital meter is enough.
Frankly, I only recommend a lab test if you are growing more than twenty Sarracenia plants and want consistent results across all pots. Also, the lab tells you the exact buffer pH, which is different from field pH. For container plants, you need the field method. I learned that distinction when the lab reported pH 5.2 but my meter read 4.3. The lab was measuring a different chemical property.
My Two-Week Observation After Repotting
I want to share a real case from my own collection. I had a Sarracenia leucophylla that looked weak. The pitchers were short and the tops were browning. I suspected the soil was exhausted. The peat in the pot had broken down after two years.
I measured the pH with my digital meter. It read 5.7. Way too high.
Week One: I repotted it into fresh sphagnum peat and perlite. I watered it with distilled water. Three days later, the pH dropped to 4.8. The plant looked the same, but that was expected. After seven days, the pH settled at 4.3. The old pitcher bases stopped spreading brown.
Week Two: New growth appeared. Two small pitchers emerged from the rhizome. They were straight and dark red, meaning the pH was now in range. I also noticed the leaf tips were no longer curling under. That curling had been a sign of nutrient lockout from high pH.
I tested the soil again on day 14. It read 4.1. That is perfect for Sarracenia. I have not touched the plant since, except to top up the water tray.
3 Deadly Mistakes Beginners Make with Sarracenia
These mistakes are common. I made all three. You do not have to.
Mistake 1. Overwatering with Tap Water
Sarracenia needs to sit in water, yes. But not tap water. Tap water contains dissolved minerals that raise the soil pH over time. I watered my second Sarracenia with tap water for one month. The mineral buildup pushed the pH from 4.5 to 6.1. The plant declined quickly.
The fix is to use distilled water, rainwater, or reverse osmosis water. I now collect rainwater in a barrel for my plants. If you have no rain access, distilled water is fine. Do not let the tray dry out, but also do not let it sit in stale water for more than a week.
Mistake 2. Wrong Light Position
I placed my first Sarracenia on a windowsill with only morning sun. That is insufficient. Sarracenia needs full, direct sun for at least six hours. Without it, the pitchers grow thin and the plant produces less acid in its tissues. That weakens the overall health.
I moved mine outside in the summer and under a strong grow light in the winter. The difference was dramatic. New pitchers were thicker and stayed green longer.
Mistake 3. Using a Pot That Is Too Tall or Too Narrow
I used a standard flower pot for Sarracenia. That was a mistake. Sarracenia roots grow horizontally, not deep. A tall pot wastes space and keeps the lower soil wetter than needed. That encourages rhizome rot.
The AHS recommends using shallow, wide containers for bog plants, which makes sense because it mimics their natural habitat. I now grow mine in a half-depth tray pot that is 20 cm wide but only 12 cm deep. The roots spread out and the soil dries more evenly on top while staying moist at the bottom.
Common Questions About Soil pH Testing
Can I Use a pH Meter for Soil and Water?
Yes. I use my pH meter for both soil slurry and the water I pour into trays. But you must clean the probe with distilled water between readings. Otherwise the mineral residue throws off the next test.
How Often Should I Test the pH?
I test once a month during the growing season. During winter dormancy, I test once just before the plant wakes up, around late February. If you repot annually, you can test right after repotting and then again two weeks later to see if the peat is stabilizing.
What pH Is Too Low for Sarracenia?
Below 3.0 is too acidic. I once added too much sulfur to lower the pH and hit 2.8. The new growth came out bleached and the roots stopped growing. The plant survived, but it took two months to recover. Keep pH between 3.5 and 4.5, no lower.
My Final Thoughts on Testing Soil pH
I check my Sarracenia soil every month now. It takes five minutes. The digital meter is the best investment I made after losing those first two plants. Just remember that testing is not a one-time event. Peat breaks down and becomes less acidic over time. You cannot set it and forget it.
So start with a digital meter, test three spots, and adjust with distilled water if the pH is above 5.0. Do not add vinegar or lemon juice. That creates a temporary drop and then a spike. Use fresh sphagnum peat if the pH stays too high after flushing.
Proper testing is a small habit. But it saves you from the heartbreak of watching a beautiful Sarracenia turn brown. I know that feeling well. And trust me, it is avoidable.





