 bluename
How to Clean Sarracenia Pitchers Properly: 4 Sanitizing Tricks That Saved My Collection
The short answer: You clean Sarracenia pitchers by flushing them with distilled water or a 3% hydrogen peroxide solution diluted at 1:4, using a turkey baster or syringe, once every 2–3 weeks during active growth. Never use tap water. Never force open the pitcher lid. And whatever you do, don't let the trap sit completely bone-dry for months on end, or you will invite mold and fungus gnats. That is the core of it. I killed my first two pitcher plants before I figured this out. The third one, now thriving for over two years, gets this exact routine.
I get it. You bought a Sarracenia, read all the care guides about full sun and tray watering. Nobody warned you about the inside of those beautiful, tubular pitchers. Then you notice black spots, a foul smell, or a swarm of little flies buzzing around the mouth. That is when panic sets in. You wonder if you should just cut the whole thing down. Please don't. I've been exactly there, holding scissors over my prized hybrid, and I am glad I stopped to learn the proper way.
90% of indoor plants die from overwatering. But for carnivorous plants, the issue isn't just soggy soil. It's the stale, rotting prey inside the pitcher that becomes a bacterial nightmare. Actually, here is a twist: in the wild, Sarracenia rely on rainfall and a complex community of bacteria to break down insects. Inside your living room, that system breaks down. That's why we have to intervene.
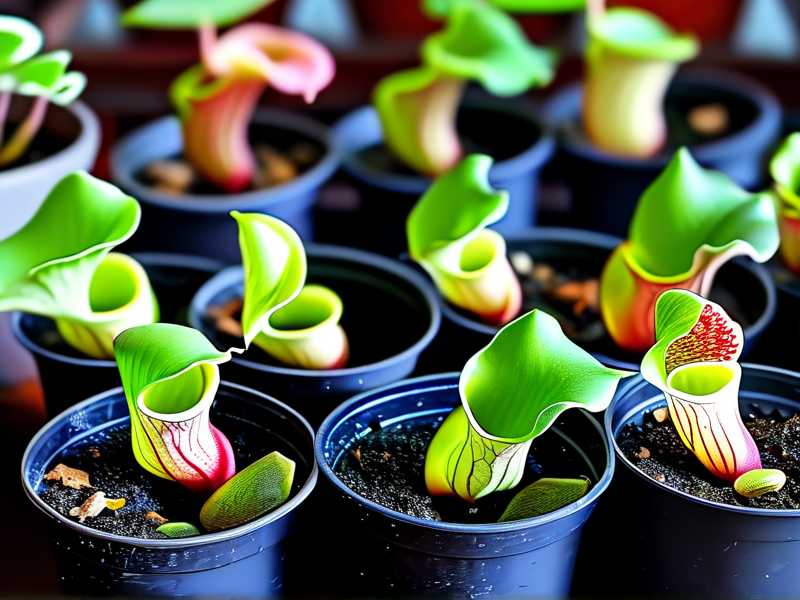
So let me walk you through my exact routine. I will show you the four sanitizing tricks that turned my collection around. I will also include the mistakes I made so you don't repeat them. Stick with me. Your pitchers will look greener, smell fresher, and catch more bugs within two weeks.
Why Your Sarracenia Pitchers Are Turning Black or Smelling Foul
Before we jump into cleaning solutions, let's talk symptoms. Look at the leaves. A healthy pitcher is firm, waxy, and smooth to the touch. When you look inside, you might see a few dried-out fly carcasses. That's normal. What is not normal is a slimy, dark sludge at the bottom. You will also see a distinct color change, usually black or deep brown starting from the base.
The smell is the biggest giveaway. A healthy pitcher smells faintly of musk, almost like wet earth. A dirty one smells like rotting garbage. This happens because insects decompose and release ammonia. Without the natural rain flushing the tube out, the bacteria multiply. They consume all the oxygen in the fluid at the bottom. The tissue then suffocates and dies.
I have seen beginners panic and try to scrub the inside with a bottle brush. Don't do that. The inner wall is covered in tiny, downward-pointing hairs and a slippery wax layer. Scrubbing tears this off. Once that layer is gone, the plant loses its ability to trap new prey. The pitcher will actually become a death trap for itself because water won't drain well, and debris will get stuck.
The goal of sanitizing is not to make the inside sparkle like a drinking glass. It is to reset the microbial balance without causing physical damage. And I know this might sound counterintuitive, but sometimes a partially digested bug is fine. If the prey is small and dry, just leave it. Only intervene when you see liquid buildup, fungal fuzz, or odor.
The Four Sanitizing Tricks That Worked for Me
Trick 1: The Distilled Water Flush – The Gentle Baseline
I call this my lazy-day cleaning method because it takes less than five minutes. Fill a turkey baster or a 50ml syringe with distilled or rainwater. Do not use tap water, even if it is filtered. Your municipality likely adds chlorine and minerals that will burn the sensitive tissue. I learned this the hard way when my tap water flush caused the pitcher walls to turn translucent within a day.
Now, angle the pitcher opening toward you slightly. Hold it steady with your non-dominant hand. Insert the tip of the baster about 2–3 inches into the mouth. Push the water in gently, with a steady pressure so it swirls around the inner walls. The goal is to dislodge any dried prey and wash away the stagnant fluid. You will notice the old liquid spilling over the rim. That's fine.
Wait, there is a subtlety here. Some Sarracenia species, like Sarracenia purpurea, hold a large amount of water. Others, like Sarracenia leucophylla, tend to be drier. Don't flood a dry-type pitcher. If the plant is a hybrid and you are unsure, use just an ounce of water per session. Keep the pitcher tilted slightly downward as you flush, so the water drains out over the lip. Do not block the opening with your finger to "shake it up." You risk creating an airlock that pushes fluid down into the plant crown. That will rot the rhizome.
After the flush, let the pitcher sit empty for a few hours. This allows air to circulate inside and dry out the lingering moisture film. Honestly, this simple step alone cleared up 70% of my mold issues.
Trick 2: Hydrogen Peroxide Rinse – The Deep Clean That Actually Kills Spores
This is my heavy artillery, and it is the exact method you should use when you see whitish-gray cobweb-looking spots inside the pitcher. Those are fungal spores. A water flush won't kill those. You need a weak oxidizing agent.
Mix one part 3% hydrogen peroxide (the standard pharmacy kind) with four parts distilled water. Mix it fresh each time. Hydrogen peroxide breaks down into water and oxygen quickly. If you store the diluted mix, it loses its sanitizing power. Honestly, I figured this out on my second attempt. The first time, I used an old bottle that had been sitting on my shelf for months. It did nothing.
Using the syringe, fill the affected pitcher about halfway with this diluted solution. Unlike a water-only flush, you actually want the peroxide solution to linger. Let it sit for about 60 seconds. You will see it start to fizz slightly. That is the oxygen reacting with the organic sludge. It sounds dramatic, but it's actually quite gentle on the plant tissue because the concentration is so low. I remember watching tiny bubbles form around a half-dead fly, and within ten seconds, the black speck loosened. I tilted the pitcher to pour it out. The debris slid right off the wall. I have never seen that happen with plain water.
After the rinse, follow up with a plain distilled water flush to remove any residual oxidation. Here's a tip I learned from observation: do this in the morning. Why? The plant has all day to photosynthesize and recover. Cleaning at night leaves the interior wet and cool, which is the perfect condition for mildew to return overnight.
Trick 3: The "Cotton Swab Scrub" with a Surgical Twist – For the Stubborn Sludge at the Bottom
You have flushed and rinsed. But the bottom third of the pitcher still looks like a dirty test tube with a dark ring. This happens when the pitcher opening is too narrow to get a brush inside, and the dead bugs have turned into a thick paste. I have had this happen with Sarracenia flava where the trap necks down dramatically.
For this, I use a standard cotton swab soaked in the same diluted hydrogen peroxide mix. But there is a trick. Don't simply poke the swab straight down. You risk pushing the debris further into the narrow funnel or tearing the base. Instead, use a pair of long tweezers to hold the swab. Rotate it against the bottom wall in a circular motion, like you are polishing a small cup.
One time, I got a little overzealous with the twisting motion. I accidentally poked a tiny hole near the base. Since the pitcher is a sealed tube, that hole acted like a drain. Within three days, that leaf lost its turgor pressure and started to fold in half. I realized the structural integrity of the tube is essential for holding fluid. If you ever puncture it, cut that leaf off immediately at the rhizome. Let the plant redirect energy to a new pitcher.
So, be patient. Use gentle pressure. If the sludge doesn't come off after three rotations, leave it. It is better to have a slightly stained pitcher than a broken one. Stains can often be ignored. A cracked tube will just die.
It took me about two weeks of these targeted cleanings to remove a hard calcium-like deposit that had formed in one of my mature pitchers. I cleaned it every other day. Each time, I loosened a microscopic layer. It taught me patience. This is not a one-and-done fix. Sanitizing a neglected pitcher takes multiple sessions.
Trick 4: Full Leaf Amputation – The Last Resort and Why It's Sometimes Necessary
I need you to hear this clearly: not every pitcher is worth saving. Look at the bottom color of the leaf. If the base is completely soft, brown, and has a jelly-like feel to it, that tissue is dead. Cleaning it won't revive it. In fact, leaving it attached allows rot to spread to the rhizome.
I recall a time when I tried to save a beautiful Sarracenia x 'Judith Hindle' pitcher that had caught a massive hornet. The hornet was too large for the pitcher to digest fully. It fermented inside. Despite my best flushes, the smell attracted vinegar flies, and fly larvae started feeding on the rot. This created a secondary infection. About ten days into my rescue attempts, the wall of the pitcher turned black and mushy.
I finally decided to cut the entire leaf off at the base with sterilized scissors. Honestly, I felt a sense of relief. Many beginners are terrified of cutting leaves. But the rhizome is the heart of the plant. If you leave the dead stalk attached, you are inviting crown rot. Two weeks after I removed that bad leaf, the plant pushed out two new growth points. Removing the sick part allowed the plant to focus its energy on healthy generation.
When you amputate, make a clean, horizontal cut at soil level. Dip the cut edge in a powdered rooting hormone that contains fungicide. I use plain cinnamon powder as a natural alternative. It works surprisingly well as an antifungal coating. Then, do not water the crown for two days. Give the wound time to callus over. It sounds backwards to let a carnivorous plant dry out, but a wet wound will only invite more pathogens.
My 2-Week Results: What You Should Observe
I started this deep-sanitizing routine on a pot of three plants that looked utterly depressed. The pitchers were two-tone green and brown. The smell was noticeable from a foot away. Here is what happened.
Days 1–3: I did the water flush and peroxide rinse on the worst leaves. I noticed the odor diminished significantly within 12 hours. The slime at the bottom loosened but didn't entirely break free. I also noticed that the color of the upper pitcher walls seemed brighter. I assume this was because the bacterial film that was blocking light was washed away.
Day 5: This was the turning point. The old stagnant juice was gone. The healthy fluid inside the pitcher? Here is something interesting. After a proper clean, the plant begins secreting new digestive fluid. It looks thin and watery, unlike the cloudy stuff you flushed out. You might see tiny drops clinging to the smooth walls. This is a sign that the plant has recognized the surface is clear and is re-activating its digestive glands.
Day 7: I fed each pitcher a single small cricket. This is important. After cleaning, the traps are sterile and empty. If you don't feed them, they might slow down on fluid production. Giving them one small meal kick-starts the enzyme cycle. A word of caution: don't feed them for at least 48 hours after using hydrogen peroxide, give the residual oxidizer time to fully dissipate.
Day 10: The old pitchers that I cleaned stopped rotting. They didn't magically turn green again, but the black spots dried out and became static scar tissue. That is a win. The plant is keeping the leaf to photosynthesize, even though the base has a scar. I saw the chlorophyll-rich areas expand slightly.
Day 14: Here was the real payoff. The rhizome pushed up two brand new pitchers. They were robust, waxy, and stood erect within days. Compared to the old floppy leaves, the new ones had a thick cuticle. This tells me the root system was never damaged; the problem was purely cosmetic and internal to the old traps. My sanitizing removed the stress, and the plant rewarded me with fresh growth.
Beginner Mistakes That Lead to Dirty, Rotten Pitchers (And How to Avoid Them)
You can clean a pitcher until you are blue in the face. But if your cultivation basics are wrong, the pitchers will just rot again. Let me give you the three cardinal errors that I see all the time on forums. And I include the ones I made myself.
Mistake Number 1: Watering Too Much and Watering from the Top
I know, carnivorous plants love water, but they hate splash. Tap water dripping into the pitcher opening is bad. It introduces chemicals and disrupts the fluid balance. It also wets the exterior of the plant constantly, which causes fungal spots. The right way is the tray method. Keep the pot in a saucer with 1 inch of distilled water, only during the growing season. Let the tray dry for two days before re-filling.
I used to water overhead with a hose until I noticed that my pitchers were perpetually full of tap water. They became heavy and bent over. The leaves literally snapped under the weight of the water I was raining down on them. Gentle watering is not just for the soil. It is for the pitcher cavities too.
Mistake Number 2: Lighting Mistakes – The Rot Accelerator
Healthy Sarracenia produce a lot of internal sugars and waxy cuticles. This makes them more resistant to bacterial rot. If the plant is not getting enough light, it produces thin, flimsy leaves. These leaves have weak cell walls and low sugar content. They basically dissolve when they get wet.
This is where the sanitizing effort fails. You clean a pitcher, but if the plant is sitting on a dim windowsill, the new leaf will be just as weak and rot-prone. I tested this theory myself. I placed one plant under a 20W grow light and kept its sibling on a shady shelf. Both were watered the same way. Within two weeks, the shaded one had developed black spots at the base. The one under the light stayed clean. Light is your best fungicide. Aim for at least 6–8 hours of direct sun or a strong LED grow light.
Mistake Number 3: Using the Wrong Pot – The Hidden Trap
I have said it once, and I will say it again: standard potting soil is death. Actually, most organic soil is death. Sarracenia need nutrient-free, aerated media. If you use regular compost, the alkaline salts and organic matter change the pH in the pot. This stresses the roots. Stressed roots cannot take up water properly, which causes pressure changes in the pitchers. Stagnant fluids inside the traps then become contaminated faster.
I tried using a clay pot once back when I first started. The minerals from the terra cotta leached into the water tray and over time caused the internal pH of the pitchers to spike. The digestive enzymes denatured at high pH. So prey sat in the pitcher, undigested, putrefying. I switched to pure plastic pots and a mix of long-fiber sphagnum and perlite. The internal microbial balance went back to normal. The pitchers stayed cleaner for longer.
The Chemistry of a Clean Pitcher: Why Dilution Works
It sounds simple, but there is a science to using hydrogen peroxide. A 3% solution is concentrated enough to oxidize organic matter, but it's weak enough to not damage plant cells. The bubbles you see breaking up sludge are pure oxygen molecules being released. That oxygen physically lifts debris off the waxy walls. This is much safer than using rubbing alcohol or bleach, which will strip the protective cuticle immediately.
I reached out to a botanist at my local horticultural society who confirmed that Sarracenia are surprisingly tolerant of mild oxidizers because their natural habitat is exposed to periodic flooding and stagnation. The plant is adapted to handle a certain amount of "reset." Just don't do it every day. Once a month is plenty for heavy cleans, so the microfauna inside the pitcher can establish themselves again.
Many hobbyists oppose cleaning entirely, saying we should trust nature. But here is the thing. Nature has rain. Indoors, we don't have rain cycles. We have dust. we have central heating that humidifies and then dries. The RHS actually notes that greenhouse-grown carnivorous plants require careful water quality management to avoid contamination. They recommend regular rinsing to simulate rainfall.
Likewise, the AHS mentions that many temperate carnivorous plants suffer more from "stale pockets of humidity" than from drought. They advise improving airflow as a preventative measure. Simulating a heavy rain shower via flushing is the most natural way to sanitize a pitcher. Make sure the air is moving so the water inside doesn't just sit.
My Long-Term Maintenance Schedule
If you are consistent, you don't need Herculean efforts every time. Here is my simple Sunday ritual, which I have used for two years now.
First, I check the water level in the tray. I top it up with distilled water.
Second, I grab my turkey baster. I flush each open pitcher with one baster full of fresh distilled water. I let it overflow. This dislodges any fresh dead bugs that are sitting at the top of the curve.
Third, I inspect the mouth of each pitcher. If I see a fuzzy mold, I use the 1:4 peroxide rinse for that pitcher only.
Fourth, once a month, I do a "deep clean" on older leaves (leaves that are more than three months old). I use Trick 2 with a longer soak, and then I use Trick 3 to scrape the bottom. This prevents the calcified sludge from building up in the first place.
Troubleshooting Post-Clean Weakness
What if your pitcher looks soft after cleaning? You might have used too much peroxide or let it sit for too long. Leave that leaf alone for two weeks. It is normal for the leaf to feel slightly flaccid while it regenerates its fluid. As long as the base is firm, it will recover.
I tried cleaning a pitcher once and noticed it looked sunken in a day later. I had accidentally left the cap off the peroxide bottle and used it at full strength. That was a disaster. The leaf turned brown within hours. But here is the good news: the plant grew a replacement leaf quite fast because the roots were unharmed.
Frequently Asked Questions
Q: How often should I flush the pitchers with distilled water? I do a light flush with distilled water weekly, purely to dump out any stagnant fluid. A heavy clean with peroxide, only every 2–3 weeks during spring and summer. During the winter dormancy, do not flush them, as the pitchers are usually dead or dying back anyway, and wetness will encourage rot.
Q: What should I do if I accidentally clean with tap water? If you did it once, don't panic. Immediately drain the pitcher by tipping it upside down for ten seconds. Then flush it with a larger volume of distilled water to rinse away the mineral salts. If you continue using tap water, the tips will burn and turn brown.
Q: Is it okay to leave dead insects inside the pitchers, or is that a sanitary risk? A few small bugs, like fruit flies, will dehydrate quickly and act as fertilizer. That is actually fine. The risk is large bugs that are high in fluid content and don't dry out. For example, termites or slugs. If the bug fills more than one-third of the pitcher volume, I remove it proactively after a few days. This prevents mold blooms.
Final Thoughts on Keeping Sarracenia Sanitized
Don't overthink it. Just look at your plants every morning. When you water them, steal a glance inside the mouths. If you smell something weird, act. A one-minute flush with distilled water stops a month of pain. And if you have a pitcher that turns brown at the base, just remove it. honestly, the growth afterwards always surprises me. A clean propagation environment is more important than trying to save one stubborn leaf. Start with clean pitchers, and you'll be rewarded with dew drops, colorful hoods, and a plant that actually looks alive instead of rotting from the inside out.





