 bluename
How to Start Sarracenia Collection for New Hobbyists: 6 Guides
Let me save you the heartbreak I went through. Ninety percent of indoor plants die from overwatering, and Sarracenia are even more unforgiving. I killed my first three pitchers before I figured out the basics. The good news? You can skip that misery.
Here is the straight answer: Sarracenia need full sun, pure mineral water, and a winter dormancy period—nothing else. If you mimic their bog habitat, they thrive. If you fuss over them like tropical houseplants, they rot.
I have been growing these carnivorous beauties for over five years now. My collection started with a single Sarracenia purpurea from a garden center. That plant, ironically, is the only one that survived my early mistakes. The ones I babied the most? Dead within weeks.
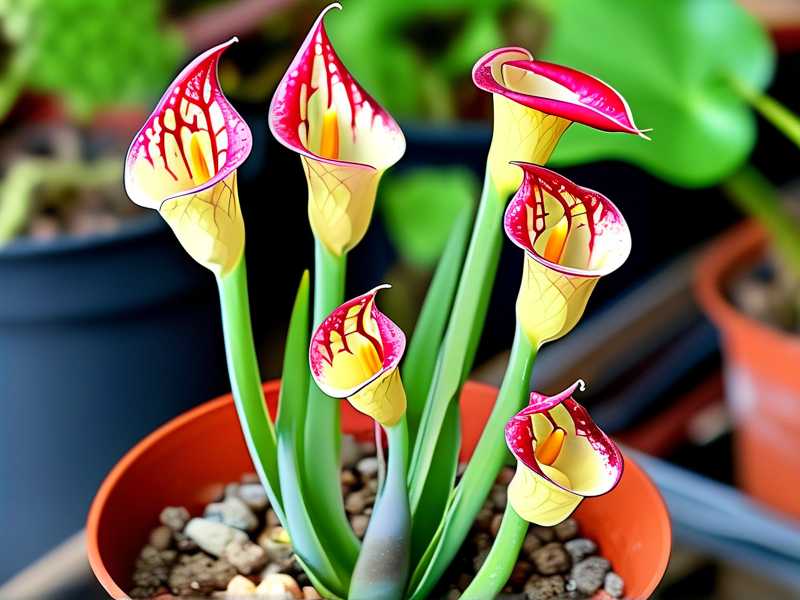
Let me walk you through the six guides that will help you start a healthy Sarracenia collection. I will share my exact steps, the two-week observations you should expect, and the traps I fell into so you do not have to.
1. Choose Hardy Species First, Not the Fancy Hybrids
I get it. You see photos of the giant Sarracenia leucophylla with its stunning white tops, and you want that. I tried that as a beginner. It died within a month.
What I learned: Start with the tough ones. Sarracenia purpurea is your best friend. It is the most cold-hardy and forgiving. Another great option is Sarracenia flava. Both tolerate inconsistent care better than fussy hybrids.
Your two-week plan: After potting, just leave them alone. Observe the old pitchers. Do not expect new growth immediately. Roots are settling. In two weeks, you should see the existing pitchers staying firm. If they start browning from the top, that is normal dieback. If they turn mushy at the soil line, you have a watering problem.
2. The Pot Matters More Than You Think
I will admit, my first attempt used a regular plastic pot with drainage holes. Then I put it in a decorative ceramic outer pot. That trapped water. The roots suffocated.
I should have listened to the experts. The Royal Horticultural Society (check their guidance at https://www.rhs.org.uk) emphasizes replicating natural bog conditions. That means deep pots. Roots grow long.
What works now: I use tall plastic nursery pots (at least 5 inches deep). No outer decorative pot unless it has zero water collection. Actually, I prefer the tray method. Sit the pot in a shallow tray of water. That is it.
Size guide:
- Rhizome length under 2 inches: 4-inch pot
- Rhizome length 2-4 inches: 5-6 inch pot
- Larger clumps: Divide them instead of upsizing too fast
3. Forget Tap Water Forever
This is where I almost quit. I used tap water for two weeks. The mineral buildup started browning the pitcher tips. The plant looked like it was dying.
The hard rule: Sarracenia require mineral-free water. That means rain water, distilled water, or reverse osmosis water. Tap water has calcium and other minerals that accumulate and kill the roots.
My test: I switched to distilled water immediately. Within two weeks, the browning stopped spreading. New growth, when it appeared, was clean and green.
Pro tip: Buy a rain barrel. I have one dedicated to my carnivorous plants. It is free and chemical-free. If you live in an apartment, buy distilled water in bulk. It is worth the cost.
4. Light is Not Negotiable
I tried growing my first Sarracenia on a bright windowsill. The sun came in for maybe three hours a day. The plant grew weak, pale, and stopped producing pitchers. It looked pathetic.
The fix: Sarracenia need full sun. That means at least 6 hours of direct sunlight. More is better. In the UK, that is a south-facing position outside.
What happened when I moved mine outside: I hardened it off gradually over a week. After two weeks in full sun, the new growth was dramatically different. Sturdier, redder, and with proper pitcher shapes. The color change in Sarracenia purpurea was stunning. The red veining intensified.
If you cannot grow outdoors, you need a serious grow light. Those cheap purple LED strips will not cut it. I use a 100W equivalent quantum board. It costs more, but it saves the plant.
5. The Dormancy Dark Horse
Nobody told me about this. I thought carnivorous plants grew year-round. I brought mine inside for the winter. It slowly declined and eventually died. That was plant number four.
The truth: Sarracenia are temperate plants. They need a winter dormancy period of about 3-4 months. This triggers healthy spring growth. Skipping dormancy exhausts and kills them.
What you must do: In late autumn, when temperatures drop, move the plants to a cold location. An unheated garage, shed, or even outside in a sheltered spot works. The soil should be kept slightly damp, not waterlogged.
My two-week observation: The plant stops growing. Old pitchers turn brown and die. This looks like death, but it is not. I learned to leave the dead growth alone until early spring. It protects the crown.
According to the American Horticultural Society (see their resources at https://ahsgardening.org), this cyclical growth is crucial for long-term cultivation success.
6. Feeding is Optional and Often Harmful
I used to drop dead flies onto the pitchers. Then I tried fertilizing the soil. That caused root burn and algae. The plant struggled for weeks.
Do not do this. Sarracenia have evolved to catch their own food. Outdoors, they get plenty. Indoors, you can occasionally drop a small dried bug into a pitcher, but that is rarely necessary. The plant gets energy from photosynthesis. It only uses bugs for nitrogen.
If you are desperate to feed, use a very diluted orchid fertilizer sprayed only on the leaves. I do not bother anymore. My plants do fine with zero intervention.
Feeding rule:
- Never fertilize the soil.
- Do not force bugs into pitchers that are still developing.
- Let nature take its course outdoors.
Common Mistakes That Kill Sarracenia
Let me be blunt about the errors that cost me plants.
Mistake 1: Overwatering (Standing Water in the Wrong Way)
The irony is that Sarracenia love wet feet. But they hate waterlogged, oxygen-deprived soil. The tray method is perfect—keep 1-2 inches of water in the tray during the growing season. However, the soil mix must be airy. If you use dense garden soil, you drown the roots.
The fix: Use a 50/50 mix of peat moss and perlite. Sometimes I add a handful of orchid bark for drainage. The water in the tray never touches the pot bottom directly if the perlite is doing its job.
Mistake 2: Wrong Light Exposure
I put my second plant in dappled shade under a tree. It survived six months but never grew. Pitchers were thin and brittle. I thought it was a slow grower. It was not. It was starving for light.
The fix: Move them to the brightest spot you have. Watch for leaf burn initially, especially if coming from a greenhouse. Acclimatize over 5-7 days. After that, let the sun blast them.
Mistake 3: Using the Wrong Pot Type
I used a glazed ceramic pot with no drainage once. The moisture stayed at the roots. Within a month, the rhizome was mushy. I tried to save it by cutting away the rot, but it was too late.
The fix: Plastic or glazed pots without drainage holes are acceptable only if you control watering carefully. Honestly, just stick to tall plastic pots with drainage. Sit them in a tray. This is the standard method used by growers worldwide.
My Exact Step-by-Step Routine for New Plants
When I receive a new Sarracenia, I follow these steps. You should too.
Step 1: Inspect the roots. I look for any mushy, black sections. I cut those off with sterilized scissors. I also remove any dead old foliage.
Step 2: Prepare the pot. I fill it with the peat/perlite mix. I wet it with distilled water until it is evenly moist but not dripping.
Step 3: Plant the rhizome. The rhizome should sit on top of the soil surface. Do not bury it deep. The roots go into the soil, but the crown stays above. I gently firm the soil around the roots.
Step 4: Set the tray. I place the pot in a tray with 1 inch of distilled water for the first week. This encourages root growth.
Week 2 observation: The plant may look the same. Maybe a bit of leaf tip browning. That is acclimation shock. I do not panic. I check that the soil is not bone dry. It stays moist.
Step 5: Move to full sun. After week one, I gradually expose it to more sunlight. By day 14, it is in full sun for at least 6 hours.
Ongoing care: I maintain the tray water level during hot days. Water the top of the soil only if the top inch looks dry. I do not disturb them for at least a month.
When to Repot and Divide
You will notice your plant outgrowing its pot. Rhizomes will overhang the edge.
Timing: Early spring, just before new growth emerges. That is the safest time. I have repotted in summer with success, but spring is best.
Process:
- Tip the pot out. Gently remove soil from roots.
- Find the growth points on the rhizome.
- Use a clean, sharp knife to cut the rhizome into sections. Each section must have roots and at least one growth point.
- Replant immediately in fresh soil mix.
My observation: After dividing, the plants sulk for a week. The old pitchers may die back. New leaves emerge in about 2-4 weeks. Do not stress.
FAQ: Three Questions I Always Get
Can I grow Sarracenia indoors on a windowsill?
Technically yes, but practically it is difficult. They need intense sunlight and a winter cold period. A sunny windowsill might work in summer, but winter dormancy requires cooler temps. I tried it. My plants got leggy and weak. They are far better outdoors or in a greenhouse. If you are in an apartment with no outdoor space, get a strong grow light and plan for a cold storage period.
How often should I change the water in the tray?
I change mine every few days during summer to prevent mosquito larvae. Stagnant water attracts pests. Also, if you use tap water in a tray (which I hope you do not), minerals accumulate. With distilled water, I change it about twice a week. Simple routine.
Why are my new pitchers black at the tips?
This is a classic sign of either mineral buildup or too much humidity and not enough airflow. If you used tap water, flush the soil thoroughly with distilled water. If the plant is in a closed terrarium (a big mistake), remove it. Sarracenia need airflow. That black tip is the start of rot. Cut it off above the dark part. Move the plant to a breezy spot.
So there you have it. Start with a tough species like Sarracenia purpurea. Use the right pot, pure water, and give it brutal sunlight. Respect the winter rest. Ignore the urge to overfeed.
I remember the day my first healthy new pitcher emerged. It was a deep red with a honey-scented lid. I had finally stopped fighting the plant and started mimicking its natural home. That is the secret. Do not treat it like a houseplant. Treat it like a miniature bog dweller that needs extreme conditions.
My collection now has over 15 different species and hybrids. Each one carries a lesson from a dead plant before it. Start small. Be patient. The two-week rule applies to everything: wait, observe, adjust. You will soon have a thriving collection that will impress everyone who sees it. Just do not show them this article, or they will know all your secrets.





