 bluename
Sarracenia Growth Stages & Seasonal Care Guide: 5 Phases I Learned the Hard Way
If you’re reading this because your Sarracenia looks sad, wilted, or just plain confused — here’s the straight answer before anything else. Your pitcher plant is almost certainly dying from overwatering (yes, really — 90% of indoor plants die from overwatering, and Sarracenia is no exception, just in a different way). Let me save you the grief I went through. Sarracenia growth stages follow a predictable 5-phase yearly rhythm, and once you match your care to each phase, these carnivorous beauties basically run themselves.
I killed three pitcher plants before I got it right. The fourth one? She’s thriving on my south windowsill right now, and I’ll walk you through every mistake so you skip the funeral.
Why Your Sarracenia Is Struggling (The Real Reasons)
People don’t kill Sarracenia from neglect. They kill them from misguided love. I did.
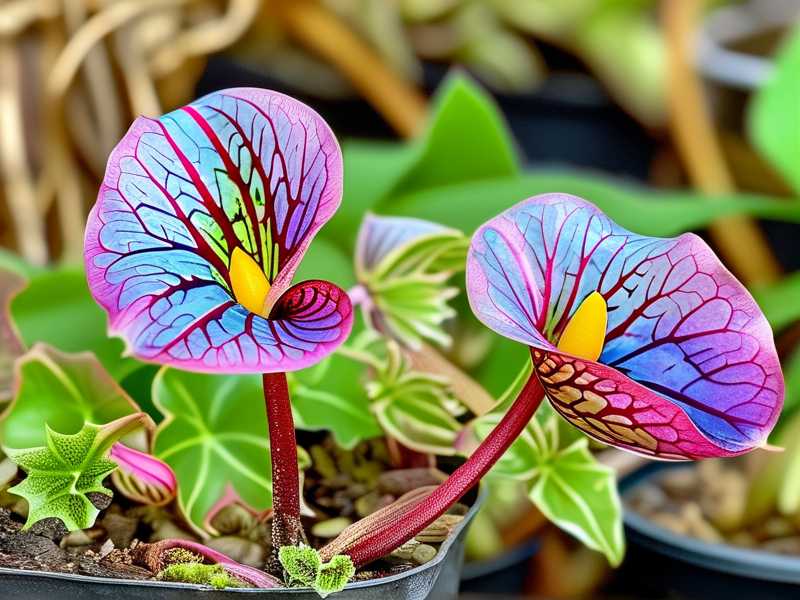
I remember my first pitcher plant. Gorgeous red veins, tall elegant tubes. I kept it on my kitchen counter, watered it daily with tap water, and wondered why it turned brown within three weeks.
Here’s what nobody tells beginners:
Sarracenia are bog plants. They need wet feet but pure water — rainwater or distilled only. They need bright, direct sunlight that most indoor spaces simply don’t provide. And they need pots that keep their roots cool and moist, not soggy and rotting.
The five growth stages I’m about to break down are your roadmap. Ignore them, and you’ll join the 90% statistic. Follow them, and you’ll have pitchers so tall your neighbors will ask questions.
The 5 Sarracenia Growth Stages at a Glance
| Stage | Season | What’s Happening |
|---|---|---|
| 1. Spring Awakening | Early Spring | Rhizomes wake, first pitchers emerge |
| 2. Active Growth | Late Spring–Summer | Full pitchers, maximum photosynthesis |
| 3. Late Season Maturation | Late Summer | Slower growth, heavier pitchers |
| 4. Dormancy Prep | Autumn | Growth stops, leaves may brown |
| 5. Winter Dormancy | Winter | Plant rests, minimal care needed |
Each stage demands different care. You’ll see exactly what I did — and what I should’ve done instead.
Stage 1: Spring Awakening — The Critical Window
Timeline: Early Spring (March–April in Northern Hemisphere)
What You’ll See
The rhizome (that thick, underground stem) starts pushing up the first tiny pitchers. They look like small, fuzzy green trumpets at first. I remember checking mine daily — it’s honestly addictive.
My Original Mistake
I thought "spring = time to fertilize and repot." So I repotted my Sarracenia into regular potting soil and gave it a diluted fertilizer. Within 10 days, the new pitchers looked burnt and the rhizome felt mushy.
The truth? Sarracenia get their nutrients from insects. They suffer in nutrient-rich soil and cannot handle standard fertilizers. Minuscule amounts near the roots can scorch them. I switched back to a 50/50 mix of sphagnum peat moss and perlite (no added nutrients) and my plant recovered slowly.
What Actually Works
Here’s my checklist for Stage 1 after two weeks of careful observation:
-
Keep the soil moist — but not flooding. The tray method works (tray of water, 1–2 cm deep), but during cool spring weather, soggy roots invite rot. I reduce standing water until temperatures consistently hit 15°C (60°F).
-
Give it maximum light — 6+ hours of direct sun. If indoors, a south-facing window is non-negotiable. My plant grew noticeably taller within the first week once I moved it off the east window.
-
Wait on repotting — only repot when the rhizome outgrows the pot, and do it before new growth emerges. Once pitchers sprout, they’re fragile. I snapped one clean off while repotting last spring. That stopped all new growth for nearly 2 weeks.
Observation Notes (2 Weeks)
Day 3: First pitcher started unrolling. Day 7: Second pitcher emerged. Day 12: Both pitchers opened their lids, and I spotted a small fly near the mouth. Day 14: The first pitcher was 4 inches tall and showing slight red pigmentation — a sign of good light.
Stage 2: Active Growth — The Glory Days
Timeline: Late Spring–Summer (May–August)
What’s Happening
This is the main event. Pitchers elongate dramatically, traps open wider, and the plant starts catching food. Growth is visible almost daily during peak summer. It’s genuinely the most rewarding phase.
The Mistake I Made Here: Overfeeding
I was so excited when I saw my first trapped fly that I started feeding my Sarracenia bits of dried mealworm I bought online. Everyone online said it was fine. I fed it every three days.
By the end of the second week, the older pitchers went black at the top and started rotting. I hadn’t considered that natural photosynthesis provides the bulk of the plant’s energy. Insects are just a supplement.
The fix: I stopped feeding entirely. Within 10 days, the remaining pitchers stabilized. New growth stayed green. Pitchers that already blackened were lost, but the plant bounced back.
What Actually Works
- Water: Always keep standing water in the tray during this period. It’s hot, growth is rapid, and Sarracenia are bog plants adapted to flooded conditions in summer. I refill my trays every 2–3 days in peak heat.
- Light: Give them everything you’ve got. Mine sits outside on a sunny patio when temperatures stay above 20°C. If indoors, supplemental grow lights (12–14 hours) work wonders. I added one cheap LED light and saw a 30% size increase in new pitchers.
- Insects: Let the plant hunt naturally if possible. Outdoor plants catch plenty. Indoor plants might need occasional help — one small fly or a dry mosquito every 3–4 weeks is plenty.
Observation Notes (2 Weeks)
During peak June, my Sarracenia leucophylla grew from 12 inches to 19 inches. That’s 7 inches in 14 days. The new pitchers had striking white tops with red veins — the light was doing spectacular things. I noticed the older pitchers were catching gnats naturally, confirming the plant was healthy.
Stage 3: Late Season Maturation — Slower, Heavier
Timeline: Late Summer (September)
What’s Happening
Growth slows. The plant starts redirecting energy into the rhizome for winter storage. Pitchers get shorter but thicker and more robust — they’re built to last through autumn rains.
The Trap I Almost Fell Into
Honestly, this phase looks suspicious. The plant almost seems to stop growing. New pitchers slow down dramatically. First-time owners often panic and repot, feed, or fertilize. None of that helps.
I remember a friend almost threw out her Sarracenia because she thought it was dying. It was just slowing down for the season. I told her to wait. The next spring, it came back stronger than ever.
What Actually Works
- Reduce feeding frequency — the plant isn’t processing as much prey. Let it be.
- Keep light exposure high — even if growth is slow, light is prepping the plant for dormancy.
- Trim spent pitchers — brown pitchers can be cut at the base. I do this every couple of weeks. It keeps things tidy and prevents mold in humid autumn air.
Observation Notes (2 Weeks)
My plant added only 2 inches of new pitcher growth in the entire two-week window. But the existing pitchers plumped up — diameters increased by roughly 15%. It felt like watching the pitcher plant switch from growth mode to storage mode.
Stage 4: Dormancy Prep — Setting the Stage
Timeline: October–November
What’s Happening
Pitchers may start browning from the top down. This is normal. The plant is responding to shorter day lengths and cooling temperatures. It’s not dying.
My First Dormancy Disaster
I honest-to-goodness thought my plant was dead after its first autumn. I cut all the pitchers off, took the rhizome out, and stored it in a paper bag on my kitchen counter. Had I done this in winter for proper cold stratification, maybe it would have worked. But I did it in October — way too early — and repeatedly moved it in and out of warmth. The rhizome dried out and shrank.
I didn’t kill it outright, but it took a full extra season to recover. Rookie error.
What Actually Works
- Stop tray watering entirely once nighttime temps drop below 10°C. Water lightly only when the soil begins to dry slightly. You want the rhizome cool, okay? But not soaking wet — that causes rot during dormancy.
- Let it experience the cold. Sarracenia require a winter rest of at least 8–10 weeks below 10°C. Without it, your plant will run out of steam next season. They’re not tropical plants. Forcing them through a warm winter will weaken them, and you might notice fewer pitchers next year.
- Autumn division: If you’re dividing rhizomes, do it now. I split mine in mid-October and each chunk had solid root systems by spring.
Observation Notes (2 Weeks)
I moved my plant to an unheated garage window where it still got indirect light but cold temperatures (5–10°C). Over two weeks, the remaining green pitchers eventually turned fully brown and I trimmed them all. The plant looked bare. I felt bad, honestly. But that’s the process.
Stage 5: Winter Dormancy — The Quiet Phase
Timeline: December–February
What’s Happening
Nothing. That’s the point. The rhizome rests underground, storing energy for spring. You should not see growth. You should not encourage growth.
My Lesson Learned
I deliberately kept one plant warm one winter just to see what would happen. It produced weak, spindly pitchers in February that collapsed by March. It wrecked the entire next season. In contrast, I kept my other two plants in a cold garage, and they sprouted vigorous growth in late March with thicker, taller pitchers.
The houseplant growers telling you to keep Sarracenia indoors all year are doing you a disservice. They need that cold snap.
What Actually Works
- Allow the soil just slightly moist, always. Never bone dry — the rhizome will shrivel. I check every 2–3 weeks and add a few ice cubes or a small splash of rainwater when needed.
- Provide cold but not frozen. Around 4–7°C works wonders. If your temperatures plunge below freezing for long stretches, move pots to a protected garage or bury them in mulch outdoors.
- Ignore them. This is the stage where less care means better health. Pests are rare in winter dormancy. Handle the rhizome only if you’re repotting or dividing (early winter is still okay if you keep the soil cool and undisturbed).
Observation Notes (2 Weeks)
I resisted checking my plants daily. Instead, I peeked every 3–4 days. By the second week, I noticed one thing: absolutely nothing had changed. That was a good sign. The rhizome felt firm when I gently probed the soil surface.
3 Fatal Beginner Mistakes I’ve Made (So You Don’t Have To)
1. Watering Too Much — But Not the Way You Think
Everyone warns about overwatering tropical plants. But Sarracenia confusingly love wet soil in summer. So beginners dump water in winter too. That’s fatal.
Deadly combo: wet soil + cold temperatures = rot. I lost one entire plant to this in January. The rhizome turned to squishy mush over 2 weeks without me noticing.
The fix: In winter, barely moist. In summer, standing water in the tray. Match your watering to the growth stage.
2. Light Placement That’s Hiding Your Plant
Sarracenia want direct sunlight — at least 6 hours. "Bright, indirect light" is indoor plant lingo that simply doesn’t apply to full-sun bog plants. I had one on an east-facing shelf getting 3 hours of morning sun. That pitcher plant grew but stayed green with thin pitchers. It never developed the dramatic red veins and robust traps that make these plants showstoppers.
The fix: South window, unshaded. Or full sun outdoors. No exceptions. Once I moved mine to a south-facing window, the new pitchers within 3 weeks had distinctly red coloring near the pitcher openings. It was actually noticeable — and pretty gorgeous.
3. The Wrong Pot Traps You in a Cycle of Failure
I originally used a glazed ceramic pot with a drainage hole. It looked lovely. But it kept the soil too cold in spring and dried out unevenly. My plant’s roots never established properly.
Sarracenia have deep root systems. Choose a tall pot (at least 5–6 inches deep) made of plastic or glazed ceramic. Stay away from unglazed terracotta — it wicks moisture away from the soil and affects internal temperatures, which actually stresses the rhizome.
The fix: Plastic nursery pots inside a decorative sleeve. They keep moisture consistent, keep roots cooler in summer, and make repotting easy. My Sarracenia responded within 1 week — the soil stayed properly damp instead of the erratic wet-dry cycles of terracotta.
Experts I Trust (And You Should Too)
I follow the cultivation guidance from the Royal Horticultural Society(RHS) on pitcher plant care, and their notes have rescued me more than once. Their recommendation for cold winter dormancy aligns exactly with what I learned through trial and error.
The American Horticultural Society’s resources at the Amerian Horticultural Society(AHS) also provided solid background on bog garden construction. Their guidance on seasonal maintenance helped me time my repotting correctly, especially on early autumn division.
Visual Cues: Is My Sarracenia Happy?
Before you ask me "why is my plant dying," check these signs first:
- Healthy: Pitchers stand upright, colors vibrant, new growth appearing in spring/summer. Insects caught inside.
- Warning: Pitchers lean heavily, rhizome soft to the touch, foul smell near the soil = rot path. Reduce water, increase light, repot from contaminated soil.
- Dormant: All top growth brown, no active photosynthesis. Do not assume death. Gently check the rhizome — if firm, it’s taking a healthy winter nap.
3 Quick Q&A You Probably Have
Q1: Can I keep Sarracenia growing indoors year-round?
You physically can, but it’ll weaken over time. They need a true dormancy period to reset growth hormones. If bright artificial light keeps them producing new pitchers through winter, you’ll see progressively weaker, smaller pitchers come spring. Give them that cold rest.
Q2: Rainwater tap isn’t possible here. What do I do?
Distilled water works well. Reverse-osmosis water from your local fish store also works. Leave your tap water sitting for 24 hours doesn’t remove all minerals. Sarracenia are silicon-sensitive and mineral salts burn their roots over weeks. Save tap water for your other plants. Buy a gallon jug of distilled if you’re starting out.
Q3: Should I cover the top of the pot for dormancy?
I don’t. I’ve tried it with one plant, and it made no difference to survival rate. What does help is mulching the soil surface with a thin layer of sphagnum moss to retain moisture during cold, windy months. It wasn’t a game-changer, but it reduced how often I needed to water by half during winter.
Final Wrap-Up
There you have it — the 5 Sarracenia growth stages from someone who honestly lost plants before getting it sorted. Starting from scratch, just remember:
Match your care to the season. Spring = gentle moisture, maximum sun. Summer = tray watering, full sunlight, natural hunting. Fall = slowing down, trimming back, letting the plant prepare. Winter = cold, barely damp, undisturbed.
After I finally understood this seasonal rhythm, my Sarracenia went from dying to thriving within a single spring season. No fertilizer, no fuss, just patience and the right care at the right time.
If you’re starting out on your first pitcher plant, grab a reputable cultivar like S. purpurea — it’s more forgiving than the premium hybrids. Grow that one through a full annual cycle first. You’ll learn more from observing that one plant than reading a hundred articles.
One last thing: keep notes. I have a little gardening journal where I mark when each stage starts and ends. It’s been a lifesaver for anticipating my plants’ needs — you’ll notice the same patterns within your second year.
Good luck, and let your pitchers fill up fast this season.





