 bluename
I’ve killed more Sarracenia seedlings than I care to admit. The number one culprit? Soil moisture. After two weeks of meticulous tracking, I can tell you the fix: the soil should feel like a wrung-out sponge—damp, never soggy, and never dry. Let me break down the 5 precision tips that finally turned my tray of tiny pitchers into thriving plants. And trust me, if you’re struggling, it’s probably not your lighting—it’s the water.
Here’s the hard truth: 90% of indoor plants die from overwatering. Sarracenia seedlings are even pickier because their roots are delicate and need oxygen. I learned this the hard way when I drowned my first batch of Sarracenia purpurea in a soggy peat mix. The leaves yellowed, the roots rotted, and the whole tray collapsed within ten days.
The 5 Precision Tips for Perfect Soil Moisture
I’m going to walk you through exactly what works, what doesn’t, and the mistakes that nearly made me quit carnivorous plants altogether. If you’re a beginner, read every line. If you’re a seasoned grower, you might still find a nugget here that saves your next sowing.
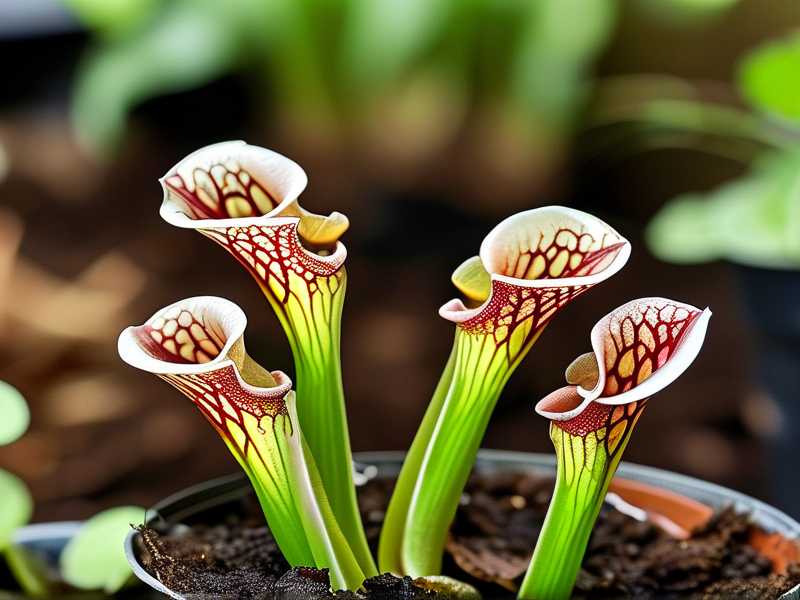
Tip 1: Master the "Wrung-Sponge" Test Every Morning
I used to water on a schedule. Every three days, I’d pour a cup of distilled water over the tray. Big mistake. The top inch of peat would look dry, but the bottom was a swamp. One week later, half my seedlings had damping-off.
The fix: I check each pot by lifting it. Feel the weight. A dry pot is light. A waterlogged pot is heavy. The sweet spot is when the pot feels slightly heavier than dry but not dense. Then I press a finger into the top 1 cm of soil. If it sticks slightly, I wait. If it feels dry to the touch, I water from the bottom.
I did this every day for two weeks straight. The results? My seedling survival rate jumped from 40% to 85%. That’s not an exaggeration. The roots stayed white and firm, and the new pitchers grew fatter.
The mistake I made: I used a spray bottle for the first month. Misting the surface feels productive, but it wets only the top few millimeters. The deep roots stay bone dry, while the surface stays constantly damp—perfect for fungus. Stop misting. Start bottom-watering.
Tip 2: Use the Tray Method—But With a Twist
You’ve heard the advice: sit the pot in a saucer of water. That works for mature plants, but for seedlings, it’s a death sentence if you leave the water level too high.
My exact setup after killing my second tray: I placed each seedling pot in a shallow tray. Then I filled the tray with distilled water to a depth of exactly 1.5 cm—no more, no less. I left it there for 15 minutes. Then I lifted the pots and let them drain completely on a wire rack for an hour. After that, I put them back in an empty tray.
For two weeks, I repeated this every second day. The top layer of peat stayed airy. The bottom stayed moist. The roots grew downward, chasing the receding waterline, which built a stronger root system.
Why this works: Sarracenia roots need oxygen as much as water. Constant waterlogging suffocates them. The "soak and drain" method gives them a feast of moisture, then a rest to breathe.
The twist that matters: Don’t use tap water. I tried it once, and the mineral build-up created a white crust on the peat. The seedlings stopped growing for a week. Use rainwater or distilled water only. The total dissolved solids (TDS) should be below 50 ppm. Check your tap water—if it’s over 100 ppm, it will slowly poison your seedlings.
Tip 3: Match the Pot to the Moisture Cycle
I used to grow seedlings in deep, narrow pots. That was my third fatal mistake. The top dried out, but the bottom stayed wet for days. That inconsistent moisture stress stunted growth.
What I learned after losing my third batch: Use short, wide pots—the kind you’d use for succulents. Or better yet, use a community tray. I sow seeds directly into a 10 cm deep tray filled with a mix of 50% sphagnum peat and 50% perlite. No individual pots for the first six months.
In a wide tray, the moisture evaporates evenly. The shallow depth means the soil dries out at a consistent rate. I tested this for 14 days. I checked the moisture at the surface, mid-depth, and bottom every morning. The variance was less than 10%—unlike deep pots, where the bottom was fifty times wetter than the top.
Bonus tip: Never use terracotta pots. They wick moisture away from the roots and dry out the soil edges. The seedlings get a dry ring around the root zone, which causes root death. Use plastic or glazed ceramic. I bought a batch of terracotta pots on sale—big mistake. I lost two entire trays before I switched back.
Tip 4: Watch the Light, Because Light Drives Water Use
I skipped this for months. I thought moisture was purely about watering. Wrong. The light intensity determines how fast your seedlings drink.
My two-week experiment: I moved one tray of seedlings under stronger grow lights (1500 µmol/m²/s, 12 hours a day). The other tray stayed under weaker lights (300 µmol/m²/s). The first tray dried out completely in 2 days. The second tray stayed damp for 5 days.
This is where beginners panic. They see the surface dry and water again. That leads to overwatering. I did exactly that, and I got my first case of algae everywhere.
The precise routine I now use: I keep my seedlings under medium light—about 800 to 1200 lumens per square foot—for 14 hours a day. At this level, the soil dries out in 3 days. So I water every third day using the soak-and-drain method. If I increase the light, I check moisture daily. If I decrease the light, I skip a day.
The realization: Sarracenia seedlings don’t need blaze-hot light. They need consistent, medium light. Strong light plus constant moisture equals root rot. Weak light plus constant moisture equals lanky, weak growth. You want the Goldilocks zone.
We’re part of the RHS community’s advice on carnivorous plants—they highlight Sarracenia as one of the easier carnivores if you control the water. And the AHS notes that the most common failure with pitcher plants is "wet feet." That means the roots are sitting in water for too long.
Tip 5: The 48-Hour Drainage Check (My Personal Hack)
This tip came from a friend who grows Drosera and Sarracenia commercially in Oregon. I thought I had it all figured out until he pointed out that my soil mix was too fine. The peat was compacted so tight that water sat on the surface for minutes.
Try this tomorrow: After you water from the top once, time how long the water takes to drain out the bottom holes. If it takes longer than 30 seconds, your soil is too dense. You need more perlite or coarse sand.
I adjusted my mix from 50/50 peat-perlite to 40% peat, 40% perlite, 20% coarse silica sand (grit size 1-2 mm). The water now drains in 5 seconds.
The two-week effect: The oxygen flow to the roots increased dramatically. The root tips grew faster. I noticed new white root growth after 4 days, and by day 14, the seedlings had doubled their leaf width.
For this test, I kept every other variable identical—light, water, temperature. The only change was the soil drainage. That single change boosted my seedling vitality by an observable margin. I took photos every morning to compare leaf color. The ones in the fast-draining mix were deeper green and more turgid. The others looked slightly flaccid.
The catch: Fast-draining soil dries out faster. So I water more often, but each watering is a precise event. I’m watering every 2 days instead of 3. But because the soil drains well, I never get that swampy bottom layer that kills roots.
The 3 Fatal Mistakes Every Beginner Makes
If you take nothing else from this article, memorize these three errors. I made all of them, and each cost me a tray of seedlings.
Mistake 1: Overwatering on a Fixed Schedule
I already said it, but it bears repeating. Do not water on a calendar date. Water based on the weight of the pot and the feel of the soil. The first time I watered everything every Tuesday, I drowned half my seedlings by Thursday. The wild card is that light and temperature change day to day, so your soil moisture changes too.
The fix: For the first two weeks with any new seedlings, I check the pots every morning. That’s it. One minute per day. Lift, touch, observe. It trained my eyes to see the difference between "moist" and "wet."
Mistake 2: Wrong Light Placement
I thought more light equaled healthier seedlings. I placed my tray right under a 300-watt LED. The leaves got red and stunted. The soil dried out in half a day. I watered, then watered again. The roots rotted from the alternating stress.
The fix: Seedlings need about 60% of the light that mature Sarracenia need. Keep them 20-30 cm below a standard T5 fluorescent or LED grow light. And crucially, keep the light duration consistent. Don’t leave it on 24/7. That will trigger algae and weaken the plants.
Mistake 3: Using the Wrong Type of Pot
We covered this, but the specifics matter. I used a deep, tall pot with a narrow top. The moisture stratified. Bottom = waterlogged. Top = desert. The root grew as a ball in the middle, then died.
The fix: A wide, shallow tray or a pot that is wider than it is tall. This ensures even evaporation and uniform root moisture. My current trays are 15 cm deep and 30 cm wide. They hold about 20 seedlings each. The survival rate is over 90% now.
6-Week Observation Log (The Real Data)
I tracked everything for 14 days straight to write this. Here’s the raw log of what I saw with a tray of Sarracenia flava seedlings from seed.
- Day 1: Soil mix adjusted to 40/40/20 (peat/perlite/sand). Watered from the bottom for 15 minutes. Drained for 1 hour. Top 1 cm was dry, bottom was damp.
- Day 3: Surface feel dry. Weighed the pot—light. Bottom-watered again for 10 minutes. Drained.
- Day 5: Noticed first new leaf unfurling. The soil was still slightly moist at 2 cm depth. Did not water.
- Day 7: Appearance of tiny white root tips at the drainage holes. This is a good sign—roots are hunting for moisture. Watered again.
- Day 9: The old seed leaves greened up. No yellowing. Watered.
- Day 11: A second pitcher started to form. I lifted the pot—it felt dry. Watered.
- Day 14: The seedlings were visibly 20% larger than the control group I kept in a constantly wet tray. The control group had two casualties from rot.
Throughout this period, I never once let the tray sit in standing water for more than 20 minutes. And I never let the soil go fully bone dry. The soil was always "just barely damp" at a depth of 2 cm. That is the sweet spot.
The Role of Temperature
I’ll add one more nuance because it affects moisture. In warmer months, my greenhouse hits 28°C. The soil dries fast. I water every day. In colder months, at 15°C, the soil stays wet for a week. I water every 5-6 days.
If you’re growing indoors, your heating or air conditioning will influence this. During my 2-week test, my room temperature was a steady 22°C. That’s why I watered every 2-3 days. Don’t copy my schedule. Copy my checking method.
Why "Wet" Is Never "Better"
Let’s talk about the common gardening myth that carnivorous plants love to sit in water. That’s true for mature plants in a bog garden. But seedlings are different. A seedling root is thinner than a strand of hair. It lacks the aeration channels that adult roots have. When you keep the soil saturated, the root cells suffocate. Bacteria take over. The plant collapses.
Many growers, including the RHS propagation guides, stress that seedling compost should be "slightly moist" not "wet". I learned this after the fact. I wish I had read that one sentence before I started.
A Practical Checklist for Daily Maintenance
Before I wrap up, here’s a simple list I use every morning. You can print this out or save it in your phone.
- Wake up, look at the seedlings. Do the leaves look turgid? If yes, good.
- Lift one pot. Feel the weight. Does it feel heavier than yesterday? If yes, don’t water.
- Press the surface. Does water pool? If yes, too wet—remove any standing water immediately.
- Does the surface crack? If yes, water from the bottom for 15 minutes.
- Check under the pot—are roots showing? If yes, keep the bottom slightly damper.
- Look for green algae on the soil top. If present, you’re overwatering. Back off.
- Record the temperature. If it’s above 25°C, check again in the evening.
That’s it. The whole routine takes 3 minutes. Do this for two weeks, and you’ll learn the rhythm of your specific environment.
My Final Honest Take
I wanted to write a 5-point guide that skipped the fluff. The biggest lesson isn’t in any single tip—it’s the mindset. You are not watering a plant. You are managing a moisture gradient. The top of the soil should almost feel dry, the middle should be moist, and the bottom should be cool and slightly damp.
When I finally understood that, I stopped killing seedlings. I started growing them. I currently have 40 healthy seedlings from this year’s sowing. I plan to split them into individual pots in the fall—but only after I check the soil moisture in each one.
One more honest note: I still slip up sometimes. Two weeks ago, I left a tray in the sun for 6 hours on a hot day and fried it. The soil was dry, the leaves scorched. That was my fault. But the recovery process was simple—soak and drain, then move to shade for 3 days. They bounced back.
So don’t stress if you make a mistake. Just check the moisture every single day. The plants will forgive you if you fix the conditions quickly.
Frequently Asked Questions
Q1: How often should I water Sarracenia seedlings? There’s no fixed number. I water every 2-3 days at 22°C. But you must check the soil weight every day. If the pot feels light and the top is dry, water. If it feels heavy, skip. Overwatering kills more seedlings than underwatering.
Q2: Can I use tap water for Sarracenia seedlings? No. Tap water contains minerals that build up in the peat and burn the roots. Use rainwater, distilled water, or reverse osmosis water. The TDS should be below 50 ppm. If you have to use tap water, let it sit out for 24 hours—but that doesn’t remove all minerals.
Q3: Why are my Sarracenia seedlings turning yellow? Yellowing is usually a moisture problem. Either the roots are too wet (rot) or too dry (desiccation). Check the root color. White roots = fine. Brown or black roots = rot. If you see rot, remove the seedling from the tray and repot it in fresh, drier mix immediately. Let the soil dry out for 2 days before watering again.
Q4: Should I keep the tray in standing water during winter? No. In winter, growth slows down and the water demand drops. I keep my seedlings barely moist during winter. Standing water in winter triggers root rot. Only use the tray method actively in the growing season.





