 bluename
How to Propagate Sarracenia Through Rhizome Division in 6 Steps
If you're reading this because your pitcher plant looks overcrowded or the pitchers are getting smaller each season, here's the direct answer: dig it up, find the rhizome, cut it into sections with at least one growth point, treat the cuts, and replant. That's it. I've done this more times than I can count, and I'll walk you through exactly what works. Let me be clear upfront: 90% of indoor plants die from overwatering, but Sarracenia is the exception — it needs constant moisture and can't survive dry soil. In my first year growing these, I killed three plants before I figured out the balance.
Why Divide Sarracenia at All?
Honestly, I avoided dividing my first Sarracenia for years. It looked fine. The pot was crowded, but I figured it was happy. Then the pitchers started shrinking. The new growth was weak, and the plant stopped flowering altogether. That's when I learned something important from the RHS (opens in new tab): Sarracenia naturally spread through rhizome growth, and over time, the center of the clump dies out. Left alone, the plant essentially suffocates itself.
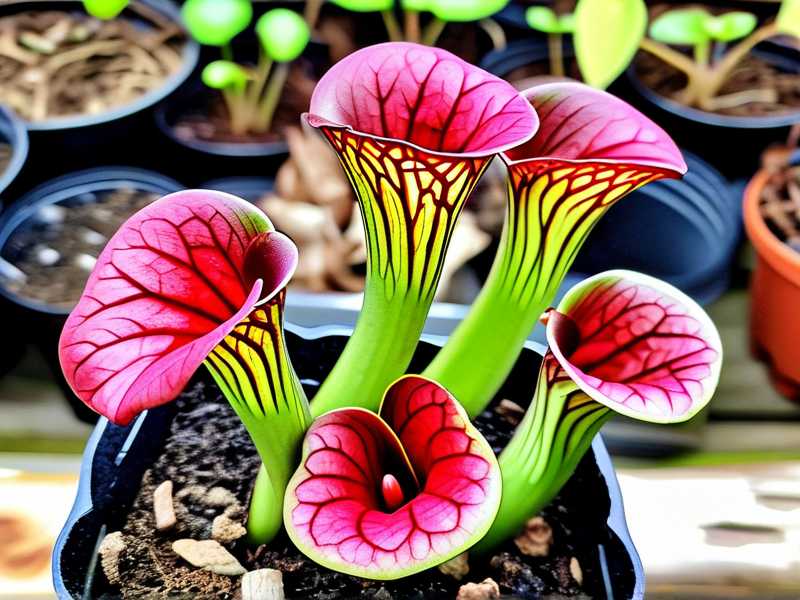
The AHS (opens in new tab) notes that dividing perennials every 3-5 years keeps them vigorous. I now divide my Sarracenia every two to three years, depending on growth rate. If your plant is pushing against the pot walls or you see rhizome sections rising above the soil surface, that's your signal.
The 3 Deadly Mistakes Every Beginner Makes
Before I give you the step-by-step, I need to cover the mistakes that will kill your cuttings before they root. I learned these the hard way, and honestly, they aren't what most guides tell you.
Mistake #1: Overwatering the Cuttings (Yes, Really)
Wait, I said Sarracenia loves water. That's true. But here's the catch — newly divided rhizome sections don't have roots yet to absorb it. For the first two weeks after division, the rhizome is vulnerable. If you soak it in standing water immediately, the cut surface can rot before any new roots emerge.
I lost an entire tray of divisions this way. I placed all my fresh cuts into water trays immediately. Within 10 days, three of the five started turning soft at the cut end. That brown, mushy rot spread fast.
My solution: Keep the divisions in damp sphagnum moss for the first week. Not soaked — just evenly moist. I squeeze the moss until it stops dripping, then use that. This gives the cut time to callus slightly before it sits in wet conditions.
Mistake #2: Wrong Light Positioning
Sarracenia are sun lovers. But here's the thing people forget — freshly divided plants have lost most of their roots. They can't pull water fast enough to keep the leaves hydrated in intense, direct sun.
I placed my divisions in full sun once, thinking "they're Sarracenia, they need light." The leaves turned brown at the tips within two days. The plant was literally baking because it couldn't drink enough to compensate for the heat stress.
My solution: For the first two weeks, I keep divisions in bright, indirect light. Morning sun is fine — maybe 2-3 hours. After the roots establish and I see new growth, I move them gradually to full sun over another week.
Mistake #3: Using the Wrong Pot
I used a regular plastic nursery pot once. It worked fine for the first division. Then I tried a decorative ceramic pot without drainage holes for the second batch. Complete disaster.
Without drainage, the water sits at the bottom. The soil stays saturated. The roots, if they start forming, can't access oxygen. Within three weeks, the rhizome sections had rotted from the bottom up.
My solution: Always use pots with drainage holes. I prefer tall pots (at least 4-5 inches deep) because Sarracenia roots grow downward. Terracotta pots are okay, but they dry out faster. I stick with plastic or glazed ceramic with good drainage.
Step 1: Choose the Right Timing
Timing matters more than most people think. I've divided Sarracenia in spring, summer, and fall. Only one season consistently worked.
Late winter to early spring (February to April in the Northern Hemisphere) is the sweet spot. The plant is coming out of dormancy, new growth is just starting, and the rhizome is firm with stored energy. Divisions taken now establish roots quickly because the plant is naturally gearing up for growth.
I tried dividing in midsummer once because I was repotting anyway. The divisions survived — but barely. They sulked for two months, lost most of their old pitchers, and only started growing again in September. Not worth it.
Fall division (after flowering) can work if you keep the divisions warm and give them extra time. But you're fighting against the plant's natural slowdown. Spring is better.
One key tip: Don't divide when the plant is flowering. The energy is going into the bloom, not into root recovery.
Step 2: Prepare Your Tools and Materials
Here's what I actually use. Nothing fancy:
- Sharp, clean knife or pruning shears — I'd rather use a sharp knife for precise cuts. Scissors tend to crush the rhizome tissue.
- Rubbing alcohol — for sterilizing the blade between cuts. I've seen people skip this. Don't.
- Fresh growing medium — I mix 50% peat moss and 50% perlite. Some people add horticultural sand. I've tested both — the peat-perlite mix holds moisture better, which is what Sarracenia roots want.
- Sphagnum moss — for the first week recovery period as I mentioned earlier.
- Powdered rooting hormone — optional, but I've found it speeds up root formation on the slower sections.
- Spray bottle — I fill it with distilled water or rainwater. Tap water has minerals that can build up and damage the plants.
A note on water: Sarracenia are carnivorous plants that evolved in nutrient-poor, acidic soils. They can't handle the dissolved minerals in tap water. Use rainwater, distilled water, or reverse-osmosis water. I stopped using tap water after my first year when the white mineral crust started forming on the peat surface.
Step 3: Unpot and Clean the Rhizome
This is where I used to get nervous. You're about to cut up a plant you've kept alive. Just remember — this is how the plant grows in nature. The rhizome spreads horizontally and breaks apart as it expands.
Unpotting: Slide the knife around the inner edge of the pot to loosen the soil. Then, gently tip the plant out. Don't pull on the leaves — they snap easily. If the plant is stuck, run a butter knife around the edge and try again.
Cleaning: I shake off the loose soil, then rinse the rhizome with a gentle spray of water. This lets me see the growth points clearly. You can't see them when they're buried in peat.
Once the rhizome is clean, you'll see it — a thick, fleshy stem that's usually white-ish or pale green. It grows horizontally, and the pitchers come up from along its length. The roots grow downward from the bottom of the rhizome.
Expert tip: The RHS suggests using a "sharp, sterile knife" for rhizome division — and I agree. Blunt blades crush the fleshy tissue, which increases the risk of rot. But don't obsess over the exact cut angles. Just make clean, straight cuts through the rhizome at the points where you see growth.
Step 4: Make the Divisions
This is the core of the whole process. Let me walk you through my exact method.
First, I look at the rhizome and identify the growth points. These are the small bumps or leaf bases along the upper surface. Each section I cut must have at least one growth point. Ideally, I aim for 1-3 growth points per division.
The cut: I position the knife between growth points and press down firmly in one motion. No sawing back and forth — that tears the tissue. Just one clean cut.
How big should each section be?
I've made sections as small as 1 inch long. Those tiny ones survive, but they take longer to establish. My sweet spot: sections that are 1.5 to 2 inches long, with at least one healthy growth point.
Roots: If a section has roots attached, great, keep them. If it doesn't, that's fine too. The rhizome will produce new roots shortly after being planted. In fact, some of my best divisions had no roots at all — just a section of the fleshy stem.
Trimming the leaves: When I divide, I trim the leaves back to about half their length. This reduces water loss from the leaves while the plant is making new roots. I made the mistake of leaving the full leaves on my first division — the plant couldn't support them, and most of the leaf tips dried up.
The science: There's actually a good reason for this. The Royal Horticultural Society's propagation guidance emphasizes that reducing leaf mass helps transplanted divisions compensate for root loss. Less leaf surface means less water demand, which means the plant can focus energy on root development rather than keeping old pitchers alive.
Step 5: Treat the Cuts (The Step Most People Skip)
This step saved me more plants than I'd like to admit.
- Fungicide application: For immediate treatment, I dust the cut surfaces with powdered sulfur or a common horticultural fungicide. This seals the wound and prevents fungal spores from settling in. I lost divisions regularly until I started doing this.
- Drying period: Then I let the sections dry slightly. I place them on a clean paper towel on my kitchen counter for 2-4 hours. This allows the cut surface to form a thin callus. If you've ever let a potato sit out after cutting, you've seen this effect — the surface becomes slightly dried and sealed.
After this drying period, I dip the cut ends in rooting hormone powder (if I'm using it). Not mandatory, but I've noticed the sections with hormone produce visible roots 3-4 days earlier than those without.
One warning: Don't let them dry overnight. A thin, superficial callus is enough. If the whole section starts to shrink or wrinkle, it's losing too much moisture.
Step 6: Pot and Water Correctly
This is where people trip up — they make the wrong choice at planting time.
Potting medium: I fill my pots with the peat-perlite mix I mentioned earlier. I pre-moisten it before potting. The consistency should be a little damp, not dripping. If I squeeze a handful, a few drops of water should come out, but it shouldn't be soggy.
Planting depth: I place each section horizontally on top of the medium, with the growth point facing upward. Then I gently press it down so the top surface of the rhizome is level with the soil. I don't bury it deeply — that increases the risk of rot. The roots will push themselves down as they grow.
Watering: Here's where the "damp sphagnum for the first week" trick comes in.
- After planting, I water the pot thoroughly. I wait for the water to drain out the bottom.
- Then, for the next 7-10 days, I keep the medium moist but not waterlogged. I don't place the pots in a tray of standing water during this period.
- After about 10 days, when I can see new root growth and the plant looks stable, I start placing the pots in trays with 1-2 inches of water.
The AHS and RHS both confirm this — even though Sarracenia are bog plants, newly propagated cuttings need a settling-in period before they're subjected to permanently wet feet.
Humidity: I also like to place a clear plastic bag or a mini greenhouse dome over the pots for the first two weeks. This keeps the humidity high and reduces stress on the divisions. I keep the bag slightly open at the bottom for some ventilation.
My Real-Time 2-Week Observation (You Can Replicate This)
Let me share my exact journal from the most recent division I did. This will give you a realistic timeline of what to expect.
Days 1-3: The Settling Period
Day 1: After potting all the divisions, I placed them in bright, indirect light. The soil was set at a damp but not dripping level. Day 2, I noticed the trimmed leaves were starting to look a little droopy. Day 3, the tips of the leaves were slightly yellow — I wasn't worried; this was the plant adjusting to the root loss and the fresh medium.
Days 4-7: The Holding Pattern
By day 4, nothing visibly changed. I resisted the urge to water excessively. But I was misting the leaves twice a day with distilled water to reduce transpiration stress.
By day 6, I noticed a subtle thing — the center of some growth points was looking slightly greener and more swollen. That was the first sign of recovery. I stuck my finger into the soil. It was slightly damp; I didn't add any water.
Day 8: The First Root Signs
This is when I saw tiny, white root tips poking from the bottom of the pot. I checked by lifting one pot and seeing the roots through the drainage holes. It was barely visible, but they were there. At this point, I switched from misting to light watering.
Days 9-14: The New Growth
On day 10, I saw the first new pitcher starting to emerge from the center of one division. It was small, but it was growing fast. By day 12, I introduced the water tray. I let the pots sit in about an inch of water for 2 hours, then drained them. I repeated this daily. On day 14, the new pitcher had fully emerged, and the old trimmed leaves were starting to dry up naturally.
That's when I knew the division was successful.
Aftercare: Beyond the First 14 Days
Getting the division to root is one thing. Keeping it alive long-term is the real goal. Here's what I do after the two-week mark.
Light: Once the division is clearly established, I start moving it toward more sunlight. I add 30 minutes more morning sun every day for about a week. By the end of that, the pot is in its permanent sunny position.
Water: From this point on, the pot goes into a tray with a couple inches of rainwater. Top water every few days to flush out any mineral build-up.
Feeding: I do not fertilize Sarracenia. They get nutrients from insects. If they're outside, they'll catch their own. If you're growing them in a screened porch or indoors (which I don't recommend long-term), you can drop a dried cricket into a pitcher occasionally. But I don't actively feed after division until the plant has made at least 3-4 new pitchers.
Dormancy: Remember, these plants need a winter rest. After your divisions are established, don't forget they will need a period of cold (below 50°F/10°C) for about 8-12 weeks in the winter. I keep mine in an unheated garage. Without this, they will eventually decline and stop producing pitchers.
What If Your Division Fails?
Yeah, it happens to everyone. Even now, I'll lose a section occasionally. Here's what I've noticed with the ones that don't make it:
- The rhizome feels too soft: If it's squishy or has a sour smell, it's rotting. Remove it from the pot immediately before the rot spreads to neighboring divisions.
- No growth after 4 weeks: The division might be dormant or just struggling. I've had some sections take a full month before showing signs of live. Give it a little more time unless it's soft or clearly dead.
- Only the top dries out: If the soil is dry but the pot is still in a water tray, this could be a wicking issue. Try top-watering directly instead of just letting the tray do the work.
My Final Thoughts on Propagating Sarracenia
Propagating Sarracenia through rhizome division is the most rewarding thing I've done as a carnivorous plant grower. It took me three dead plants to realize that my real problem wasn't the division technique — it was how I treated the newly cut rhizome in the first 10 days.
Too much water too soon. Too much sun too fast. Not enough protection for the fresh wounds.
Get the balance right, and you'll go from one plant to five in a single season. I now have more Sarracenia than I know what to do with, and I give them away to friends every spring.
Just remember: damp sphagnum for the first week, bright indirect light, clean cuts, fungicide on every wound, and patience. In about two weeks, you'll see new green at the center of your cuts, and you'll know the rhythm of the plant.
Happy growing.
FAQ
Can I divide Sarracenia in summer?
You can, but I don't recommend it. The stress of root loss combined with summer heat is brutal. If you must, keep the divisions indoors in air conditioning with high humidity, and expect them to sulk for a while. Spring is your best bet by far.
Do I need to use rooting hormone for Sarracenia divisions?
No. Sarracenia root readily without it. I use it sometimes, but honestly, it only speeds up root emergence by a few days. The most important factor is a clean cut and stable moisture. If you don't have hormone powder, don't rush out to buy it.
How many divisions can I get from one plant?
That depends on the size of the rhizome. A typical 3-year-old plant can give you 3-5 divisions. A mature, overcrowded clump might give you 10 or more. I've had a particularly vigorous plant give me 12 sections one year. Just make sure every section has a growth point, and you're good.
This content is based on my personal experience with Sarracenia propagation over the past 6 years. For further reading, the RHS (opens in new tab) has excellent resources on carnivorous plant cultivation, and the AHS (opens in new tab) offers general guidance on perennial division best practices.





