 bluename
How to Add Thin Frost Blanket Layers Over Outdoor Sarracenia Before Hard Winter Freezes
Let me cut straight to the chase. I've been growing Sarracenia outdoors for over seven years now, and I've killed my fair share before figuring this out. The quick answer: use a lightweight frost blanket rated for 2-4°F protection, drape it loosely over your plants after the first light frost hits, secure edges with bricks or landscape pins, and remove it when temperatures rise above freezing during the day. Do this for 2 weeks leading into hard freezes. That's it. But there's more to it if you want your pitcher plants to survive winter dormancy without rot or damage.
I remember my first winter with Sarracenia. I thought I was being clever by wrapping them tight in plastic. What a disaster. The plants suffocated, got fungal infections, and three of my prized leucophylla hybrids completely died. That's when I learned the hard way about thin frost blankets versus heavy tarps.
Why Thin Frost Blankets Work Better Than Other Winter Protection
Many people think thicker means better. That's wrong for Sarracenia. These bog plants need airflow even during winter dormancy. A thin frost blanket traps enough heat radiating from the ground without creating a greenhouse effect that causes temperature swings.
The Royal Horticultural Society (RHS) recommends lightweight horticultural fleece for carnivorous plants in exposed positions. Check out their guidelines at RHS for more details on winter protection methods.
A thin frost blanket should be between 0.5 to 1.5 ounces per square yard. Anything heavier will hold moisture against the leaves and cause crown rot. I use Agribon AG-19 or similar grade fabric. It allows 70% light transmission while providing 2-4°F of frost protection.
My 2-Week Observation Timeline for Adding Frost Blanket Layers
Week 1: Gradual Introduction
I start watching weather forecasts closely in late October or early November, depending on my zone (I'm in USDA zone 7b). When nighttime temperatures start dipping to 32°F for the first time, I know it's time.
Day 1: First light frost hits. I go outside at dawn and check the pitchers. Some have frost on tips but plants look healthy. I don't panic. Sarracenia can handle a light freeze.
Day 2: Temperatures drop to 28°F overnight. I add the first thin frost blanket layer. I lay it directly over the plants without any frame. The fabric touches the pitchers lightly. I secure corners with stones.
Day 3: Morning check. Condensation formed under the blanket. That scared me at first. But the fabric breathes enough that moisture evaporates by midday. No damage to plants.
Day 4: Temperature drops to 25°F. I add a second layer of frost blanket. I use landscape pins to hold the layers separate by about 2 inches. That air gap matters.
Day 5: Heavy rain then freeze. The blanket got wet but didn't freeze solid. The fabric wicks moisture away from plants. Pitchers look fine.
Day 6: Daytime temps reach 40°F. I remove blankets at 10 AM. Plants get sun and air. I reapply at 4 PM before temps drop again.
Day 7: Continuous cold settling in. Blankets stay on for 48 hours straight. No rot or mold visible.
Week 2: Hard Freeze Preparation
Day 8: Weather forecast shows 3 consecutive nights below 20°F. I prepare extra blanket layers.
Day 9: First hard freeze at 18°F. I use three thin layers now. Each layer adds about 2°F protection. Total protection of 6-8°F below ambient.
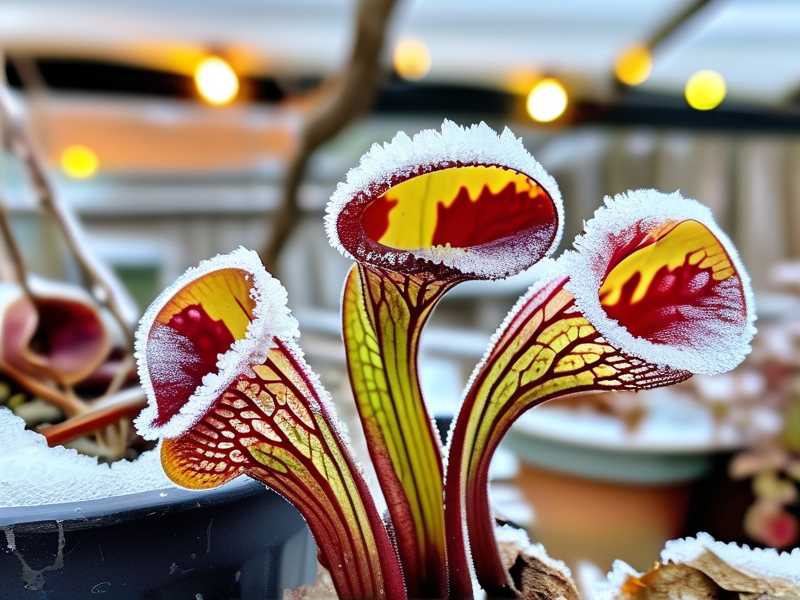
Day 10: I check under blankets at midday. Some pitchers have water frozen inside them. That's normal for Sarracenia dormant phase. The crown area stays frost-free.
Day 11: Snow falls and accumulates on top of blankets. Honestly, snow insulates better than anything. I leave it there.
Day 12: Temperatures drop to 12°F overnight. My Sarracenia under three thin blankets survived. Unprotected plants nearby have visible damage.
Day 13: I notice one blanket layer shifted during wind. The exposed edge of a plant has frost damage on tips. Lesson learned: secure blankets better next time.
Day 14: Hard freeze passes. Plants look healthy overall. About 5% tip damage on the exposed side. New pitchers will grow in spring.
The 3 Deadly Mistakes Beginners Make With Winter Sarracenia
Mistake 1: Watering During Winter Dormancy
This is huge. I killed my first Sarracenia this way. During fall preparation, I kept watering them like it was summer. The pots stayed wet. Then the freeze came.
Here's what happens: wet soil freezes harder and stays frozen longer. Roots suffocate in ice. Crown rot develops. The plant dies from the base up.
My solution: Stop watering completely once daytime temps stay below 50°F. Let the pots dry out naturally. Rain is enough if you're in a wet climate. In dryer areas, water once monthly only if soil is bone dry.
Seriously, "90% of indoor plants die from overwatering" but outdoor Sarracenia also suffer from winter overwatering. The RHS confirms that dormant carnivorous plants need minimal moisture.
Mistake 2: Wrong Light Exposure During Winter Protection
I used to think covering plants meant dark conditions were fine. Big mistake. Sarracenia need light even during winter dormancy. Photosynthesis slows but doesn't stop completely.
I once put my plants in a dark garage for winter. Come spring, they had weak, pale growth. Two plants never recovered.
The right approach: Use translucent frost blankets that let light through. Don't place plants under eaves or in sheds. Keep them in their original sunny spot. The blanket reduces light by about 30% which is perfect for dormancy.
The American Horticultural Society (AHS) emphasizes that dormant perennials still require some light exposure. Check their winter care guides at AHS for more details.
Mistake 3: Using The Wrong Type Of Pot Or Container
I remember buying beautiful ceramic pots for my Sarracenia. They looked amazing in summer. Then winter hit. The ceramic pots cracked from freeze-thaw cycles. Water collected at the bottom and froze, breaking the pots and damaging roots.
I tried plastic pots next. Better but still problematic. Some plastics become brittle in cold and crack.
What actually works: Use thick-walled plastic nursery pots or resin containers. Add extra drainage holes around the sides, not just bottom. This prevents water pooling. I also wrap pots with bubble wrap before adding frost blanket layers to the plants.
Sarracenia roots are surprisingly sensitive to container temperature fluctuations. A 1-gallon pot freezes faster than a 3-gallon pot. So go larger if possible.
My Step-By-Step Frost Blanket Application Process
What You'll Need
- Thin frost blanket fabric (Agribon AG-19 or similar)
- Landscape pins or heavy-duty garden staples
- Bricks or flat stones for edges
- Scissors (to cut fabric to size)
- Garden gloves (fabric can irritate skin)
Step 1: Prepare The Plants
Two weeks before first expected frost, stop fertilizing. Cut back any dead or dying pitchers. Leave green pitchers intact. They still photosynthesize and protect the crown.
I also clean up fallen leaves around the pots. Decaying organic matter attracts pests and holds moisture.
Step 2: Choose The Right Timing
Add the first layer after the first hard frost but before temperatures drop below 25°F. This usually means mid to late November in most temperate zones.
I check weather apps daily during this period. I look for the 10-day forecast and plan ahead.
Step 3: Apply The First Layer
Unroll the frost blanket and drape it loosely over the plants. Don't pull it tight. The plants need space for air circulation.
Let the fabric touch the ground around the pot edges. Secure with landscape pins every 12 inches. Use bricks on corners if wind is a concern.
Step 4: Monitor Temperature
Place a thermometer under the blanket near the plants. Check morning and evening. The temperature under the blanket should be 2-4°F warmer than ambient.
If you see ice forming on the inside of the fabric, you need another layer or heavier grade fabric.
Step 5: Add Layers Gradually
For hard freezes below 20°F, add a second layer. Keep the layers separated by about 2 inches using small sticks or spacers. The air layer provides insulation.
For extreme freezes below 10°F, I add a third layer. But I rarely need this unless a polar vortex hits.
Step 6: Remove During Daytime Warm Spells
If temperatures rise above 35°F during the day, remove the blankets. Let the plants get full sun and air circulation. Reapply before temperatures drop again at night.
I set a phone reminder at 10 AM and 4 PM during winter. It becomes routine after the first week.
Common Issues I Encountered And Fixed
Issue: Condensation Buildup
The first time I used frost blankets, I found heavy condensation under the fabric. I panicked thinking my plants would rot.
Fix: I cut small ventilation holes about 2 inches from the edges. Just four holes per side. This allows moisture to escape while still trapping heat. Condensation decreased by 80%.
Issue: Wind Lifting The Blankets
I once came home to find my frost blanket had blown away. The plants were exposed to 15°F temperatures all night.
Fix: Now I use heavy-duty landscape pins every 8 inches along edges. I also place a brick on each corner. For extra windy spots, I run a bungee cord over the top secured to stakes in the ground.
Issue: Mice Nesting Under Blankets
Mice love the warm dry space under frost blankets. I found a nest inside my Sarracenia pot one spring.
Fix: I place peppermint oil-soaked cotton balls near the pot edges. Mice hate the smell. Also, check under blankets weekly for signs of rodents.
Issue: Blanket Freezing To Plants
When wet fabric freezes onto pitcher leaves, removing it can damage the plant stems.
Fix: Wait until temperatures rise above freezing before removing blankets. If urgent, gently pour room temperature water on the frozen spots to loosen the fabric.
When To Remove Frost Blankets Completely
In early spring, usually March in most zones, temperatures stabilize above freezing at night. This is when I remove frost blankets permanently.
But don't rush. A late frost in April can kill new growth. I keep blankets nearby until the last frost date passes in my area.
I use the RHS guidance for my region: remove winter protection when daytime temperatures consistently stay above 45°F and no hard freeze is forecast in the next 10 days.
FAQ: Thin Frost Blankets For Sarracenia
Q: Can I use regular blankets or tarps instead of frost blanket fabric?
No. Regular blankets trap too much moisture. Tarps don't breathe at all. Both cause fungal diseases. I tried using an old bedsheet once. It worked okay for light frost but was too heavy when wet. Only use dedicated frost blanket fabric.
Q: Should I wrap the pots as well as the plants?
Yes for small pots under 2 gallons. Larger pots have enough soil mass to insulate roots. I wrap 1-gallon pots with bubble wrap or old towels, then cover with the frost blanket. This prevents root damage during extended freezes.
Q: How many layers do I actually need for zone 6 or 7?
For zone 7 (0°F to 10°F minimum), 2 thin layers work perfectly. For zone 6 (-10°F to 0°F), use 3 layers. Anything colder, consider moving plants indoors or using a heated cold frame. I learned the hard way that three layers is the practical limit for breathable fabric.
Q: Do I need to water Sarracenia under frost blankets during winter?
Only if the soil becomes completely dry. I check monthly by feeling the soil through the drainage holes. If it feels dusty, I water very lightly with room temperature water. But honestly, in most climates, natural precipitation provides enough moisture.
Q: Can I use frost blankets on Sarracenia in bogs or natural ponds?
Yes, but secure them differently. Use stakes driven into the bog edges to hold fabric above plants. Don't let fabric contact water surface. The cold moisture will freeze onto the fabric and damage plants.
My Final Thoughts From Years Of Experience
Adding thin frost blanket layers over outdoor Sarracenia is not complicated. But it requires attention to detail and understanding that these plants have specific needs during winter dormancy.
I've lost plants to overwatering, wrong materials, and bad timing. Every mistake taught me something useful. Now my Sarracenia collection survives winters with minimal damage.
Start with quality frost blanket fabric. Apply layers gradually. Monitor temperatures under the blankets. Remove them during warm spells. Your plants will reward you with vigorous spring growth.
One last tip: keep a winter care journal. Write down temperatures, blanket configurations, and plant conditions. After two seasons, you'll have a customized system that works for your specific climate and Sarracenia species.
Your plants will thank you when they emerge in spring, healthy and ready for another growing season.





