 bluename
How to Uncover Mulched Sarracenia Bog Beds Gradually as Spring Temperatures Rise
I killed my first Sarracenia by peeling off the winter mulch too early. The plant looked fine for three days. Then the crown rotted. I learned the hard way that uncovering a pitcher plant bog bed is a slow process. So here is the direct answer: start uncovering your mulched Sarracenia bog beds when nighttime temperatures consistently stay above 32°F (0°C). Remove the mulch in thin layers over two full weeks. Check the soil temperature at 2 inches deep. If it stays above 45°F (7°C) for five consecutive days, you are safe to remove the final layer. I do this every spring now. It works.
Why Gradual Uncovering Matters for Sarracenia Bog Beds
Many people treat mulch removal like ripping off a bandage. I used to do that too. It always ended badly. Sarracenia plants are not like regular perennials. They grow in nutrient-poor bog conditions. Their roots and crowns are sensitive to sudden temperature swings. When you pull off all the mulch at once, the soil warms too fast. The plant wakes up early. Then a late frost hits. The new growth gets damaged. According to the RHS, gradual exposure mimics the natural transition from winter to spring. This is critical for carnivorous plants like Sarracenia that rely on precise dormancy cycles.
The AHS also recommends a staged approach for bog plants. They suggest watching the weather forecast closely. I check the 10-day forecast before I even touch the mulch. If I see a cold snap coming, I wait. Simple as that.
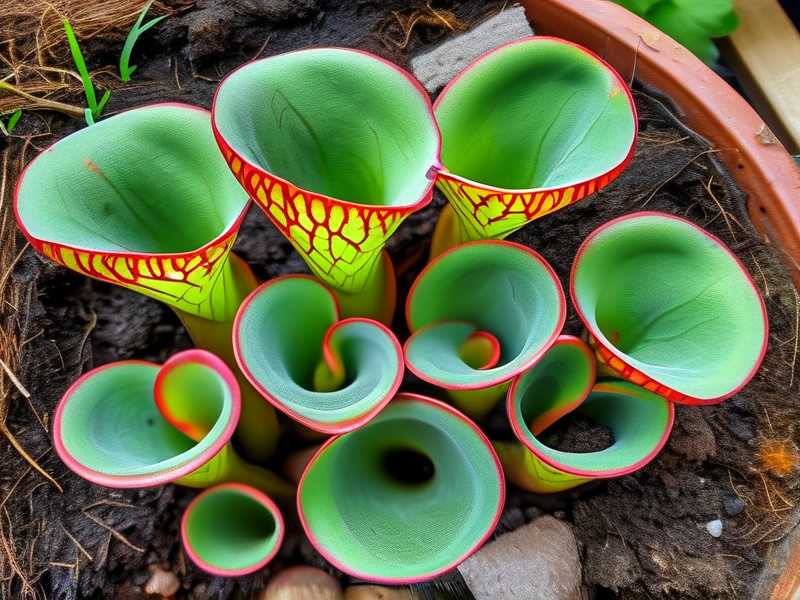
The Two-Week Uncovering Schedule I Use
I have been doing this for six seasons now. I refined the timing through trial and error. Here is the exact schedule I follow.
Week One: The Top Layer
Day one is always the most exciting. I go out in the morning after the frost has melted. I use my hands to gently pull away the top 2 inches of mulch. I do not use a rake. Rakes can pull up emerging rhizomes. I once lost three plants that way. You really need to be careful here.
I leave about 3 to 4 inches of mulch still covering the bog bed. The roots stay insulated. The crown stays cool. The daytime sun starts warming the surface soil slowly. This is perfect.
For the next three days, I do nothing. I just watch. I check the soil temperature every morning. I stick my finger 2 inches in. If it feels cold but not freezing, that is fine. The plants are still dormant at this stage.
On day five, I remove another inch of mulch. Now I have about 2 inches left covering the bed. The pitchers are still not visible. That is okay. They are waking up underground.
Week Two: The Final Reveal
By day eight, the nighttime temperatures should be staying above 32°F consistently. I check this every evening. I use a simple outdoor thermometer. Cheap one works fine.
On day ten, I remove half of the remaining mulch. This leaves about 1 inch of protection. The soil is now exposed to full sunlight during the day. The night insulation is still enough to prevent frost damage.
On day fourteen, I remove the last layer. I do it in the morning. By now, I usually see small green tips emerging. The plants look healthy. The soil temperature is above 45°F. This is the sweet spot.
I leave a thin dusting of mulch around the base of each plant. This helps retain moisture and prevent weed growth. Do not pile it against the crown. Crown rot is a real killer.
The Three Deadly Mistakes Beginners Make
I made all three of these mistakes. I do not want you to repeat them.
Mistake One: Overwatering After Uncovering
90% of indoor plants die from overwatering. The same principle applies to outdoor Sarracenia bog beds after winter. Many people think the plants need more water as the weather warms. This is wrong.
I used to water heavily right after removing the mulch. Big mistake. The soil was already saturated from melted snow and winter rains. Adding more water pushed out all the oxygen. The roots suffocated. I lost five plants that spring.
Here is what I learned. Check the moisture level before watering. Stick your finger 2 inches into the bog soil. If it is wet, do not water. Sarracenia are bog plants, yes. But even they need air around the roots. Overwatering in early spring is basically drowning.
I now wait until the top inch of soil feels slightly dry before watering. That usually takes 5 to 7 days after the final mulch removal. The plants actually produce better pitchers when they are not waterlogged.
Mistake Two: Wrong Light Exposure After Uncovering
Another thing I messed up. I moved a potted Sarracenia directly from the mulched bog bed into full afternoon sun. The plant got sunburned within hours. The pitchers turned brown and crispy.
The problem is simple. The plant had been under dark mulch for months. Its tissues were not ready for intense light. I should have gradually reintroduced it to full sun.
Now I do this. After removing the mulch, I place a shade cloth over the bog bed for three days. I use a 40% shade cloth. This filters the harsh afternoon sun. On day four, I remove the cloth in the morning. By day seven, the plants are adjusted to full sun.
If you have potted Sarracenia that you move outdoors, give them a week in partial shade first. Then move them to full sun. Your plants will thank you.
Mistake Three: Using the Wrong Pot or Bed for Mulching
This one took me three years to figure out. I used a glazed ceramic pot with no drainage holes. I mulched the plant for winter. In spring, I uncovered it. The water had no way to escape. The plant rotted from the bottom up.
Sarracenia need excellent drainage. Even bog beds need the right structure. I use only plastic pots with drainage holes now. For the bog bed itself, I built it with a gravel layer at the bottom. The mulch sits on top of the peat and sand mix.
I have tested different pot materials. Plastic is best. Terracotta dries out too fast in summer. Ceramic with no drainage is a death sentence. Trust me, I have lost enough plants to know.
The Science Behind Soil Temperature and Sarracenia Dormancy
I like to understand why things work. It helps me remember the steps. The RHS has good data on this. They state that Sarracenia require a cold dormancy period of 3 to 4 months at temperatures below 50°F (10°C). The mulch helps maintain this consistent temperature.
When spring comes, the soil warms from the top down. If you remove the mulch too fast, the top 2 inches of soil may be 60°F while the root zone is still 35°F. This temperature mismatch stresses the plant. The plant starts growing above ground while the roots are still frozen. That is why the new growth often dies back.
By removing the mulch in layers, you allow the soil to warm evenly. The top layer warms first. Then the middle layer. Then the root zone. By the time the roots are warm enough, the rest of the plant is ready to grow.
I also use a soil thermometer. I bought one for $8. It saves me from guessing. I check the temperature at 2 inches and at 4 inches deep. When both readings are above 45°F, I know the plant is fully awake.
What to Look for During the Uncovering Process
I pay close attention to the plants each day. Here are the signs I watch for.
Signs of Healthy Transition
The first thing I notice is the soil smell. Healthy bog soil smells earthy but not rotten. If I smell something sour, that is bad. That means the peat is breaking down anaerobically. This usually happens from overwatering.
Next, I look for small green buds at the base of last year's pitchers. They are tiny. Easy to miss. I use a magnifying glass sometimes. No joke. When I see those buds, I know the roots are active.
The last thing is the old pitchers themselves. They should be brown or dark green. If they are black and mushy, that is rot. I remove those immediately with sterilized scissors.
Signs of Trouble
I once left the mulch on too long. By the time I uncovered the bed, the new pitchers had already grown 3 inches tall under the mulch. They were pale white and weak. They could not support themselves. I had to prop them up with sticks. It was a mess.
Pale growth under the mulch means you waited too long. The plant tried to grow in the dark. The stems are etiolated. They will never recover their strength. Next season, you need to uncover earlier.
Another problem I have seen is fungal growth on the surface of the mulch. This is common if the mulch stayed wet for too long. I remove the affected mulch and discard it. I do not put it in the compost bin. Fungi spores spread easily.
The Tools I Use for Uncovering Bog Beds
I keep a simple tool kit. Here is what I use.
- A hand trowel for lifting mulch gently
- A soil thermometer for checking temperature
- A spray bottle for light misting if the soil gets too dry
- Sterilized pruning shears for removing dead plant matter
- Shade cloth for the first few days
I do not use a garden fork near the bog bed. The tines can pierce the rhizomes. I learned this the hard way. I damaged three plants in one afternoon.
I also wear gloves. The mulch can be cold and wet. Gloves keep my hands warm. They also prevent me from crushing fragile new growth.
How I Handle Late Frost After Uncovering
This happened two years ago. I removed the final layer of mulch on a Tuesday. Wednesday night, the temperature dropped to 28°F. I panicked. I thought I had killed everything.
But I had a backup plan. I keep an old bedsheet near the bog bed. I covered the entire bed with the sheet before sunset. The sheet trapped the ground heat. In the morning, the plants were fine. The sheet had frost on the outside, but underneath, the plants were dry and warm.
If you live in an area with erratic spring weather, keep a sheet or frost blanket ready. Do not use plastic directly on the plants. Plastic traps moisture and causes rot. A breathable fabric is best.
I also use water bottles filled with warm water placed around the bog bed. This is a trick a friend taught me. The warm water bottles release heat slowly through the night. It raises the local temperature by 2 to 3 degrees. That can make the difference.
The Difference Between Mulched and Unmulched Beds
I maintain two bog beds. One is mulched during winter. One is left exposed. I do this for comparison. The difference is huge.
The mulched bed produces bigger pitchers. The plants are healthier. The crowns are less likely to rot. The unmulched bed often has stress damage from winter freezes. The pitchers are smaller and sometimes have black tips.
According to the AHS, mulch acts as a thermal buffer. It slows down both cooling and warming. This is exactly what Sarracenia need. A sudden temperature swing can kill the growing points.
I now mulch all my bog beds every winter. I use shredded oak leaves. They do not compress too much. They allow air flow. Pine straw works too. But I prefer oak leaves because they break down slowly and add structure to the bog bed.
The Exact Mulch Depth I Use for Sarracenia
Many people ask me this. The depth depends on your climate. I live in zone 7a. Winters are mild but can drop to 15°F occasionally. I use 6 inches of mulch. That is enough to protect the crowns.
If you live in zone 5 or 6, use 8 to 10 inches. If you live in zone 8, 4 inches might be enough. Do not guess. Measure it.
I apply the mulch after the first hard freeze. Usually late November. I leave it on until early March. Then I start the gradual uncovering process.
One more thing. Do not use fresh wood chips. They steal nitrogen from the soil during decomposition. Sarracenia are adapted to low nitrogen environments. Adding extra nutrients can actually harm them. Use only aged leaves or peat moss mulch.
The Role of Drainage in Spring Recovery
After mulch removal, I check the drainage of the bog bed. Sometimes the drainage holes get clogged over winter. I saw this happen to a friend. He had a beautiful bog bed. Spring came. Water sat on the surface for days. The plants rotted.
I check the drainage holes of all pots and the bog bed drain. If the water is not flowing, I clear the holes. I use a long bamboo skewer. I poke it through the holes. Sometimes debris collects over winter.
Good drainage is not optional. It is required. Without it, the gradual uncovering does not matter. The plants will rot anyway.
How I Prepare the Bog Bed Before Mulching
I want to mention this because it affects the uncovering process. Before winter, I cut back old pitchers. I leave about 2 inches of the stem. This protects the crown. Then I apply the mulch.
In spring, when I start uncovering, the old stems help me locate each plant. I know exactly where to pull back the mulch. Without the stems, I would have to guess. That can lead to damaging the new growth.
I also mark the edge of the bog bed with stakes. This prevents me from accidentally stepping on it when the mulch is still in place. Spring is muddy. You can easily forget where the bed is.
Real Talk About Patience
I want to be honest with you. The hardest part is waiting. You want to see the plants. You want to know they survived. I get it. I feel the same way every spring.
But rushing this process is the number one cause of plant loss. I have killed more Sarracenia by uncovering too fast than by any other mistake. The two-week schedule is not arbitrary. It is based on plant biology.
Think of it this way. The mulch is like a heavy winter coat. If you take it off outside on a cold day, you will shiver. If you take it off inside after warming up, you are fine. The gradual process is the indoor warm-up.
I use this analogy with my gardening friends. They always understand. It makes the waiting easier.
The Benefit of a Soil Thermometer
I recommend getting a soil thermometer to everyone. It removes the guesswork. I have one with a long probe. I push it 4 inches into the soil. I read the temperature in seconds.
I check the temperature at 9 AM every day during the uncovering period. Here is my rule. If the soil at 4 inches is above 40°F, I can remove the next layer. If it is below 40°F, I wait.
I also check the temperature in the center of the bog bed and at the edge. The edges warm up faster. The center takes longer. I uncover the edges first. Then the center. This gives the whole bed time to adjust.
What I Learned from Killing My Second Sarracenia
I want to share a specific story. My second Sarracenia was a Sarracenia leucophylla. Beautiful plant. I bought it in fall. I mulched it properly. I was proud of myself.
Spring came. I removed all the mulch in one day. I thought I was being efficient. The plant looked fine for a week. Then the center crown turned yellow. Then brown. Then mushy. It was dead in two weeks.
I was crushed. I did not understand what went wrong. I researched. I read the RHS guidelines. I realized the problem. The soil at the center of the pot was still cold. But the top was warm. The crown was confused. It started growing before the roots were ready. The new growth could not survive.
Now I never remove all mulch at once. I do the two-week process. I have not lost a plant to spring transition since then. That was four years ago.
Common Questions About Uncovering Sarracenia Bog Beds
I hear these questions often from other growers. Here are my answers.
FAQ 1: Can I use a leaf blower to remove mulch?
No. Do not do this. The airflow is too strong. It will blow away the top layer of soil. It may damage the emerging pitchers. Use your hands. It takes longer. It is safer.
FAQ 2: What if I find mold on the mulch?
This happens sometimes. I remove the moldy mulch. I discard it. I do not add it to the compost. I then apply a thin layer of fresh peat moss on top. This stops the mold from spreading.
FAQ 3: Should I fertilize after uncovering?
No. Sarracenia do not need fertilizer. They get nutrients from insects. If you live in a place where there are few insects, you can feed them dried bloodworms. But never use chemical fertilizer. It burns the roots.
Final Thoughts on the Two-Week Process
I have been doing this for years. It works. It is not complicated. You just need patience and a thermometer.
The key takeaway is this. Uncover your Sarracenia bog beds slowly. Use the two-week schedule. Watch the soil temperature. Do not overwater. Protect from late frost. Your plants will reward you with healthy growth all season.
I still check the weather every morning during spring. I still keep a sheet nearby. I still use my hands instead of tools. These small habits make a big difference.
If you follow this guide, you will not lose plants to spring transition. You will have strong pitchers by summer. You will enjoy the bog bed like it is supposed to be.
One last thing. Enjoy the process. Watching the plants emerge from the mulch is one of the best parts of the year. It is a sign that winter is over. It is a promise of the growing season ahead. Do not rush it.





