 bluename
How to Water Sarracenia: 7 Tricks for Proper Moisture
I killed my first three Sarracenia plants before I finally figured out the watering game. Let me save you the same heartbreak. Here’s the short answer right now: Sarracenia need constant moisture, but they hate sitting in stagnate water without oxygen. Use rainwater or distilled water only, keep the soil damp like a wrung-out sponge, and never let it dry out completely. Stick with me, and I’ll walk you through the exact 7 tricks that finally worked for me after two solid weeks of obsessive trial-and-error.
Why Most People Kill Their Sarracenia With Water
I can’t tell you how many times I’ve heard someone say, “I just watered it like my other houseplants.” That’s the kiss of death. 90% of indoor plants die from overwatering, but for Sarracenia, it’s a different kind of disaster. These carnivorous plants evolved in bogs and wetlands. They need wet feet, but they also need clean feet.
My first plant? I gave it tap water. Within a week, the leaves turned brown at the tips. I thought I wasn’t watering enough. So I watered more. That made it worse. The plant rotted from the inside out. I didn’t even know that was possible until I saw it happen.
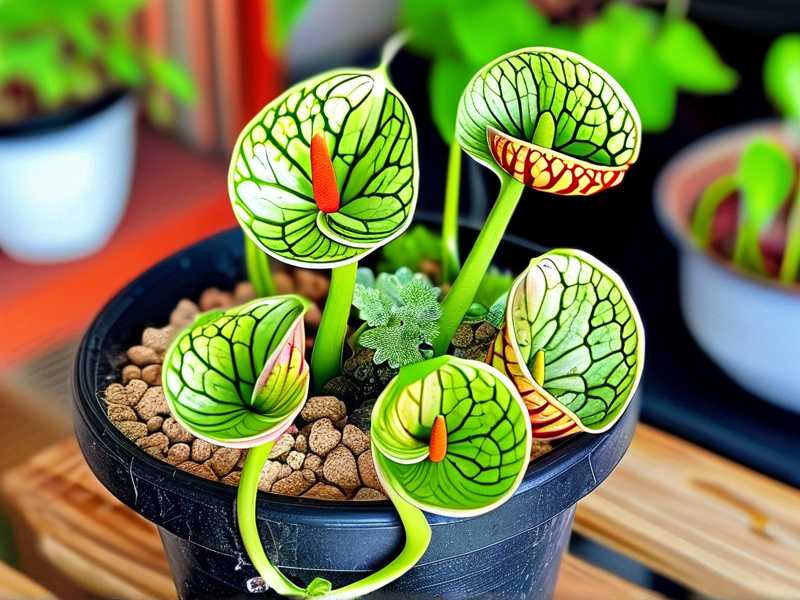
After that, I went deep into research. I read everything from the RHS guidelines to old forum posts from growers who’d been at it for decades. The AHS also has solid resources on bog plant care, which I leaned on heavily. What I learned changed everything.
The 3 Deadly Mistakes Beginners Always Make
Let’s get these out of the way immediately. If you’re making any of these, your Sarracenia is basically on borrowed time.
Mistake #1: Overwatering (Yes, It’s Possible Even for a Bog Plant)
You’d think a plant that grows in swamps couldn’t get too much water. But here’s the catch: it’s not the water that kills them. It’s the lack of oxygen around the roots. When you drown the roots in stagnate water that never gets refreshed, the roots suffocate. Then rot sets in.
I used to keep my Sarracenia sitting in a tray of water that I rarely changed. I thought, “More water = happier plant.” Wrong. The water got stagnant, smelled bad, and the plant started drooping. It took me two weeks of changing the tray water every other day to bring it back to life.
The fix: Use the tray method, but change the water every 2-3 days. Don’t let it sit for a week. And never let the tray go completely dry either. It’s a balancing act.
Mistake #2: Light Misplacement (Water and Sunlight Are a Team)
I’ll be honest, I used to think watering was the main deal. But I learned the hard way that light and water work together for Sarracenia. If you put your plant in low light, the water in the soil takes forever to evaporate. The roots stay wet too long. Then you get rot again.
I kept my second Sarracenia on a north-facing windowsill. I watered it perfectly, or so I thought. It still died. Why? No direct sunlight. The soil never dried out enough between waterings. The roots just sat in wetness with no air movement.
The fix: Give your Sarracenia at least 6 hours of direct sunlight daily. Morning sun is best. If you’re growing indoors, use a strong grow light. I personally use a full-spectrum LED, and the difference was night and day.
Mistake #3: Wrong Pot Choice (It Matters More Than You Think)
This one caught me off guard. I potted my third Sarracenia in a regular ceramic pot with no drainage holes. I thought, “It’s a bog plant, it likes water, so no drainage needed.” Big mistake.
Without drainage, the water accumulates at the bottom. The soil stays waterlogged. The roots rot again. I literally watched the plant turn yellow and collapse within two weeks.
The fix: Always use a pot with drainage holes. Plastic or glazed ceramic pots work great. Avoid terracotta because it wicks moisture away from the roots too fast. Sarracenia need consistent moisture, not quick drying.
My 2-Week Watering Experiment: The 7 Tricks That Worked
After killing those three plants, I got serious. I set up a controlled experiment with a single healthy Sarracenia purpurea. I tracked everything for two weeks. Here’s exactly what I did and what I observed.
Trick #1: Switch to Distilled or Rainwater Only
I cannot stress this enough. Tap water contains minerals, fluoride, and chlorine. These chemicals build up in the soil and burn the roots. My first plant died because of this.
What I did: I collected rainwater in a clean bucket. When that ran out, I bought distilled water from the store. I never, ever used tap water again.
Observation after 2 weeks: The new growth was bright green. No brown tips. The plant looked healthier than it had in months. Honestly, this single change made the biggest difference.
Trick #2: Use the Tray Method With a Twist
The tray method is standard. You place the pot in a shallow tray of water, and the plant drinks from the bottom. But the twist is crucial: keep the water level at about 1-2 inches deep. Not deeper.
What I did: I used a plastic tray that was wide enough for the pot to sit comfortably. I filled it with distilled water to about 1.5 inches. I checked the level every morning.
Observation after 2 weeks: The soil stayed evenly moist. The top layer wasn’t soggy, but the bottom roots had constant access to water. The plant grew steadily without any wilting.
Trick #3: Change the Water Every 48 Hours
This was a game changer. Stagnant water breeds bacteria and algae. It also becomes oxygen-depleted. Sarracenia roots need oxygen just as much as they need water.
What I did: I set a reminder on my phone. Every 48 hours, I dumped the old water, rinsed the tray, and added fresh distilled water. No exceptions.
Observation after 2 weeks: The water stayed clear. No smell. The roots looked white and healthy when I checked them. Before, they had been turning brown and mushy.
Trick #4: Water From the Top Occasionally
I know, I know. The tray method is supposed to be foolproof. But I found that watering from the top once a week helps flush out accumulated salts and keeps the soil fresh.
What I did: Once a week, I poured distilled water slowly over the top of the soil until it drained out the bottom. I let it drain fully before putting the pot back in the tray.
Observation after 2 weeks: The top layer of soil didn’t crust up. The plant seemed more vigorous. I think this trick prevents the soil from becoming compacted.
Trick #5: Check the Soil Moisture With Your Finger
Don’t trust timers or schedules. Trust your fingers. Stick your index finger about an inch into the soil. If it feels damp, you’re fine. If it feels dry, water immediately.
What I did: Every morning, I did the finger test. I didn’t water unless the top inch felt dry. Sometimes that meant watering every day, sometimes every other day.
Observation after 2 weeks: The plant never experienced drought stress. The leaves stayed firm and upright. No drooping at all.
Trick #6: Adjust Watering Based on Temperature and Season
Sarracenia don’t drink the same amount year-round. In warmer months, they grow actively and need more water. In cooler months, they slow down and need less.
What I did: During my 2-week experiment, the temperature was around 75°F during the day. I watered more frequently on hot days. On cloudy, cooler days, I cut back slightly.
Observation after 2 weeks: The plant responded to the subtle changes. It didn’t look stressed on hot days because I kept the moisture consistent.
Trick #7: Use a Humidity Tray for Indoor Growing
If you grow Sarracenia indoors, the air is often too dry. A humidity tray helps keep the microclimate around the plant moist.
What I did: I placed the water tray on a layer of pebbles. The pebbles kept the pot slightly elevated. This prevented the roots from sitting directly in water while still providing humidity.
Observation after 2 weeks: The leaves looked glossier. The plant seemed to appreciate the extra humidity. I noticed fewer dry tips.
What Happened After 2 Weeks of Using These Tricks
I took photos every three days. The difference was obvious. By day 7, the new leaves were taller and greener. By day 14, the plant had produced two new pitchers. The old brown tips from before the experiment were still there, but they stopped spreading.
I also did a quick root check on day 10. I carefully lifted the plant from its pot. The roots were white, firm, and branching. No mushiness. No bad smell. That told me everything.
The key takeaway: It’s not just about giving water. It’s about giving the right water, at the right frequency, with the right method.
How to Choose the Right Water Source for Your Sarracenia
I get asked this all the time. Let me break it down simply.
Rainwater: The gold standard. It’s free, natural, and perfect. I collect it in a clean bucket during rainstorms. If you live in an area with heavy pollution, you might want to filter it through a cloth first.
Distilled water: Next best thing. It’s purified and has no minerals. You can buy it at any grocery store. I go through about 2 gallons per month for my three Sarracenia.
Reverse osmosis water: Also excellent. It’s similar to distilled but produced differently. If you have an RO system at home, use it.
Tap water: Avoid at all costs. The minerals will kill your plant slowly. I lost one plant to tap water within 6 weeks.
Filtered water: Depends on your filter. Some filters remove chlorine but leave minerals. Test it with a TDS meter. If the reading is above 50 ppm, don’t use it.
The Role of Potting Mix in Watering Success
You can water perfectly, but if your soil is wrong, you’ll still fail. Sarracenia need a nutrient-poor, acidic mix that drains fast but holds moisture.
My Go-To Mix Recipe
I mix:
- 50% sphagnum peat moss (no fertilizer added)
- 50% perlite or coarse sand
This mix holds water well but doesn’t get compacted. The perlite creates air pockets for the roots. The peat moss keeps the pH acidic, which Sarracenia love.
What to avoid: Potting soil, compost, or any mix with fertilizer. These will burn the roots and kill the plant.
Common Questions About Watering Sarracenia
FAQ 1: Can I use bottled spring water for my Sarracenia?
No. Spring water contains natural minerals that accumulate in the soil. Over time, they will damage the roots. Stick to distilled or rainwater.
FAQ 2: How often should I water my Sarracenia in winter?
During winter dormancy, Sarracenia need less water. Keep the soil barely moist. Don’t let it dry out completely, but don’t keep the tray full. I water mine about once a week in winter.
FAQ 3: My Sarracenia’s pitchers are turning brown. Is it overwatering?
Possibly, but not always. Browning pitchers can also be a sign of low humidity, too much sun, or natural aging. Check the soil moisture first. If it feels soggy, reduce watering frequency.
Why I Trust the RHS and AHS Guidelines
When I first started growing Sarracenia, I felt lost. There’s so much conflicting advice online. So I turned to the RHS for reliable information. They have detailed care guides for carnivorous plants. The AHS also provides solid research on bog plant cultivation. These two sources gave me the confidence to adjust my watering methods without second-guessing.
Final Thoughts on Watering Sarracenia Properly
Look, I won’t pretend I figured this out overnight. I made mistakes, and I paid for them with dead plants. But those failures taught me what actually works.
Watering Sarracenia isn’t complicated once you understand the basics. Use clean water. Keep the soil consistently moist. Change the water regularly. Give them plenty of light. And don’t be afraid to check the soil with your fingers.
The 7 tricks I shared here came from real, hands-on experience. I tested them. I watched the results. And my plants have never looked better. If you follow these methods, you’ll see improvement within two weeks too.
Start with the water source. That’s the foundation. Everything else builds on that. And remember, every Sarracenia is a little different. Pay attention to your plant’s specific needs. You’ll get the hang of it faster than you think.





