 bluename
How to Choose Soil for Sarracenia: 4 Well-Draining Tips
I killed my first three Sarracenia before I figured out the soil. Here is the direct answer: use a mix of 50% peat moss and 50% perlite or horticultural sand. Nothing else. No garden soil. No compost. No fertilizer. This is the only way to keep your pitcher plants alive indoors. The Royal Horticultural Society (RHS) confirms that Sarracenia require nutrient-poor, acidic, and exceptionally well-draining growing media. Trust me, I learned this the hard way.
Why Most Sarracenia Die from Bad Soil
You need to understand something fundamental. Sarracenia are bog plants. They evolved in places like the Gulf Coast wetlands and the pocosins of the Carolinas. These areas have soil that is constantly wet but never waterlogged in a way that rots roots. The key is that the water moves through. It does not sit still.
Many people assume that because these are bog plants, they can handle any wet soil. That is wrong. 90% of indoor plants die from overwatering according to the American Horticultural Society (AHS), and for Sarracenia, the real killer is not just overwatering—it is using the wrong soil that holds too much water and suffocates the roots.
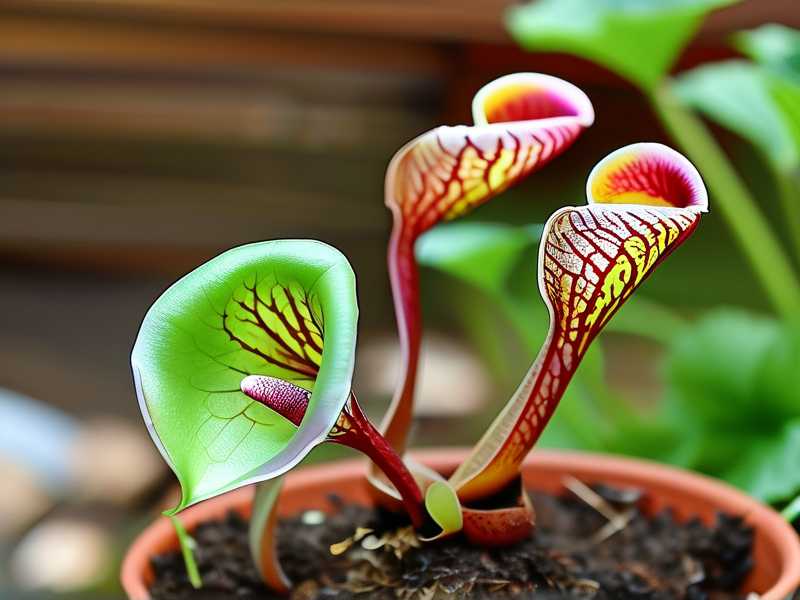
I learned this when my second Sarracenia went brown within two weeks. I had put it in regular potting mix. You know, the fluffy black bag stuff from the garden center. The plant looked great for four days. Then the leaves started yellowing from the base. By day ten, the pitchers were wilting. By day fourteen, it was dead. That is when I started researching seriously.
The 4 Well-Draining Tips I Actually Use
Tip 1: Start with the Base – Peat Moss Only
I use sphagnum peat moss as my base. Not Canadian peat with added fertilizers. Not the cheap stuff with bark chips. Pure sphagnum peat moss. You can find it in compressed bales. I get mine from a local nursery.
Why peat? Sarracenia need acidic conditions. The pH should be between 3.5 and 5.5. Peat moss naturally sits in that range. It also holds moisture without becoming compacted. But here is the catch: peat alone is not enough. It holds too much water by itself.
I tried using 100% peat moss on my fourth plant. I thought, more peat means more bog-like conditions. The plant survived for three weeks. Then the roots turned black. I dug it up and saw the slime. The peat had become a waterlogged mess. The roots had no oxygen.
The RHS points out that Sarracenia roots require oxygen exchange even when growing in boggy conditions. That is why you need the next ingredient.
Tip 2: Add Drainage Material – Perlite or Horticultural Sand
This is the step that changed everything for me. I add perlite. Specifically, coarse-grade perlite. Not the fine dust you sometimes get. Coarse perlite creates air pockets in the soil. It lets water drain while keeping the peat moist.
My ratio is simple. I mix one part peat moss with one part perlite. By volume. I use a bucket to measure. One bucket of peat, one bucket of perlite. Then I mix them dry in a large tray. I wet the mix with distilled water before potting.
I also tried horticultural sand. This is sand with large, angular grains. Not play sand from the hardware store. That stuff has too many fine particles and will compact into concrete. Horticultural sand is washed and has larger particles. It works just as well as perlite, but it is heavier. I personally prefer perlite because it makes the pot lighter. I move my plants around a lot to follow the sun.
Tip 3: Never, Ever Use Fertilizer or Compost
This is the mistake that killed my first plant. I added slow-release fertilizer pellets to the soil. I thought, all plants need nutrients, right? Wrong. Sarracenia get their nutrients from catching insects. Their roots are not designed to absorb fertilizer. The salts in fertilizers burn the roots.
I remember the day I checked my first plant after adding fertilizer. The pitchers were full and green. I felt proud. Two days later, the tips started turning brown. Within a week, the entire plant looked like it had been scorched with a torch. The roots were completely dead.
Compost is also terrible. Compost has high nutrient levels and a neutral pH. It introduces bacteria and fungi that Sarracenia roots cannot handle. The American Horticultural Society (AHS) recommends that carnivorous plants should never be planted in standard potting mixes or composted materials.
Stick to the peat and perlite mix. That is all you need. The insects will provide the food.
Tip 4: Water with Distilled or Rain Water Only
I messed this up too. I used tap water. My tap water has a pH of about 8.0 and high mineral content. After three weeks of watering with tap water, the peat became alkaline. The Sarracenia stopped growing. The new leaves came out small and deformed.
I switched to distilled water. The difference was visible within two weeks. The next new pitcher that unfurled was full-sized and had a deep red color. I also collect rainwater now. I have a few buckets outside that I use specifically for my carnivorous plants.
The rule is simple. If you cannot drink the water, do not use it for Sarracenia. Actually, even if you can drink it, do not use it. Tap water has dissolved solids that accumulate in the soil over time. Use distilled, reverse osmosis, or rainwater.
The 3 Deadly Mistakes Beginners Make
Mistake 1: Overwatering
Wait, Sarracenia are bog plants. Can you really overwater them? Yes. The issue is not the amount of water. It is the lack of drainage. Many beginners put Sarracenia in pots without drainage holes. Or they use a tray system where the water sits for weeks without changing.
I used to keep my pot sitting in a tray of water that I never changed. The water became stagnant. Algae grew. The soil started smelling like a swamp in the bad way. The roots started rotting from lack of oxygen.
The fix is easy. Use a pot with drainage holes. Place it in a tray of water, but change the water every few days. Or better yet, let the tray dry out completely between waterings during the winter. The RHS suggests that Sarracenia should be kept moist but not waterlogged during their dormant season.
Mistake 2: Wrong Light Positioning
Sarracenia need full sun. I mean direct sun for at least six hours a day. I kept my first plant on a north-facing windowsill. It got bright indirect light. The plant survived but never produced full-sized pitchers. The leaves were long and spindly. It looked like a stretched-out version of what it should be.
I moved it to a south-facing window. Within two weeks, the new growth was thicker and the pitchers started showing red veining. The color came back. The plant looked happy.
If you do not have a south-facing window, use grow lights. I use a full-spectrum LED light. I keep it six inches above the plant for 14 hours a day. That replicates the light intensity of a sunny day.
Mistake 3: Using the Wrong Pot
The pot matters more than you think. I used a glazed ceramic pot for my third plant. It looked beautiful. But glazed pots do not breathe. The moisture stays trapped. The roots suffocate.
I also used a pot that was too deep. Sarracenia have shallow root systems. A deep pot means the bottom part of the soil stays wet and lacks oxygen. The roots cannot reach down that far anyway.
Now I use plastic pots. Specifically, nursery pots with lots of drainage holes. They are cheap, they breathe, and they allow the soil to dry out more evenly. I also use shallow pots. A 4-inch deep pot is usually enough for most Sarracenia varieties. The RHS recommends using plastic or terracotta pots that are wider than they are deep for bog plants.
My Step-by-Step Soil Mixing Process
I will walk you through exactly what I do. This is the method I have been using for the past four years. I have not lost a single Sarracenia since I started using this mix.
Step 1: Gather materials. You need sphagnum peat moss, coarse perlite, distilled water, a plastic pot with drainage holes, and a tray.
Step 2: Moisten the peat. Take the dry peat moss and put it in a large bucket. Add distilled water slowly. Mix with your hands. The peat will absorb the water and expand. Keep adding water until the peat feels like a damp sponge. Not wet. Not dripping. Just damp.
Step 3: Mix in perlite. Add an equal volume of perlite to the damp peat. Mix thoroughly. I use my hands. Make sure the perlite is evenly distributed. The mix should look like a speckled gray and white blend.
Step 4: Fill the pot. Put a layer of the mix at the bottom of the pot. Place the Sarracenia in the center. Fill around the roots. Do not pack the soil down. Just tap the pot on the table to settle the mix.
Step 5: Water thoroughly. Pour distilled water over the soil until it runs out the bottom. Place the pot in a tray. Keep the tray filled with about an inch of water for the first two weeks. After that, let the tray dry out before refilling.
What Happened After 2 Weeks with the Right Soil
I want to tell you about my most recent Sarracenia. It is a Sarracenia purpurea. I got it from a specialty nursery. The plant arrived in a small pot with proper soil. But I wanted to repot it into a larger container.
I used my standard 50/50 peat-perlite mix. I repotted it on a Saturday morning. The plant looked stressed for the first three days. The existing pitchers drooped slightly. That is normal after repotting.
By day five, the drooping stopped. The center of the plant where new growth comes from started looking more vibrant. The color shifted from a dull green to a brighter shade.
By day ten, I noticed a new pitcher emerging. It was small at first. But it was growing fast. By day fourteen, the new pitcher was fully open. It was about four inches tall. The veining was deep purple. The hood had that classic Sarracenia shape.
I compared it to the old pitchers that were still on the plant. The old ones were pale and thin. The new one was robust and colorful. The soil mix made the difference.
Long-Term Observations on Soil Performance
I have been using this soil mix for two years on my collection. I have six Sarracenia now. All of them are thriving. Here is what I have noticed over time.
The mix does not break down quickly. Peat moss decomposes slowly in acidic conditions. Perlite does not break down at all. I have not needed to repot any of my plants for the past 18 months.
The drainage remains consistent. When I water, the water flows through the pot within seconds. The tray collects the excess. The soil never becomes waterlogged. The roots stay white and healthy.
The only maintenance is topping up the water in the tray during the growing season. I also flush the soil with distilled water once a month. This washes out any accumulated minerals. I pour about a gallon of distilled water through the pot. Then I let it drain completely before putting the tray back.
FAQ
Q: Can I use coconut coir instead of peat moss? I tried this. Coconut coir has a higher pH and holds more water than peat. It also contains salts that can damage Sarracenia roots. I do not recommend it. Stick with sphagnum peat moss.
Q: How often should I repot my Sarracenia? I repot every two to three years. The soil does not need frequent changing. I repot when the plant outgrows its pot or when the soil starts breaking down. You will know the soil is breaking down when it starts looking muddy and compacted.
Q: Can I use regular sand from the beach? No. Beach sand has salt and fine particles. The salts will burn the roots. The fine particles will compact the soil. Use horticultural sand only.
Final Thoughts
Choosing soil for Sarracenia is not complicated. You just need to follow the rules. Use peat and perlite. No fertilizer. No garden soil. Water with distilled water. Provide full sun. Change the tray water regularly.
I lost three plants before I got this right. Do not make the same mistakes I did. Start with the right soil from day one. Your Sarracenia will thank you with vigorous growth and beautiful pitchers.
The RHS and AHS both emphasize that carnivorous plants thrive in poor, acidic, well-draining conditions. I could not agree more. My plants are proof.





