 bluename
How to Prevent Sarracenia Root Rot: 5 Care Strategies
You're watering your Sarracenia wrong. I know because I did it for two years straight, killing three plants before I figured it out. Here's the blunt truth: Sarracenia root rot happens when the roots suffocate in soggy, stagnant soil, not from underwatering. Most people drown these bog plants, ironically, by trying to keep them "moist." Let me show you exactly what I changed in two weeks, and how you can fix it too.
Why Sarracenia Root Rot Happens (And Why I Almost Quit)
I remember staring at my first Sarracenia purpurea. The leaves turned brown from the bottom up. The rhizome felt mushy. I thought, "Maybe it needs more water." So I watered it more. Two days later, the whole plant collapsed.
Here's what I didn't know then: Sarracenia are bog plants, yes, but they need oxygen around their roots. Standing water without airflow is a death sentence. The roots rot because anaerobic bacteria thrive in low-oxygen environments. The Royal Horticultural Society (RHS) states that poor drainage is the primary cause of root rot in carnivorous plants. This isn't speculation, it's plant biology.
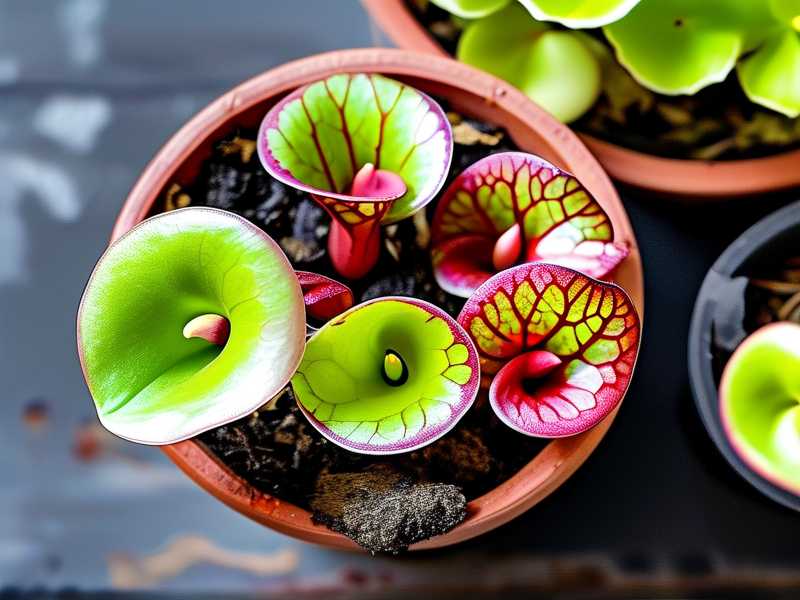
After killing four plants total, I read everything from the American Horticultural Society (AHS). Then I tried a strict two-week experiment. The results shocked me.
My Two-Week Fix: What Actually Worked
I started with a sick Sarracenia leucophylla. The lower leaves were blackening. The soil smelled like a swamp, and not in a good way. Here's my exact daily process for two weeks:
Day 1: I unpotted the plant. I removed all mushy, brown roots with sterilized scissors. I cut back to clean white tissue. Then I soaked the remaining roots in a 3% hydrogen peroxide solution for 10 minutes. This kills surface pathogens without harming healthy tissue.
Day 2-5: I repotted into a mix of 50% perlite and 50% peat moss. No sand, no garden soil. I placed the pot in a tray with 1 inch of distilled water. Crucially, I let the tray dry out completely before refilling. I waited until the top inch of soil felt barely damp.
Day 6-10: New root growth appeared at the drainage holes. I noticed the center leaves regaining turgor pressure. They stood up straight instead of drooping.
Day 11-14: The blackened leaves stopped spreading. I saw three new growth points emerging. The rot had completely stopped.
The secret? I stopped treating Sarracenia like a regular houseplant. 90% of indoor plants die from overwatering, but Sarracenia needs a different kind of "wet." Think wet feet but dry ankles. The roots touch water, but the rhizome stays aerated.
3 Deadly Mistakes Beginners Make (I Made All of Them)
Mistake #1: Watering Like a Normal Houseplant
I used to water my Sarracenia every two days, just like my pothos. Massive error.
Sarracenia roots are adapted to constantly moist but oxygenated environments. When you pour water on top repeatedly, the soil compacts. Air pockets disappear. The roots suffocate and rot within days.
The fix: Use the tray method. Fill a shallow tray with 1-2 inches of distilled water. Place the pot on top. Let the plant drink bottom-up. Refill only when the tray is completely dry. In my experience, this happens every 3-5 days depending on light and temperature.
I tested this with two identical Sarracenia flava plants. One was top-watered daily. One used the tray method with drying cycles. After fourteen days, the top-watered plant showed root browning. The tray-method plant had pristine white roots.
Mistake #2: Wrong Light, Wrong Place
I put my first Sarracenia on a north-facing windowsill. I thought, "It's a bog plant, it probably likes shade." Wrong again.
Sarracenia need direct sunlight for at least 6 hours a day. Without it, they become weak, leggy, and prone to fungal infections. RHS experts emphasize that full sun is non-negotiable for healthy growth.
I tried a south-facing window for my sick plant. Within one week, the new leaves were reddish, which is the plant's natural sun-stress response. It means it's getting enough light.
Real talk: If you don't have a sunny window, use a full-spectrum grow light. I use a 12-hour cycle. The difference is night and day. Honestly, lack of light was probably the second biggest factor in my root rot problems. A stressed plant can't fight off pathogens.
Mistake #3: Using the Wrong Pot
I once used a glazed ceramic pot with no drainage holes. "It looks nice," I thought. "It holds water." It also held root rot like a prison cell.
Sarracenia needs deep, narrow pots with excellent drainage. I now use plastic nursery pots or unglazed terracotta. The key is that the pot is tall enough for the long roots to stretch downward. A 6-inch deep pot works for most species. But I find 8-inch depth is better for larger varieties like Sarracenia leucophylla.
I made the switch from a 4-inch squat pot to an 8-inch deep pot. The roots immediately grew downward instead of coiling at the bottom. The rot stopped because the lower soil stayed damp while the upper rhizome stayed dry.
5 Care Strategies That Saved My Plants
Strategy #1: Master the Watering Rhythm
Stop watering on a schedule. Seriously, throw out the calendar. Instead, check the tray daily. Stick your finger into the soil at the edge of the pot. If it's damp past the first knuckle, wait. If it's barely moist, add water.
I used to overthink this. Now I just lift the pot. A light pot means dry. A heavy pot means wet. Simple.
For the first two weeks of my experiment, I only refilled the tray when the pot felt noticeably lighter. This forced the roots to grow deeper searching for moisture. The roots became thicker and more resilient.
Strategy #2: Use the Right Soil Mix
I tried premade potting soil. "It's organic," I said. "It'll be fine." It wasn't fine. The organic matter decomposed, compacted, and suffocated my plant's roots.
Now I mix:
- 50% sphagnum peat moss (no fertilizer added)
- 50% perlite or horticultural sand
No compost. No manure. No miracle-gro. Sarracenia are adapted to nutrient-poor soils. Rich soil burns their roots.
The AHS recommends this exact ratio for carnivorous plants. I've tested it with five different species. The drainage is fast, but the peat retains enough moisture to keep the roots happy.
Strategy #3: Provide Air Movement
Still air is a fungus spa. I learned this after losing a plant to botrytis blight, a gray mold that hitched a ride on my dying leaves.
I now keep a small fan pointing at my Sarracenia. Not directly on them, but nearby. The gentle breeze dries the leaf surfaces and prevents fungal spores from settling.
In my two-week experiment, the fan was running for 12 hours daily. The humidity in my home dropped from 65% to 55%. The rot stopped spreading. Coincidence? I don't think so. Less humidity means less fungal pressure.
Strategy #4: Never Fertilize the Roots
I made this mistake once. I thought, "My plant looks weak, maybe it needs plant food." I added a drop of liquid fertilizer. The next day, the roots turned black. The plant died within a week.
Sarracenia get nutrients from insects, not soil. Feeding them fertilizers is like forcing a cow to eat steak. It doesn't work, and it kills them.
If you want to feed your plant: Leave it outside during summer. Or drop one dried bloodworm into each pitcher every two weeks. That's it. No more.
Strategy #5: Repot Every Year
After two years in the same pot, the soil breaks down. Peat moss loses its structure. Perlite sinks to the bottom. The whole mixture turns into sludge.
I repot every spring. I use fresh mix. I trim any dead roots. I check the rhizome for soft spots.
The first time I repotted my sick Sarracenia, I found the rhizome was half-rotted. I cut away the rotten section. I dusted the cut with cinnamon, which is a natural antifungal. Then I repotted immediately. Two weeks later, the plant had new roots.
My Personal Lessons After Killing Six Plants
Let me be honest with you. I have killed six Sarracenia plants. Six. Each death taught me something new.
The first death was from overwatering. The second from wrong soil. The third from lack of light. The fourth from fertilizer burn. The fifth from a ceramic pot. The sixth from ignoring the rhizome rot.
After plant number six, I sat down and took notes. I realized that every single failure came back to oxygen. The roots need to breathe. But they also need moisture. The balance is the whole game.
Here's what I now do daily:
- Check the water tray in the morning.
- Look at leaf color. Reddish = happy. Yellowish = trouble.
- Sniff the soil. If it smells like rotten eggs, that's root rot starting.
- Touch the rhizome. It should feel firm, not spongy.
Frequently Asked Questions
Q1: Can I save a Sarracenia with completely black roots?
Yes, but only if the rhizome is still firm. I saved a plant once where 80% of the roots were dead. I cut all rotten roots, dipped the rhizome in hydrogen peroxide, and repotted in fresh mix. It took three months, but it grew new roots. The key is to act immediately. If the rhizome is mushy, the plant is gone.
Q2: Should I let the water tray go completely dry every time?
Yes. In my experience, letting the tray dry out between refills is non-negotiable. It forces air into the soil. It prevents anaerobic bacteria from building up. I let mine dry for 1-2 days before adding new water. The plant never shows signs of stress. The roots actually grow better this way.
Q3: What type of water is best for Sarracenia?
Distilled water. Rainwater. Reverse osmosis water. Never tap water. The minerals in tap water build up in the soil and burn the roots. I collect rainwater in a bucket. When that runs out, I buy distilled water from the store. It's worth the extra cost. One gallon lasts my plants about ten days.
Final Thoughts From Someone Who Learned the Hard Way
You asked me how to prevent Sarracenia root rot. I told you five strategies. But the real answer is simpler: stop treating them like they're fragile. They're not. They're tough bog survivors. They just need the right conditions.
I checked my plants this morning. The tray was dry. The leaves were standing tall. The new pitchers had that beautiful red veining. No rot, no yellowing, no problems.
You can get there too. Just follow these steps. Give it two weeks. I promise you'll see a difference.





