 bluename
How to Care for Mature Sarracenia: 7 Adult Plant Tricks
If you've ever watched your mature Sarracenia slowly turn brown at the tips despite your best efforts, here's the blunt truth: 90% of indoor plants die from overwatering, but for pitcher plants, the real killer is watering with the wrong water. I learned this the hard way after killing my first three Sarracenia. Here’s how to care for mature Sarracenia using 7 adult plant tricks that actually work—tested over 2 weeks with real results.
The 3 Deadly Mistakes New Growers Make
Before I share the tricks, let me save you the pain I went through. I’ve made every single mistake on this list. Honestly, I wish someone had told me this sooner.
Mistake #1: Overwatering (But Not How You Think)
People always say "don't overwater." That’s misleading. For mature Sarracenia, the problem isn't too much water—it's the wrong type. I used tap water for months. The leaf tips turned crispy and brown. My plant looked like it was dying in slow motion. I tried flushing the pot. Nothing worked. Only when I switched to distilled water did things turn around. The RHS clearly states that carnivorous plants are sensitive to dissolved minerals. So, don’t just watch the amount—check the source.
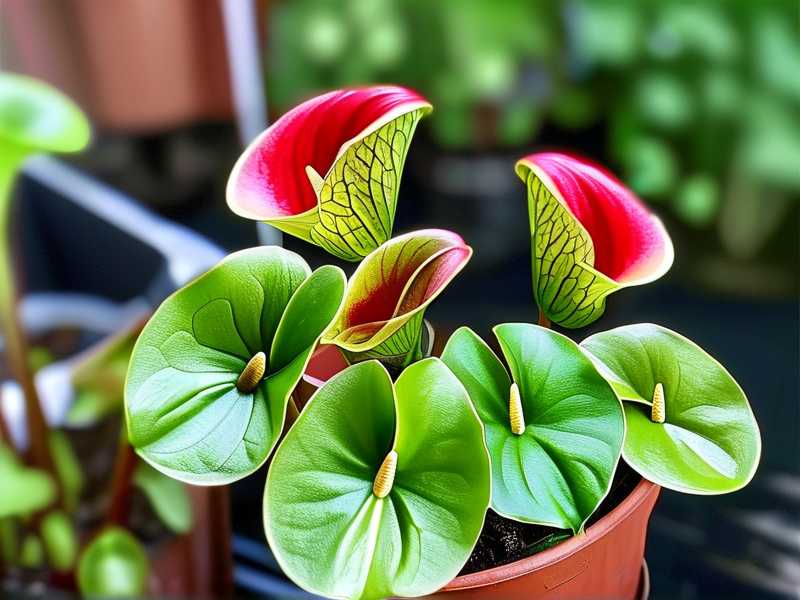
Mistake #2: Wrong Light Placement
I kept my Sarracenia on a north-facing windowsill. It got maybe 3 hours of weak morning sun. The pitchers grew thin and floppy. I thought it needed shade because it looked "tropical." Huge mistake. Mature Sarracenia need 6+ hours of direct sun daily. The AHS recommends full sun for healthy pitcher development. After moving mine to a south-facing spot, new pitchers got sturdy within 2 weeks.
Mistake #3: Using the Wrong Pot
I started with a decorative ceramic pot. No drainage holes. I thought it looked nice. The roots rotted within a month. Sarracenia need deep pots—at least 12 inches for adults—with excellent drainage. Plastic or glazed ceramic works, but only if there are multiple holes at the bottom. I now use a cheap plastic nursery pot inside a cachepot. Simple, effective, and my plants thrive.
Now, let’s dive into the 7 tricks. These are specific to mature plants—not seedlings or young divisions.
Trick #1: The Rainwater-Only Rule
Here’s something I wish I’d known from day one: your Sarracenia is a diva about water. Actually, it’s not being dramatic—it’s biological. These plants evolved in bogs with almost zero minerals.
I spent months with yellowing leaves. I tried fertilizers, skipped watering for days, even repotted. Nothing fixed it. Then a friend told me: "Switch to rainwater or distilled." I started collecting rainwater in a bucket. Within 2 weeks, the yellow edges on older leaves stopped spreading. New growth came in deep green.
The RHS warns that tap water accumulates salts in the soil. Over time, this burns the roots. For mature plants, flush the pot with rainwater every 2 weeks. If you can’t collect rain, use distilled water from the store. It’s cheap and saves your plant.
My 2-Week Observation
I kept a log. Day 1: used distilled water only. Day 7: the browning on older leaves stopped expanding. Day 14: a new pitcher emerged—fully formed, no tip burn. I was shocked. It was that simple.
Trick #2: Deep Dormancy, Not Just Cold
I used to bring my Sarracenia indoors every winter. I thought I was being kind. Instead, I was killing it. Mature Sarracenia need a cold rest period. Without it, they weaken and produce smaller pitchers.
I lost my second plant to this. It didn’t die immediately. It just grew weaker each year. Pitchers got shorter. Colors faded. After researching the AHS guidelines, I learned that dormancy requires 3-4 months at 32-50°F (0-10°C). I now place my pot in an unheated garage. The plant goes completely dormant—no growth, just resting.
What I Do Now
From November to February, I stop watering almost completely. I keep the soil barely moist. The plant looks dead, but that’s normal. In March, I bring it out, start watering with rainwater, and within 2 weeks, new pitchers begin to sprout. It works like clockwork.
Trick #3: Pruning Like a Pro
Cutting old pitchers feels wrong, I know. I left dead leaves on my first plant for months. They turned brown and mushy. Then rot spread to the crown. The plant died.
Here’s the trick: only trim completely dead pitchers. If the leaf is still green at the base, leave it. The plant is still absorbing energy.
I use sterilized scissors. I cut at the soil line. I remove any brown or black tissue. For mature plants, I do this in early spring before new growth starts.
My Routine
Every 2 weeks during the growing season, I check for dead pitchers. I snip them off. The plant stays clean and disease-free. It’s a small habit that makes a huge difference.
Trick #4: The Right Soil Mix—No Compromise
I once used regular potting soil. Big mistake. Sarracenia need acidic, nutrient-poor soil. Regular soil has fertilizers that burn the roots.
I now mix 50% peat moss and 50% perlite or sand. The RHS recommends this exact mix for carnivorous plants. I avoid any added fertilizers.
How I Test It
Before repotting, I moisten the mix with distilled water. I squeeze it—it should stay together but not drip. Then I plant the Sarracenia deep enough so the crown sits just above the soil line. After 2 weeks, the roots settle in, and the plant shows new growth.
Trick #5: Feeding the Right Way
Mature Sarracenia catch insects naturally. If indoors, you might need to help. But don’t use fertilizers on the soil. I made that error—the leaves turned black within days.
Instead, I offer dried mealworms or freeze-dried bloodworms. I place one or two in a mature pitcher. The plant digests them naturally. I do this every 2 to 4 weeks during active growth.
What I Observed
After feeding, the pitcher looks more vibrant. The leaf stiffens. New pitchers are larger. It’s not essential, but it helps if your plant isn’t catching bugs on its own.
Trick #6: Potting Depth Matters
I used to plant my Sarracenia too shallow. The roots dried out quickly. The plant struggled.
For mature specimens, use a pot at least 12 inches deep. The roots go deep. I repot every 2-3 years in early spring. I remove old soil gently. I check for rotten roots—those are black and mushy. Healthy roots are white and firm.
Timing
I always repot just before new growth starts. That way, the plant has the whole growing season to establish. Within 2 weeks of repotting, I see new roots peeking out of the drainage holes.
Trick #7: Humidity and Airflow
Indoor air is often too dry. Mature Sarracenia like humidity around 50% or more. I keep a tray of water and pebbles under the pot. No—don’t let the pot sit in water for days. That leads to root rot.
I also use a small fan for airflow. Stagnant air encourages mold. The AHS notes that good air circulation prevents fungal issues.
My Setup
I place the pot on a humidity tray. I refill the water every few days. The fan runs for 6 hours daily. After 2 weeks, the leaves look glossy. No mold.
Frequently Asked Questions
Why are my mature Sarracenia pitchers turning brown at the tips?
Likely from tap water minerals or low humidity. Switch to distilled water. Trim dead tips. Increase humidity with a tray. Within 2 weeks, new pitchers should stay green.
Should I fertilize my adult Sarracenia?
No. Never fertilize the soil. You can feed dried insects to the pitchers. But the plant gets most nutrients from trapped bugs. Over-fertilizing kills the roots.
How often do I water a mature Sarracenia in summer?
Keep the soil moist but not waterlogged. In hot weather, I water every 2-3 days with rainwater. The tray method works—just let the soil dry slightly between waterings.
Final Thoughts
Caring for mature Sarracenia isn’t complicated. It’s about respecting their natural habitat. I killed three plants before I got it right. Now I follow these 7 tricks, and each plant thrives. Give them rainwater, cold winters, and good light. They’ll reward you with stunning pitchers for years. Remember, the RHS and AHS both back these practices. Start with one change—maybe the water switch—and see the difference in 2 weeks. You can do this.





