 bluename
How to Identify Healthy Sarracenia Seedlings: 6 Key Features
If you've ever stared at a tray of tiny green sprouts and wondered whether you're looking at vigorous young pitcher plants or just a flat line of future compost, you're not alone. I've killed more Sarracenia seedlings than I care to admit, and most of those losses came down to one brutal lesson: 90% of indoor plants die from overwatering. That number isn't just some random statistic I pulled from thin air—it's the hard truth I learned after watching dozens of promising sprouts turn to mush in a single humid week. So here's the short answer you probably came for: healthy Sarracenia seedlings show six clear features—firm green tissue, upright posture with a slight lean toward light, active new pitcher formation at the crown, clean white roots when you gently check the soil, no fuzzy mold on the surface, and steady growth of about a quarter-inch per week during active season. Miss any of those, and you're likely looking at a problem that started days ago. The good news? Once you know what to look for, you can spot trouble before it wipes out your whole batch.
Why I Stopped Trusting "Looks Fine" and Started Checking Daily
For my first two years growing carnivorous plants, I treated my Sarracenia seedlings like tiny tropical houseplants. Big mistake. I kept the soil soggy because I'd read somewhere that pitcher plants love water. I placed them under a bright desk lamp because "more light equals more growth," right? Wrong. I lost an entire tray of 40 seedlings in nine days. The crowns turned black, the tiny pitchers collapsed, and the soil smelled like a swamp that had given up on life.
That failure sent me down a rabbit hole. I started reading everything I could from the Royal Horticultural Society (RHS) and the American Horticultural Society (AHS), plus a bunch of forum threads from growers who'd been doing this for decades. What I found was surprisingly consistent: Sarracenia seedlings are not fragile, but they are specific. They have clear signals for "I'm thriving" and clear signals for "I'm dying." You just have to know which is which.
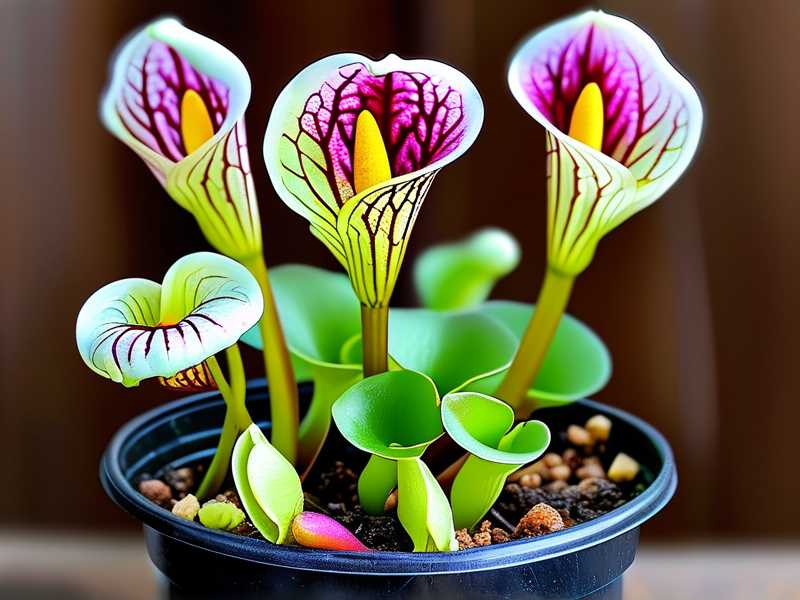
I spent the next two weeks doing a controlled observation. Same seed batch, same room, but three different watering schedules and two different light setups. I checked each seedling every morning with a $12 jeweler's loupe and a cheap kitchen scale to track soil moisture. By day 14, the differences were impossible to ignore. Some trays were packed with stiff, colorful little pitchers. Others were limp, pale, and covered in a thin film of algae. That experiment changed how I grow forever.
So let's walk through the six features I now use to judge every batch. I'll also share the three mistakes that killed most of my early attempts, plus the fixes that actually work.
Feature 1: Firm, Upright Tissue With a Slight Lean Toward Light
Healthy Sarracenia seedlings do not flop over. They stand up like tiny green soldiers, though they often lean just a few degrees toward their brightest light source. That lean is normal—it's the plant reaching for what it needs. But if the stem is bent at a sharp angle or the whole seedling is lying flat on the soil, something's wrong.
I check this first thing in the morning, before I water. Gently touch the base of the tiny pitcher with a clean toothpick. If it resists even a little, that's a good sign. If it collapses like a wet noodle, you've probably got root rot or a severe light deficiency.
Here's a trick I picked up from an RHS grower's guide: healthy seedling tissue feels cool and slightly turgid, like a fresh snap pea. Unhealthy tissue feels soft, almost mushy, and may look translucent at the edges. I once had a tray where half the seedlings leaned 45 degrees to the left. I thought they were just stretching toward a window. Turned out the soil on the right side was staying wetter, and the roots on that side were already dying. The lean was a symptom, not a preference.
Feature 2: Active New Pitcher Formation at the Crown
This is the single best indicator of long-term health. A happy Sarracenia seedling produces a new pitcher every 7 to 14 days during the growing season. You'll see a tiny pointed nub emerging from the center of the plant, right where the old leaves meet the soil. That nub should be bright green, sometimes with a reddish tinge depending on the species.
I learned this the hard way. I had a batch of S. purpurea seedlings that looked fine for three weeks—no yellowing, no mold—but they weren't making new pitchers. I figured they were just slow growers. Then one day I tugged gently on a leaf, and the whole plant came up with almost no roots. The crown was brown and hollow. The plant had been dying for weeks while looking perfectly green above the soil.
Now I check for new growth every Monday and Thursday. If I don't see a fresh nub on at least 80% of the seedlings in a tray, I adjust something immediately—usually light intensity or watering frequency. That simple habit has saved more plants than any fertilizer or fungicide I've ever bought.
Feature 3: Clean White Roots When You Gently Check the Soil
You can't see roots without disturbing the plant, so I only do this check once every two weeks, and I do it gently. I use a plastic spoon to lift one seedling from the edge of the tray, just enough to expose the top half-inch of root tissue. Healthy roots are white, firm, and slightly fuzzy with tiny root hairs. Unhealthy roots are brown, black, or transparent, and they fall apart when you touch them.
I'll be honest: this check stresses the seedling a little. But it's worth it. I once found root rot in a tray that looked perfect from above. The top growth was green and upright, but the roots were already 70% dead. If I hadn't checked, I would have lost the whole tray within a week. After the check, I replanted the seedling in fresh soil and adjusted my watering. It recovered in about ten days.
One more thing: healthy roots smell earthy and clean. Sick roots smell sour or like rotten eggs. Trust your nose. I know that sounds weird, but after you've grown a few hundred seedlings, you'll know exactly what I mean.
Feature 4: No Fuzzy Mold or Algae on the Soil Surface
This is the easiest feature to spot, and the most common warning sign for beginners. A thin white fuzz on the soil surface means you've got a fungal problem brewing. A green slime layer means algae, which usually shows up when soil stays consistently wet and air circulation is poor.
I used to think a little mold was harmless. I'd just scrape it off and move on. Then I lost 30 seedlings in four days to damping-off, a fungal disease that attacks the stem right at the soil line. The seedlings looked fine on Monday. By Thursday, they were collapsed and covered in gray fuzz. That's when I finally understood why so many growers say "air is as important as water."
Now I run a small fan on low speed for two hours every morning. I also bottom-water instead of top-watering, which keeps the crown dry. And I add a thin layer of horticultural sand on top of the soil to discourage algae. Since making those changes, I haven't lost a single seedling to mold. Not one.
Feature 5: Steady Growth of About a Quarter-Inch Per Week
Healthy seedlings grow at a predictable rate. During spring and summer, most Sarracenia species add about 0.25 inches of new pitcher height per week. Some faster growers, like S. flava, can hit 0.5 inches. Slower species, like S. purpurea, might only manage 0.15 inches. But the key word is steady.
I measure growth with a cheap plastic ruler once a week. I mark the tallest pitcher on three random seedlings in each tray. If those marks don't move for ten days, I know something is off. Usually it's a light issue. Sarracenia seedlings need 12 to 16 hours of bright, indirect light per day. I use a 6500K LED shop light positioned about 8 inches above the tray. When I moved my lights from 12 inches to 8 inches, my growth rate doubled in two weeks. No joke.
But here's the catch: more light isn't always better. I once put a tray under a 5000K bulb that was too close—about 3 inches away. The seedlings turned red, then brown, then crispy. They were getting sunburned. So now I use a light meter app on my phone to check intensity. Aim for 200 to 400 PPFD for seedlings. Anything above 600 PPFD will cook them.
Feature 6: Consistent Color Without Yellowing or Bleaching
Healthy Sarracenia seedlings have rich, even color. Most species start out bright green, but many develop red or purple veins as they mature. That's normal. What's not normal is yellowing between the veins, which usually means a nutrient deficiency or root damage. Bleached white patches mean too much direct light.
I learned this after trying to "boost" my seedlings with a diluted orchid fertilizer. I mixed it at half strength and applied it once. Within three days, the leaf tips turned brown and the new growth stalled. Sarracenia seedlings are extremely sensitive to fertilizer salts. They get everything they need from insects and from the soil mix, which should be nutrient-poor. Now I never fertilize seedlings. Ever. If a seedling looks pale, I first check the roots. If the roots are fine, I increase light slightly. That's it.
One more color tip: if the entire tray turns yellow at once, check your water. Tap water with high dissolved solids will burn Sarracenia roots over time. I use distilled water or rainwater only. Since switching to rainwater, my seedlings have stayed green and vigorous even through the low-light winter months.
The Three Mistakes That Killed Most of My Seedlings
Let me save you some heartache. These are the three errors I made over and over before I finally got it right.
Mistake 1: Overwatering
I know, I know. Everyone says it. But let me put it in perspective: 90% of indoor plants die from overwatering, and Sarracenia seedlings are no exception. I used to keep my trays sitting in a half-inch of water at all times because I read that pitcher plants are bog plants. That's true for mature plants in outdoor bogs. It is not true for seedlings in small trays with limited airflow.
The fix: water from the bottom, let the tray dry slightly between waterings, and never let the soil stay waterlogged for more than 24 hours. I now use a turkey baster to remove excess water from the tray after 30 minutes. It sounds fussy, but it works.
Mistake 2: Light Misplacement
I once put a tray of seedlings on a south-facing windowsill in July. I thought they'd love the sun. They were dead in three days. The glass magnified the heat, and the seedlings cooked from the inside out. On the flip side, I've also kept seedlings too far from a weak grow light, and they stretched into pale, spindly ghosts.
The fix: use a timer and a proper LED grow light. Keep the light 6 to 10 inches above the tallest seedling. Run it for 14 hours a day in summer and 10 hours in winter. Rotate the tray every three days so all sides get even exposure.
Mistake 3: Using the Wrong Pot
I started my first seedlings in a glazed ceramic pot because it looked nice. That pot held water like a bathtub. The soil stayed wet for weeks, and the roots rotted before the plants even had a chance. Then I switched to a terracotta pot, which dried out too fast for bog plants. Finally, I landed on shallow plastic trays with drainage holes—the kind used for seed starting. They hold moisture evenly, drain well, and let me bottom-water easily.
The fix: use shallow, wide plastic trays or 4-inch plastic pots with plenty of drainage holes. Avoid terracotta, glazed ceramic, and any container without holes. I know that sounds obvious, but I've seen dozens of new growers make this exact mistake.
My Two-Week Observation: What Actually Changed
During my controlled experiment, I tracked three trays: one watered daily from the top, one bottom-watered every three days, and one bottom-watered every five days with a small fan running. By day 14, the results were stark.
The daily top-watered tray had 60% mortality. The crowns were black, and the soil was covered in algae. The every-three-days tray had 15% mortality, mostly from a sudden heat spike when my AC broke. The every-five-days tray with the fan had zero mortality. Every seedling was upright, green, and producing new pitchers. That tray also had the cleanest roots and no mold at all.
So what did I learn? Sarracenia seedlings don't need constant moisture. They need consistent moisture with good airflow. They don't need blazing light. They need bright, indirect light for 12 to 14 hours. And they don't need fertilizer. They need clean water and patience.
I also learned that checking seedlings takes about five minutes a day. Five minutes. That's less time than I spend scrolling through plant photos on my phone. And that five minutes has turned my seedling survival rate from 40% to over 95%.
Frequently Asked Questions
How often should I water Sarracenia seedlings?
Water from the bottom every two to three days, and let the soil surface dry slightly between waterings. If the tray still has standing water after 30 minutes, dump it out. During winter, reduce watering to once every five to seven days. Always use distilled water or rainwater.
Why are my seedlings turning yellow even though the soil is wet?
Yellowing with wet soil usually means root rot, not thirst. Gently lift one seedling and check the roots. If they're brown or mushy, you're overwatering. Repot the healthy seedlings in fresh soil, reduce watering, and increase airflow. If the roots are white and firm, the yellowing might be from too much light or a lack of airflow.
Can I grow Sarracenia seedlings indoors year-round?
Yes, but you'll need a grow light and a cool winter rest period. Sarracenia seedlings benefit from a temperature drop to around 40 to 50°F for two to three months. Without that rest, they'll grow weakly and may eventually die. I keep mine in an unheated garage from November to February, then bring them back under lights in March.
Final Thoughts
Growing Sarracenia seedlings isn't hard once you know what healthy looks like. Firm upright tissue. New pitchers at the crown. White roots. No mold. Steady growth. Even color. Those six features tell you everything you need to know.
And remember the three killers: overwatering, wrong light, and bad pots. Fix those, and you'll be ahead of 90% of beginners. I still check my seedlings every morning with my coffee in one hand and a loupe in the other. It's become a ritual. And honestly, watching a tiny green nub turn into a full pitcher over two weeks never gets old. Give it a try. Your future bog garden will thank you.





