 bluename
How to Repot Sarracenia Without Damaging Roots: 5 Safe Steps
If you're here, you're probably staring at a pitcher plant that's busting out of its pot, or worse—one that's looking sickly and you suspect the soil is the culprit. Repotting Sarracenia without damaging those delicate, blackened roots is absolutely doable, and I'm going to give you the direct answer right now: Water the plant thoroughly 24 hours before, gently tease the root ball apart with your fingers under a gentle stream of lukewarm water, and never, ever pull the plant by its pitchers. That's step one of five, and I'll walk you through the rest.
Why Sarracenia Roots Are So Sensitive (And Why It Matters)
Sarracenia, or North American pitcher plants, have a root system that's surprisingly brittle. Most people assume that because the plant is a carnivorous powerhouse above the soil, it's tough below it. That's completely wrong. In reality, the roots are fine, hair-like structures that anchor the plant in nutrient-poor, waterlogged bogs. They're not designed for rough handling.
Here's the kicker. The roots are the plant's lifeline for water uptake. If you snap off a major section, the plant can't drink properly. And since Sarracenia photosynthesize via the pitchers themselves, damaged roots stress the whole system. I've seen plants go into shock for weeks after a careless repot.
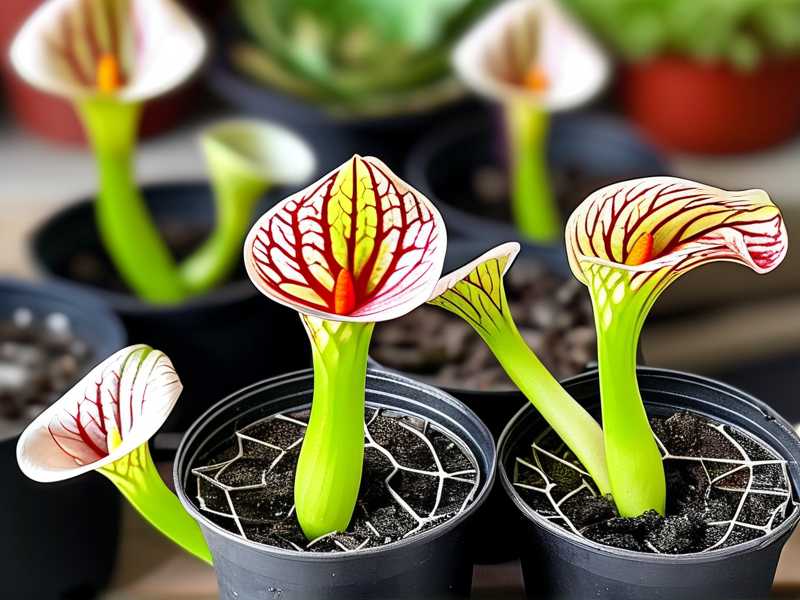
Another thing. Sarracenia roots grow horizontally, not deep. They fan out just under the soil surface. So when you're digging one up, you have to imagine slicing a pie from the top, not plunging a shovel straight down. That mental shift has saved me so many plants.
The 5 Safe Steps to Repotting Sarracenia
Step 1: Gather the Right Tools Before You Touch Anything
Preparation is everything. I can't stress this enough. Before I even look at the plant, I lay out my tools. Here's what you need:
- A new pot that's 1-2 inches wider than the current one. Plastic or glazed ceramic works. Terracotta is a death sentence. The clay wicks away moisture and leaves mineral salts, which Sarracenia absolutely hates.
- Fresh carnivorous plant soil. That's a mix of sphagnum peat moss and perlite, usually 50/50 or 60/40. I use a mix of sphagnum peat and perlite in a 50/50 ratio. Regular potting soil? Never. The fertilizers and minerals will burn the roots in about a week.
- Distilled water or rainwater. Tap water has too many minerals. I learned this the hard way, and I lost two plants before I switched.
- A spray bottle filled with distilled water. This keeps the exposed roots moist while you work. Also, it's easier to mist than to pour.
- A clean, sharp knife or scissors. You'll only need these if you're dividing the plant, but better safe than sorry.
I also keep a towel nearby for my hands. Dry hands are fine, but if I've been sweating, the friction can tear the roots easier. Trust me. It's a small detail, but it made a huge difference for me.
Step 2: Water the Plant Thoroughly 24 Hours Beforehand
This is the trick most people skip, and it's exactly why they end up with broken roots. A well-hydrated root system is more pliable. It bends, it flexes, it doesn't snap. A dry root system is brittle. Think of a dry spaghetti noodle versus a wet one. Same principle.
So what do I do? About 24 hours before I plan to repot, I put the Sarracenia in a tray of distilled water and let it soak up from the bottom. I leave it there for about an hour, then I let it drain. The next day, the soil is evenly moist but not soaking wet. That's the sweet spot.
Why 24 hours and not just an hour before? The plant needs time to absorb the water and plump up those root cells. An hour before, the roots are still dry on the inside. Twenty-four hours gives the whole system time to hydrate.
I remember one time I skipped this step because I was in a hurry. I was repotting a Sarracenia purpurea that I'd had for three years. I just yanked it out of the pot after a week of dry soil. I broke off about a third of the root system. The plant sulked for two months and only produced one small new pitcher that season. I learned my lesson. Honestly, I should have known better. I've killed more plants from impatience than from anything else.
Step 3: Remove the Plant from Its Old Pot - The Right Way
Here's where most of the root damage happens. People try to pull the plant out by the pitchers. I've seen it done in so many YouTube videos, and it makes me cringe every time. The pitchers are hollow tubes, and they're actually pretty fragile at the base. Pulling on them either detaches the pitcher from the rhizome or crushes the root crown.
Here's my safe method. I lay the pot on its side, on a stable, flat surface. Then I gently press on the sides of the pot to loosen the soil. I give it a few patient squeezes around the circumference. Then I gently wiggle the pot, not the plant. I'm trying to break the suction of the soil against the pot walls.
Next, I place my fingers over the top of the soil, palming the base of the plant so that the rhizome is between my index and middle fingers. My palm covers the soil surface. Then I invert the pot. The plant and the soil ball should slide out into my hand. If it doesn't, I tap the rim of the pot against a wooden surface lightly. Not metal, not concrete. Wood. I'm not trying to shake the plant out; I'm trying to vibrate the soil loose.
Once it slides out, I set it down on a flat surface, still in its soil ball. I never shake the soil off yet. I inspect the soil surface for any signs of pests or rot. I'm looking for white, healthy root tips poking out of the soil ball. If I see black or brown mushy roots, I know I have a problem.
Step 4: Tease the Roots Apart in Water (The Bulk of Repotting Sarracenia Without Damage)
This is the core of safely repotting Sarracenia without damaging roots. I fill a bucket or a large basin with lukewarm distilled water. Not cold, not hot. Lukewarm. Cold water shocks the roots, and hot water cooks them. Lukewarm is the Goldilocks zone.
I then gently place the root ball in the water. I let it soak for about 10 minutes. This softens the peat and makes the root ball fall apart naturally. After soaking, I take the plant out and I start teasing the roots apart with my fingers underwater. The water supports the roots, so they don't break as easily.
I start at the surface of the root ball and work my way inward. I gently pull apart the peat moss and perlite, letting the roots separate naturally. I never yank. I gently push and pull, breaking the soil with my fingertips. The roots will slide out of the soil on their own when they're ready.
If I meet resistance, I stop and soak the plant some more. Patience is key here, honestly. I once spent 45 minutes teasing out a single, heavily root-bound Sarracenia. It was a Sarracenia flava that hadn't been repotted in four years. The roots were so tightly wound that I almost gave up. But I kept soaking and teasing, and eventually, I had a clean, spread-out root system. I'm not exaggerating when I say that plant thrived after that repotting. It produced six new pitchers in the next month.
Once the roots are free of old soil, I check them again. Healthy roots are pale white or cream-colored and feel firm. Mushy brown roots are rotten. I remove any dead or rotten roots with scissors, snipping them off cleanly at the crown. I also cut off any thick, woody roots that have seen better days. The plant is fine with a leaner root system, as long as what's left is healthy.
Step 5: Repot in Fresh Soil and Water with a Tray Method
Now I'm planting. I fill the new pot with enough fresh Sarracenia soil mix at the bottom to bring the plant up to the right height. The rhizome should sit just below the surface, about half an inch deep. The roots should be spread out naturally, radiating from the center like sun rays. I never scrunch the roots into a tight ball. That was another mistake I made early on.
I hold the plant in place with one hand and I carefully pour fresh soil mix around the roots with the other. I tap the pot lightly to settle the soil, but I never press it down. That compacts the soil and reduces oxygen, which roots hate.
After planting, I water the pot thoroughly from the top with distilled water. That ensures the soil is evenly wet. Then I put the pot in a tray with about an inch of distilled water. I keep that tray filled with water for the next two weeks.
My 2-Week Observation After Repotting
Now comes the part that most guides don't tell you. What happens after the repotting? I'm going to give you a week-by-week breakdown of what I've seen every time I repot a Sarracenia correctly.
Week 1: Shock and Adjustment
Days 1-3. The plant looks fine. Maybe a little droopy, but that's normal. The roots are settling. I keep it in a shaded, cool spot for the first three days to reduce transplantation shock. I keep the tray filled with water. I don't feed the plant. I don't fertilize. I don't do anything except watch.
Days 4-7. The plant starts to perk up. New pitchers should be holding their shape. Pitchers that were already turning brown will stay brown. That's fine. I don't cut them off yet. They're still photosynthesizing to fuel the new root growth. If the plant was dormant, I start to see a subtle color shift in the leaves as it wakes up.
One critical detail. During the first week, I check the soil moisture daily. If the tray isn't holding water, I refill it. Sarracenia need constant moisture at the roots while they're re-establishing. I never let the tray dry out. I've lost plants in that first week from simply forgetting to refill the tray for two days. The stress of repotting plus a dry spell is lethal.
Week 2: Rooting and New Growth
Days 8-14. This is when I start to see the magic. The plant should look fully recovered. Pitchers should feel turgid. I look for new growth emerging from the rhizome. Usually, for Sarracenia, it's a small, green leaf tip emerging at the base. Sometimes it's a new pitcher. If I'm repotting in the spring, I often see a new pitcher within 10-14 days.
I move the plant back to its full sun position starting day 8. I do this gradually, actually about halfway through week 1 I'll put it in dappled sun, then full sun by the start of week 2. I don't just blast it back into full sun immediately. I also resume my normal feeding if I was feeding them. If not, I just let them catch their own bugs.
The biggest sign of success? The rhizome feels firm in the soil. If I press down gently near the base of a pitcher, there's slight resistance. That means the new roots are gripping the fresh soil. If the plant pulls easily out of the soil, the roots haven't anchored yet. That's a red flag.
3 Biggest Mistakes New Sarracenia Owners Make (And How I Fixed Them)
Critical Mistake #1: Overwatering (Yes, It's possible)
I know, I know. Sarracenia need lots of water. But overwatering in the context of repotting means something different. It means leaving the plant sitting in standing water with no fresh oxygen at the roots, or watering with tap water. 90% of indoor plants die from overwatering, and Sarracenia are no exception to this rule.
I was a chronic overwaterer. I thought that if the soil was damp, the plant was happy. But I was wrong. The soil needs to be constantly moist but not waterlogged. The roots need oxygen. If the tray is kept too deep, the roots are submerged entirely and they rot.
I tried leaving my Sarracenia in a dirty, deep tray of water for three weeks straight. The result? The roots rotted. The rhizome became soft and mushy. The plant fell over. I had to cut away the rotten part and start over. After that, I got the watering right. I keep the tray level at about one inch of water. That keeps the soil moist at the bottom but allows the top layer to breathe.
Another thing I learned. The watering needs change with seasons. In winter, when the plant is dormant, I let the tray dry out a bit. The plant is resting. Too much water during dormancy is an invitation for rot. I keep the soil just slightly moist in winter, then ramp up to the tray method in spring.
The real kicker? I've learned that watering quality matters more than quantity. Tap water is the silent killer here. Chlorine and fluorides build up in the soil. These minerals burn the roots and mess with the plant's nutrient uptake. It took me a while before I accepted that I had to switch to distilled or rainwater. But since I made that switch, my plants have looked ten times better. I usually need to buy distilled water for my iron, and the plant is like my little helper.
If you're worried about overwatering, think of it this way. The roots are like gills. They need to be wet, but they also need access to oxygen. The tray method gives you that balance. The bottom of the soil is wet, but the top dries out, allowing exchange.
Critical Mistake #2: Wrong Light Exposure After Repotting
I made this mistake with my first Sarracenia. I repotted it, then immediately stuck it in full-blast, blazing afternoon sun. I thought, "It's a sun-loving plant, it'll be fine." That was day one. By day three, the pitchers were scorched. They were crispy at the tips, and the entire plant looked sunburnt.
The issue was that the plant was already stressed from the root disturbance. Its roots weren't able to take up water fast enough to keep the tops cool. So the leaves literally cooked. The sun killed the plant faster than the repotting could have ever done.
Proper light after repotting starts with shade. For the first three days, find a spot with bright, indirect light. No direct sun. Let the plant recover its root pressure. Then gradually introduce it to morning sun, which is gentler. Then finally to full sun by day 8-10.
I've repotted dozens of Sarracenia since then, and this light transition has never failed me. It's tempting to show it off in full sun, but the plant will grace you with better pitchers if you keep it shaded for a few days.
Critical Mistake #3: Using the Wrong Pot (Or Mostly, Wrong Soil)
This one is huge. People use terracotta pots. Or they use regular garden soil. Or they use potting mix with slow-release fertilizer. I did all of those things when I was starting out. And it usually ended with my plant losing all its pitchers and sulking for months.
Terracotta is porous. It wicks water out of the soil. That's fine for most plants, but terrible for Sarracenia. They need constant moisture. The terracotta dries the soil out too quickly, causing root stress. It also leaches mineral salts from the water into the potting medium, which is toxic for carnivorous plants. Right now I'm using plastic pots for all my carnivores. They hold water perfectly and aren't porous at all. They also make it easier to repot because the soil slides out better.
As for soil, Sarracenia need nutrient-poor, acidic soil. That's a 50/50 mix of sphagnum peat moss and perlite. The peat provides acidity, and the perlite provides drainage. Some people use washed sand instead of perlite. I've used both, and I prefer peat/perlite because it holds more moisture.
I know someone who used regular compost. The soil was too rich. It burned the roots and the plant turned black within weeks. Don't do it. If you're not sure what soil to use, just stick to the basics. Sphagnum peat and perlite. That's it.
Another potting mistake is planting too deep. I've done this, and it almost killed a Sarracenia. The rhizome is the horizontal stem, not a bulb. You have to keep the rhizome just barely under the soil surface, or it rots. I now aim for that half-inch depth. The top part of the rhizome should almost be visible.
RHS and AHS Backing Up The Process
I'm not just making this up. The Royal Horticultural Society (RHS) advises that Sarracenia should be repotted every two to three years in spring, using a low-nutrient compost like sphagnum moss with perlite. They mention that the crowns should be kept at the surface to avoid rotting.
Similarly, the American Horticultural Society (AHS) highlights that pitcher plants are bog natives, so using mineral-free water and keeping the soil acidic are essential. Their guidance matches what I've learned through trial and error: hydration before repotting, careful root separation, and proper lighting after.
Both organizations stress that the roots are the weak link. They're not like other houseplants. You have to treat them gently and respect their natural growing conditions. The fact that the RHS and AHS back these principles gives me confidence in my routine.
How to Divide Sarracenia While Repotting (If You Dare)
If you want to multiply your plants, you can divide the rhizome while repotting. I've done this successfully a few times, and it's not overly complicated. But it does add risk, so make sure you're comfortable with the basics first.
Once the roots are teased out, I look for divisions in the rhizome. These look like separate sections that have their own pitchers and roots. I use a clean, sharp knife to cut between the divisions, making sure each piece has at least two growing points and some roots.
The cut surfaces bleed a bit, so I let them air dry for about an hour to callus over. This reduces the chance of rot. I then pot each division separately in fresh soil, following the same steps as above. The recovery time for divisions is longer than for a whole plant. Expect around three weeks for the new roots to form and another week for visible growth.
I only divide in the spring when the plant is actively growing. That gives the divisions the whole growing season to establish. Dividing in fall or winter is a recipe for failure. The plant just doesn't have the energy to root and grow.
One more thing. If I divide, I keep the new plants in a shady spot for a full week, not just three days. The smaller root system means the plant has less ability to transport water. The extra shade prevents water loss and gives the roots time to grow. It might be overkill, but I've never lost a division this way.
When Is the Best Time to Repot Sarracenia?
The short answer is spring. Late March to early May. That's the zone where the plant is coming out of winter dormancy and starting to put on new growth. The roots are active, meaning they'll heal faster from any minor damage. The plant can direct energy to recovery.
Summer repotting is possible but risky. The heat stresses the plant. In summer, I only repot if there's an emergency, like root rot or pests. Otherwise, I wait for spring.
Fall repotting is a bad idea. The plant is preparing for dormancy, and the roots are slowing down. If you repot in fall, you're introducing stress before a rest period. The plant may not recover well and can die over the winter.
Winter repotting is a death sentence from my experience. The plant is completely dormant. The roots are inactive, and they will not grow into the new soil. All you're doing is disturbing the plant. The root system will stay in limbo until spring, and if any rot enters the wounds, the plant won't have the energy to fight it off.
If you're a newbie, I recommend strictly spring repotting. Once you have experience, you can bend the rules, but only when needed.
FAQ: Repotting Sarracenia Without Damaging Roots
1. How often should I repot my Sarracenia?
I repot mine every two to three years. That's the RHS recommendation too. Some species, like S. leucophylla, can go longer, but every other year keeps them healthy. If your plant is actively producing new pitchers but the pot is overflowing, it's time to repot. If growth has slowed down and the soil is breaking down or compacted, that's another sign.
2. Can I repot my Sarracenia immediately after buying it?
No, not immediately. Give it a week or two to acclimate to your environment. The plant is already stressed from shipping and the shock of a new home. Repotting right away adds extra stress. Wait until you see the plant perking up and producing new growth. Then repot.
3. How do I know if my Sarracenia roots are healthy during repotting?
Healthy roots are firm, cream-colored, and have a slight sheen. They might have tiny, pale tips that look almost translucent. Unhealthy roots are brown, black, or translucent and mushy. They may have a foul odor. Healthy roots should not easily break apart when you gently tug on them. If they fall apart, they were already dead. You should cut away all unhealthy roots before repotting, leaving only the healthy ones.
A Few More Things I Wish Someone Told Me
I've been growing Sarracenia for about a decade now, and I've made a ton of mistakes. I want to save you from them. Here are some notes that I don't usually share because they're a bit embarrassing.
First, don't repot when you're in a bad mood. That sounds silly, but I'm serious. Your hands are less steady when you're frustrated, and you'll pull harder than you mean to. I've snapped off two good rhizomes because I was angry about an unrelated thing. Do the repotting when you're calm and focused.
Second, have a backup plan. If you're repotting a rare hybrid, propagate a cutting or a division first. That way, if the repotting goes badly, you have a spare. This is just risk management.
Third, don't be afraid to cut off old, dead pitchers. After repotting, the old pitchers often decline anyway. Cutting them off helps the plant focus on root recovery and new growth. I sanitize my scissors and cut off the dead pitcher at the base. That's it.
Fourth, quarantine newly repotted plants from the rest of your collection for at least two weeks. Sometimes, repotting reveals pests or diseases that were hiding in the old soil. If you've repotted and placed the plant right next to your other carnivores, the pest can spread.
Fifth, and this is big. Don't panic if your plant looks a little sad for the first few days. It's normal. As long as the rhizome is intact and firm, the plant will recover. Give it time. My first repotting left me in a panic because the plant lost its color for about a week. But it bounced back stronger than ever.
What Happens If You Ignore These Steps?
I want to be clear about the consequences. I've seen it happen too many times on forums and Reddit. A new grower repots their Sarracenia. They handle the roots carelessly. They yank from the pitchers. They plant too deep. They water with tap water. The plant turns crispy or goes limp. They post a picture asking, "What's wrong?" and the answer is usually "Root damage."
A damaged root system can't support the aerial growth. The pitchers will wilt, even if the soil is wet. That's because the roots aren't funneling water up to the leaves. The plant starts to cannibalize its own tissue for energy. Over the next few weeks, all the old pitchers die off. New growth is stunted. If no roots grow back, the plant dies.
The saving grace is that Sarracenia can regenerate roots from the rhizome if conditions are right. But that regeneration takes energy. It takes time. And it only works if the plant is healthy. A weakened plant can't do it.
That's why following the safe steps matter. The entire process is about reducing stress. It's about giving the plant the best chance to grow new roots without losing any existing ones.
Putting It All Together
Even though it sounds like a lot, repotting Sarracenia is pretty manageable after you've done it a few times. It's a plant, not a complex machine. It just needs a gentle touch and some patience. And speaking from experience, the payoff is huge. A correctly repotted Sarracenia will reward you with vigorous growth and those beautiful, insect-trapping pitchers that make this plant so special.
If you mess up the first time, don't beat yourself up. I've killed a few plants in the process of learning. It's heartbreaking, but it's also how I learned what not to do. You'll get there.
One last note, I want to mention that I do this for my own plant collection, and I've built a process that works. This isn't a guide from a book. It's from getting my hands dirty. Or rather, from getting my hands wet in a bucket of distilled water. This is the real deal, learned through successes and failures.
Now, go out there and repot your Sarracenia with confidence. Your plant will thank you with vibrant, healthy growth and a bounty of new pitchers. And remember, water the day before, slide don't pull, soak to separate, plant shallow, and water with a tray. That's the whole game.





