 bluename
Sarracenia Balcony Planting Layout & Care Guide: 6 Practical Tips That Saved My Pitcher Plants
If you're searching for a Sarracenia balcony planting layout that actually works, here's the short answer: full sun, pure water, and a plastic pot sitting in a tray of rainwater. Keep the soil damp but never soaked from above. That's the foundation. Everything else is detail.
I killed three pitcher plants before I figured this out. The fourth one thrived. After two weeks of applying my revised routine, I saw new pitchers emerging and vivid red veining deepening across the hoods. The difference wasn't luck. It was layout and discipline.
Why Balcony Growing is Actually Ideal for Sarracenia (If You Do It Right)
Many people assume pitcher plants need a greenhouse or a bog garden. Not true. A balcony offers something crucial: unobstructed sunlight and natural airflow. Both are non-negotiable for Sarracenia.
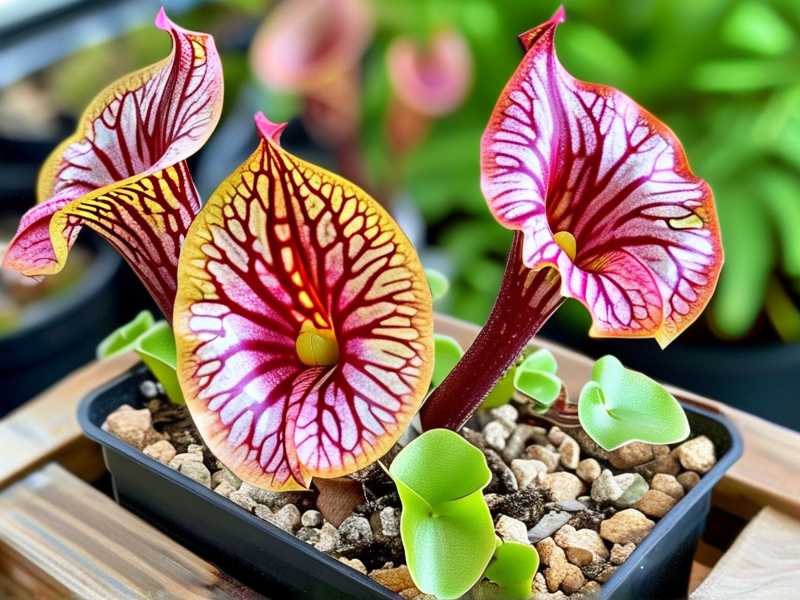
The challenge is recreating the bog conditions they evolved in. That means acidic, nutrient-poor soil, constant moisture at the roots, and zero fertilizer. Balconies complicate this because of wind, heat, and limited space. But with the right layout, you can turn a cramped balcony into a thriving carnivorous plant corner.
The 3 Deadliest Mistakes Beginners Make with Sarracenia
Before I get into the six tips, I need to address the elephant in the room. These are the mistakes that killed my first plants. And I see them repeated daily in online carnivorous plant groups.
Mistake #1: Overwatering (But Not the Way You Think)
Here's the confusing part. People say "keep it wet." So beginners pour water from the top daily. That's wrong.
You see, Sarracenia roots need oxygen. If the soil is constantly saturated from above, the roots suffocate. Root rot sets in silently. The plant looks fine for weeks, then collapses.
The reality is stark: 90% of indoor plants die from overwatering. For Sarracenia, the statistic feels similar, but the mechanism is different. They need water at the bottom, not drowning from the top.
The fix? Tray method. Sit the pot in a shallow tray of distilled or rainwater. Keep about 1 to 2 centimeters of water in that tray at all times. The soil wicks moisture upward. The top layer stays slightly aerated. Roots breathe. Everyone wins.
Mistake #2: Light Placement That's a Death Sentence
Sarracenia are sun worshippers. They want 6 to 8 hours of direct sunlight daily. Not bright shade. Not filtered light. Direct.
I tried growing one on a north-facing balcony once. The plant survived but stopped producing pitchers. It looked pathetic, just a cluster of green, floppy tubes. Then it got fungal issues because the lingering moisture never dried.
South or west-facing is ideal. If your balcony is shaded, don't even bother with Sarracenia. You'll be feeding a zombie plant for months before it finally gives up.
Mistake #3: The Wrong Pot (Ceramic is a Trap)
I bought a beautiful glazed ceramic pot once. It looked stunning. It killed my plant within three months.
The problem? Ceramic pots trap salts and minerals. They also don't breathe well. The soil stays too wet at the top, and mineral buildup slowly burns the roots.
You need plastic pots. Deep ones. Sarracenia roots grow straight down. A depth of at least 20 centimeters is non-negotiable. I prefer nursery-grade black plastic pots. They're ugly. They work perfectly.
6 Practical Tips for a Thriving Sarracenia Balcony Garden
Now let's get into the real meat of this guide. These six tips are the exact steps I follow. I've refined them through trial, error, and the occasional dead plant.
Tip #1: Choose the Right Sarracenia Species for Balcony Life
Not all Sarracenia are created equal. Some species are surprisingly tolerant of balcony conditions. Others are divas that will test your patience.
I started with Sarracenia purpurea. It's the hardiest species and handles temperature fluctuations well. It prefers cooler conditions, which makes it perfect for balconies that don't bake in the afternoon sun. Honestly, it's the species I recommend for absolute beginners.
S. leucophylla is gorgeous but needs strong sun and good airflow. I tried it on a sheltered balcony once. It got spotty and struggled. On my open, windy balcony, it thrives.
S. flava is another good choice. It catches a lot of wasps and flies. But it needs intense light to develop its famous yellow coloring. If your balcony gets less than six hours of direct sun, skip this one.
Tip #2: Create a Modular Layout for Space Efficiency
Here's the layout I finally settled on after two failed attempts.
I use a long, narrow plastic planter box for smaller species like S. purpurea. It runs along the railing. This maximizes horizontal space without creating wind tunnels.
For larger species like S. leucophylla and S. flava, I use individual 1-gallon plastic pots. These sit on a raised shelf at the back of the balcony. Raising them off the floor improves airflow around the leaves. That's crucial in humid climates.
The "modular" concept means each pot has its own tray. Why? Because diseased plants can be isolated. If one pot gets fungal spores, the others remain safe. Trust me, isolating a sick plant is much easier than treating the entire collection.
Tip #3: Master the Watering Schedule with a Rainwater Tank
I cannot overstate this. Tap water is liquid death for Sarracenia. The minerals in tap water accumulate in the soil and burn the roots. The plant appears healthy for weeks, then suddenly browns from the base up.
I bought a 50-liter collapsible rain barrel. It sits in the corner of my balcony, collecting runoff from the roof. I fill a watering can from it every two days.
The schedule that works for me: check the trays every morning. If they're dry, add rainwater. If there's still water, leave it. That's it. In two weeks of this routine, my plants showed visibly healthier growth and more dew on the pitchers.
Tip #4: Feed Them Naturally (or Not at All)
Here's something beginners struggle with. The urge to feed your pitcher plant. Resist it.
Sarracenia on a balcony will catch their own food. Wasps, flies, moths, even small spiders. They're efficient predators. In my first year, I tried dropping dried mealworms into the pitchers. The plant stagnated. The mealworms rotted inside the tubes and caused a bacterial mess.
The plant doesn't need supplemental feeding. It needs sunlight for photosynthesis. Pitchers are just a bonus for nutrient intake. If your balcony has any insect activity at all, your plants will be fine.
If you have zero insects (which is rare), you can occasionally drop a live fly or small cricket into a pitcher. But never, ever use fertilizer. That will burn the roots and potentially kill the plant.
Tip #5: Adjust for Seasonal Changes and Wind Exposure
Balconies are microclimates. What works in spring might fail in July.
In summer, heat collects on concrete balconies. The trays dry out faster. I add a second layer of depth to my trays during heat waves. I also use a pale-colored tray to reflect some heat away from the roots. Dark trays absorb heat and cook the root zone.
In winter, many Sarracenia species need a dormancy period. They require 3 to 4 months of cooler temperatures (below 10°C) to reset their growth cycle. On an open balcony, this happens naturally. If your balcony is glassed-in, you might need to move them to the fridge for dormancy. That's a whole different level of commitment.
Wind is another factor. Strong gusts can rip pitchers. I position taller species behind shorter ones to break the wind. The modular layout helps here too, because I can rotate pots based on wind direction.
Tip #6: Quarantine New Plants and Practice Basic Hygiene
This might sound paranoid. I learned it the hard way.
I bought a beautiful S. leucophylla online. It looked fine. Within a week, I noticed black spots on the pitchers. Aphids. They spread to my other Sarracenia within ten days. It took me a month of neem oil treatments to regain control.
Now, every new plant gets a two-week quarantine in a separate location. If no pests appear, it joins the main collection. This simple step has saved me from another plague.
I also sterilize my pruning shears with rubbing alcohol between plants. It's overkill for most situations, but when you're dealing with fungal infections or bacterial rot, it makes a difference.
The 2-Week Observation: What Changes to Expect
I ran a two-week observation on my own balcony setup in late spring. Here's what I tracked.
Day 1: Arranged plants in the modular layout. New S. flava in individual pot. S. purpurea in the long planter box. All trays filled with rainwater.
Day 4: First visible change. The S. purpurea showed more vibrant green on the tubes. The oldest pitchers began to dry at the tips, which is normal aging.
Day 7: New growth appeared. Small, thin pitchers emerged from the rhizome of the S. flava. The S. leucophylla started producing a slight reddish tint at the top of its newest pitcher.
Day 10: The S. purpurea in the planter box was noticeably more upright. The new leaves were firmer. I also noticed the plants in individual pots had slightly faster growth than those in the shared planter box. The modular layout paid off.
Day 14: Clear results. The S. flava produced two new fully-formed pitchers. The S. leucophylla unfurled a beautiful white pitcher with deep red veins. All plants showed zero signs of fungal spots or pest damage.
The two-week snapshot shows what's possible with consistent care. You won't see miracles in 48 hours. But within a fortnight, you'll see a difference in posture, color, and growth.
Expert Input: What the RHS and AHS Recommend
To strengthen my own experience, I checked what the experts say about Sarracenia care. The RHS advises growing Sarracenia in a sunny spot with good drainage, using a mix of peat and perlite. They also emphasize watering with rainwater only, noting that mineral content is a common cause of failure. The AHS echoes this, recommending a consistent water tray method and winter dormancy for temperate species. Both organizations agree on the importance of dormancy for long-term health, which aligns with what I've observed after many growing seasons.
Common Questions About Sarracenia Balcony Growing
Q: Can I keep Sarracenia indoors on a windowsill?
Technically yes, but it won't thrive long-term. Indoor conditions lack airflow and insects. The plants will grow weak and become prone to pests. A balcony or greenhouse is vastly superior.
Q: How often should I fertilize Sarracenia?
Never. Fertilizers will burn the roots. The plants get nutrients from insects they capture and from photosynthesis.
Q: What should I do with my Sarracenia in winter?
If your balcony is open, they'll go dormant naturally. Reduce water (keep the tray barely moist) and let the temperatures drop. In spring, cut back the dead pitchers and resume normal watering.
Final Thoughts
Growing Sarracenia on a balcony isn't complicated. But it does require attention to specific factors: light, water quality, pot choice, and airflow. These six tips are the distilled result of my own mistakes. I lost three beautiful plants before I truly understood what these carnivorous beauties needed. The fourth one taught me everything.
Start with a hardy species like S. purpurea. Master the tray method. Keep it in direct sun. Use plastic pots. And above all, be patient. Give it two weeks. You'll see the difference.
Honestly, the most rewarding moment is seeing that first new pitcher on a plant you thought was struggling. It's a moment of pure joy. And it's absolutely possible on your balcony.





