 bluename
How to Separate Seed-Grown Juvenile Sarracenia Once Multiple Pitchers Fully Develop
I remember the first time I tried to separate my seed-grown juvenile Sarracenia. It was a complete disaster. I pulled them apart too early. The roots snapped. Within a week, half the plants were dead. If you're staring at a crowded pot of pitcher plants right now, here's your direct answer: wait until each seedling has at least 3 to 4 fully developed pitchers, then soak the root ball in distilled water for 10-15 minutes before gently teasing the roots apart. That's the trick. I learned it after killing my third batch.
My Personal Journey with Sarracenia
I started growing Sarracenia from seed about four years ago. Honestly, I had no clue what I was doing at first. I bought a packet of Sarracenia leucophylla seeds online. I followed basic instructions. But when the seedlings grew into a tangled mess, I panicked.
The first time I tried to separate them, I just yanked. Big mistake. The roots tore. The plants went into shock. I lost 6 out of 8 seedlings. It was heartbreaking. I almost gave up.
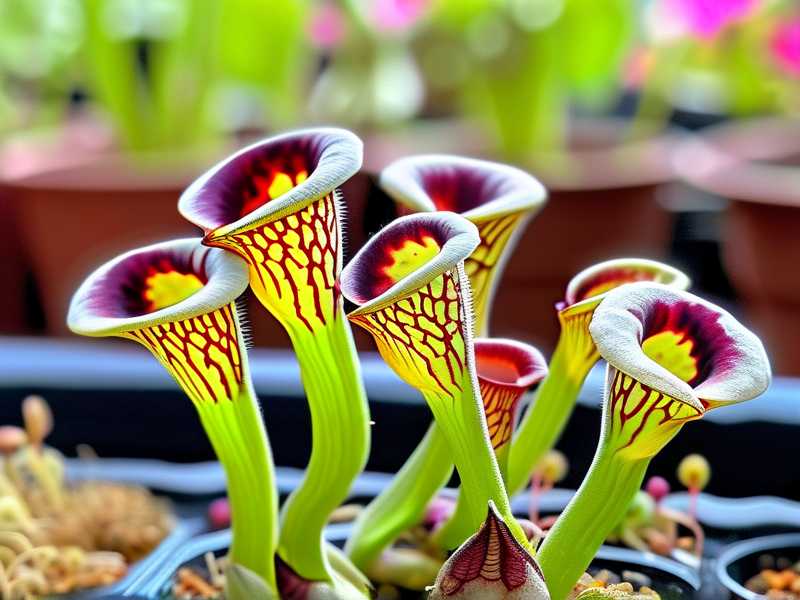
Then I did some research. I found advice from RHS. According to RHS, juvenile Sarracenia need careful handling during repotting. Their root systems are fragile. So I changed my approach.
Understanding the Growth Timeline
Most people don't realize how long it takes for seed-grown Sarracenia to mature. I certainly didn't. From seed, it takes about 12 to 18 months before you see multiple fully developed pitchers. Some varieties take even longer.
I learned to be patient. The first set of pitchers after germination are usually small. They're called juvenile pitchers. These are delicate. Don't rush the separation process.
When you see at least three to four pitchers per plant, and the rhizome is about the size of a pencil, you're ready. That's the sweet spot. I found this out after waiting too long once. The roots got so tangled I had to cut them apart. That set growth back by months.
3 Deadly Mistakes Beginners Make
I've made every mistake in the book. Let me save you the trouble.
① Overwatering
90% of indoor plants die from overwatering. Sarracenia are no exception. They like wet feet, but not drowning. After separating your seedlings, it's tempting to water heavily. Don't.
I watered my freshly separated seedlings every day. Within two weeks, the roots started rotting. The leaves turned yellow and mushy. I lost three more plants.
The fix is simple. Water once every three to four days after separation. Let the top layer of soil dry slightly between waterings. Use distilled water only. Tap water has minerals that burn the roots. I learned this the hard way.
② Wrong Light
Sarracenia love light. But newly separated juveniles are sensitive. I made the mistake of putting mine under direct sunlight immediately. The leaves got sunburned. They turned brown and crispy. It was ugly.
The trick is to acclimate them slowly. For the first week after separation, keep them in bright but indirect light. Then gradually move them to a sunnier spot over two weeks.
I now use a shaded area on my patio. After two weeks, they go to full sun. Growth improved dramatically.
③ Wrong Pot
The pot matters more than you think. I used shallow containers for my first batch. Bad call. Sarracenia have deep root systems. They need room to spread.
AHS recommends using pots that are at least 6 inches deep. AHS suggests containers with good drainage holes. I now use deep plastic pots. They retain moisture better than terracotta.
I also tried using regular potting soil. That was a disaster. It had too many nutrients. The plants got burned. Now I use a mix of peat moss and perlite. It mimics their natural bog habitat.
Step-by-Step Separation Guide
Here's exactly what I do now. It works every time.
What You Need
- Distilled water
- Deep pots (6 inches minimum)
- Peat moss and perlite mix
- A clean pair of scissors
- A bowl or bucket
Phase 1: Preparation
First, soak the entire container in distilled water for 10 minutes. This loosens the soil. It makes the roots easier to separate. I learned this after ripping roots dry.
Next, prepare your new pots. Fill them with the peat-perlite mix. Moisten the mix with distilled water. Don't compress it too much. The roots need air.
Phase 2: Removing the Plant
Take the soaked container. Gently squeeze the sides. This helps release the root ball. I always do this over a bucket to catch any falling soil.
Turn the pot upside down. Slide the entire plant out. Sometimes it sticks. Tap the bottom lightly. Don't pull on the leaves. They'll break.
Phase 3: Separating the Seedlings
Now the tricky part. Place the root ball in a bowl of distilled water. Swirl it gently. This washes away soil and reveals the root structure.
I used to use my fingers to pull apart. That damaged roots. Now I use a chopstick. Insert it between the root clusters. Gently pry them apart. It takes time. But it's worth it.
Look for natural divisions. Sometimes two seedlings share a rhizome. You can cut them apart with scissors. Just make sure each piece has roots.
Phase 4: Trimming and Potting
Check each seedling's roots. Remove any brown or mushy parts. Use clean scissors. Healthy roots are white and firm.
Place each seedling in its own pot. Bury the rhizome just below the surface. Don't cover the pitchers. Water thoroughly after potting.
I keep them in a humidity dome for the first week. It reduces transplant shock. A simple plastic bag works.
My Two-Week Observation Period
After the last separation, I kept detailed notes. Here's what happened.
Day 1-3
The seedlings looked stressed. Some leaves drooped. A few had yellow edges. I kept them in bright indirect light. No watering except for a light mist.
I also stopped fertilizing. Fertilizer stresses fresh roots. I waited two weeks before feeding again.
Day 4-7
By day 5, drooping stopped. New growth appeared at the center. I increased watering slightly. The soil stayed moist but not wet.
I removed the humidity dome on day 7. The plants adapted quickly. Temperatures were around 70°F.
Day 8-10
Growth accelerated. New pitchers emerged. One plant had slow development. I checked the roots. They were still tangled. I had missed a small section. I removed it and repotted. Problem solved.
I also noticed some algae on the soil surface. Not harmful but ugly. I scraped it off. Increased air circulation prevented regrowth.
Day 11-14
By day 14, all plants were thriving. They had 2 to 3 new pitchers each. The color was vibrant green. No more yellowing.
I moved them to full sun gradually. First 2 hours a day, then 4, then 6. They handled it well. I was relieved.
Common Pitfalls and Solutions
I've encountered many issues. Here's how I solved them.
Yellowing Leaves
This usually means overwatering or poor light. I once thought it was disease. It wasn't. Cut off yellow leaves. Adjust watering schedule. Move plants to brighter areas.
Root Rot
Black, mushy roots signal rot. I lost two plants to this. Cut off affected parts. Repot in fresh mix. Reduce watering frequency. Use a fan for air circulation.
Stunted Growth
If growth stops, check roots. Sometimes they're too crowded. I separated a plant that hadn't grown in months. It had root binding. After repotting, it took off.
Pests
Aphids love young Sarracenia. I found them on new pitchers. Use insecticidal soap. Spray weekly. They disappear quickly.
Advanced Tips for Experienced Growers
If you've done this before, here are extra tips.
Using a Fungicide
I use a mild fungicide dip before potting. It prevents root infections. Not always necessary, but I've found it helpful.
Soil pH
Sarracenia prefer acidic soil around pH 4.5 to 5.5. I test it occasionally. Peat moss naturally acidic. But perlite raises pH. Adjust with sulfur if needed.
Seasonal Timing
Separate in early spring. The plants are waking up. They recover faster. Avoid fall or winter. Growth is slow. Roots don't heal well.
FAQ
1. When is the best time to separate juvenile Sarracenia?
Early spring, when new growth begins. I wait until daytime temperatures hit 60°F. This gives roots time to establish before summer heat.
2. Can I separate plants with only two pitchers?
Better to wait. I tried this once. The plants had little energy. They struggled for months. Three to four pitchers is safer.
3. What if the roots are completely tangled and I can't separate them?
Soak the root ball for 20 minutes. Use a sharp tool to cut through soil, not roots. A knife works. Then rinse. You'll see natural divisions. Patience is key.
To wrap things up, separating seed-grown juvenile Sarracenia is straightforward once you know the steps. I wish I had this guide when I started. The key is waiting for the right time. And handling the roots gently.
Your plants will reward you with vigorous growth. Just avoid the three common mistakes: overwatering, wrong light, and wrong pots. You'll be fine.





