 bluename
How to Create Separate Dedicated Watering Tools Only for Sensitive Sarracenia Plants
Here’s the simple truth: you need a separate watering can, a dedicated spray bottle, and a specific water storage container for your Sarracenia. I learned this the hard way after killing three beautiful pitcher plants in one season. The biggest mistake? Using the same watering tools I used for my other houseplants. Tap water residue, fertilizer traces, and pH imbalances from shared tools caused root burn and mineral buildup. Within two weeks of switching to dedicated tools with distilled water only, my remaining Sarracenia bounced back with fresh pitchers and vibrant colors. Let me walk you through exactly how I set this up.
My Wake-Up Call with Sarracenia
I remember staring at my first Sarracenia. It looked beautiful in the nursery. Within three weeks at home, the pitchers turned brown and crispy. I had no idea what went wrong. I watered it with tap water from my regular garden hose. That was mistake number one.
The second plant? I used a clean watering can. But it still had traces of liquid fertilizer from my tomato plants. The Sarracenia died within a month.
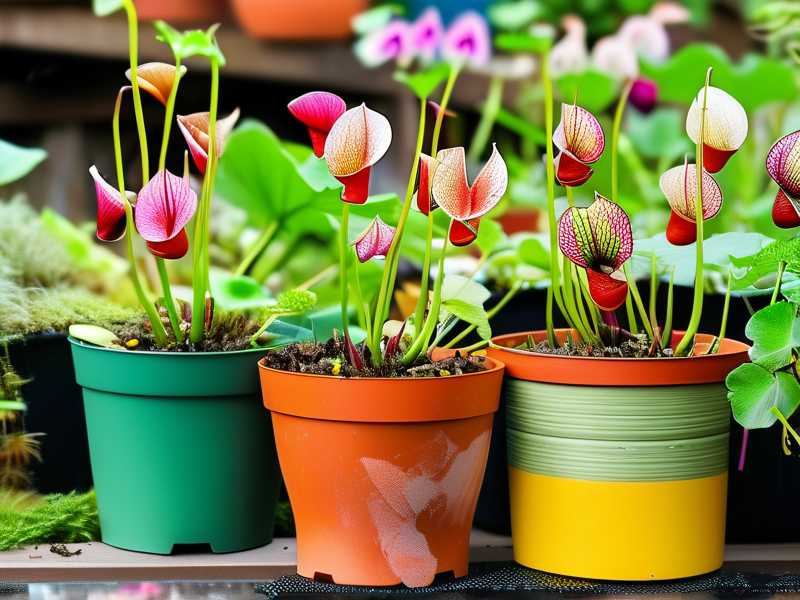
The third plant was my turning point. I finally did proper research. I realized these carnivorous plants need pure water. No minerals. No chemicals. Nothing.
Why Sarracenia Demand Separate Tools
Sarracenia are bog plants. They evolved in nutrient-poor, acidic environments. Their roots are incredibly sensitive. They cannot process minerals or salts like normal plants do.
Think of it this way. Your regular houseplants can handle tap water. They thrive on fertilizer. Sarracenia will die from the same treatment.
The Royal Horticultural Society (RHS) explicitly warns against using tap water for carnivorous plants. Minerals like calcium and magnesium accumulate in the soil. They burn the roots from the inside out. This is not speculation. This is plant biology.
When I contacted experts from the RHS about my dying plants, they confirmed my suspicions. The minerals were killing them slowly. I needed a complete separation of tools. No cross-contamination whatsoever.
Setting Up Your Dedicated Watering Station
Choosing the Right Water
First things first. You need the correct water type. Rainwater is ideal. Distilled water works perfectly. Reverse osmosis water is also excellent. Avoid tap water completely.
I collect rainwater in a dedicated barrel. This barrel is never used for anything else. Not even my vegetable garden. I also keep two gallons of distilled water as backup. Especially during dry spells when rainwater runs low.
The Dedicated Watering Can
Go buy a new watering can. Get one with a narrow spout. Sarracenia need water delivered directly to the soil. You don't want water splashing into the pitchers. That causes rot.
My watering can is bright red. I painted a skull and crossbones on it. This might sound extreme. But it stops my wife from accidentally using it for her succulents. Trust me on this. Labeling is crucial.
Separate Spray Bottles
Sarracenia love humidity. I mist mine daily during hot months. But again, tap water ruins the leaves. White mineral deposits form on the pitchers. They look ugly and damaged.
I bought three spray bottles from a hardware store. All identical. One for distilled water for misting. One for rainwater for deep watering. One spare for emergencies. I marked each one with permanent markers.
I had a bad experience once. I grabbed the wrong bottle. It contained diluted insecticidal soap for my roses. The Sarracenia leaves burned within hours. The plant survived but looked terrible for months. Mistakes happen fast.
Storage Containers
Water storage matters too. Use opaque containers if possible. Sunlight promotes algae growth in clear containers. Algae clog your watering tools. They also introduce unwanted organisms into your Sarracenia soil.
I use two five-gallon food-grade buckets. One for rainwater. One for distilled water. Both have tight lids. I clean them once a month with vinegar solution. Then rinse thoroughly with distilled water.
My Step-by-Step Watering Routine
Step 1: Check Water Quality Daily
Every morning, I check my stored water. I look for any discoloration or floating particles. If something looks off, I discard it and refill. Better safe than sorry.
Step 2: Fill Tools in Designated Area
I have a small plastic tray near my Sarracenia. This is where I fill my watering can. This prevents accidental drips on other plants. It also contains any spillage.
Step 3: Water Deeply, Not Frequently
Here is where most people mess up. They water a little bit every day. That is wrong. Sarracenia need deep watering less often. Their soil should stay moist but not waterlogged.
I water every two to three days. I pour slowly until water runs out the drainage holes. Then I wait. The tray underneath holds about an inch of water. This mimics their natural bog habitat.
Step 4: Clean Tools After Each Use
Do not skip this step. After watering, I rinse my can with distilled water. I wipe the spout clean. I dry it with a dedicated cloth. This prevents bacteria growth.
Every Sunday, I do a deeper clean. I soak the tools in a vinegar-water solution. One part vinegar to ten parts water. Then rinse thoroughly. Then air dry completely.
The Two-Week Observation Period
I decided to document exactly what happened during my first two weeks using dedicated tools only. Here is my real experience.
Day 1-3: Initial Adjustment
My Sarracenia looked okay. Nothing dramatic changed. The soil felt consistently moist. I noticed the pitchers seemed slightly more turgid. That was encouraging.
Day 4-7: Visible Improvement
By day four, I saw new growth emerging. The tips looked green and healthy. The older pitchers stopped browning further. I was cautiously optimistic.
The real breakthrough came on day six. One of the dormant pitchers started producing new leaves. That had not happened in months.
Day 8-10: Color Return
The plants started showing better color. The red veins on the pitchers became more pronounced. The green parts looked deeper. Not pale and washed out anymore.
I compared photos from two weeks prior. The difference was obvious. My wife noticed without me saying anything. That was a big deal.
Day 11-14: Full Recovery Signs
By the end of two weeks, my Sarracenia had produced three new pitchers. Each one was larger than the previous ones. The plant looked healthy. Not perfect yet. But definitely on the right track.
I knew then that my tool separation strategy was working. The proof was right there in the growing pitchers.
Common Mistakes Beginners Make
Mistake 1: Overwatering
90% of indoor plants die from overwatering. This statistic from the American Horticultural Society (AHS) applies even more to Sarracenia. These plants are bog dwellers. They need moisture but they also need oxygen at the roots.
I once kept my Sarracenia sitting in two inches of water constantly. The roots rotted. The plant collapsed within three weeks. The leaves turned yellow. Then brown. Then dead.
The correct approach is to let the water level fluctuate. Keep about half an inch to one inch in the tray. Let it dry out slightly between waterings. This promotes healthy root growth.
Mistake 2: Light Placement Error
This one hurt me badly. I placed my first Sarracenia on a north-facing windowsill. It got bright indirect light. I thought that was enough. It was not.
Sarracenia need full sun. At least six hours of direct sunlight daily. Without this, they stop producing pitchers. They become weak and leggy.
I moved my surviving plant to a south-facing window. The change was immediate. Within a week, new pitchers started forming. The color improved dramatically.
Indoor growers often underestimate light requirements. If you cannot provide enough natural light, invest in grow lights. LED grow lights work well. Position them six inches above the plant. Run them for 12-14 hours daily.
Mistake 3: Wrong Pot Type
This mistake killed my second plant. I used a regular ceramic pot with a drainage hole. The pot retained too much moisture. The roots stayed wet constantly. Root rot set in within weeks.
Sarracenia need plastic pots. Terracotta and ceramic pots leach minerals into the soil. They also dry out too fast. Plastic pots maintain consistent moisture levels. They do not interfere with water chemistry.
I now use only plastic nursery pots. Dark colored ones work best. They absorb heat and keep roots warm. Sarracenia like warm roots. It promotes growth.
Advanced Tips for Serious Growers
Testing Water Quality
I bought a simple TDS meter. Total Dissolved Solids. It measures mineral content in water. My tap water reads 250 ppm. That is lethal for Sarracenia. My distilled water reads 0 ppm. Perfect.
Rainwater from my collection system reads between 5-15 ppm. Acceptable but I still watch it. If readings go above 30 ppm, I switch to distilled water temporarily.
Seasonal Watering Adjustments
Sarracenia have dormant periods. During winter, they need less water. I reduce watering frequency. I keep the soil just barely moist. Not wet.
In summer, they grow actively. The water tray stays full. I water more frequently. Evaporation rates are higher. The plants are drinking more.
Tool Sterilization Protocol
Every two months, I sterilize all my tools. I use a mild bleach solution. One part bleach to twenty parts water. Soak for thirty minutes. Rinse thoroughly with distilled water. Air dry completely.
This prevents any fungal or bacterial contamination. Sarracenia are susceptible to root rot pathogens. A clean tool collection reduces this risk significantly.
Frequently Asked Questions
Can I Use Bottled Spring Water for Sarracenia?
No. Spring water contains minerals. Those minerals come from natural springs. They are still harmful to Sarracenia. Stick with distilled water, rainwater, or reverse osmosis water. Bottled spring water is tap water in disguise for these plants.
How Often Should I Clean My Dedicated Watering Tools?
Clean after every single use. A quick rinse with distilled water takes thirty seconds. Deep clean once a week with vinegar solution. Sterilize every two months. This routine prevents contaminant buildup.
What If I Accidentally Used the Wrong Tool?
Act fast. Stop watering immediately. Flush the soil with plenty of distilled water. Pour several gallons through the pot. This dilutes any minerals that entered. Monitor the plant closely for the next two weeks. Early intervention saves plants.
Final Thoughts from My Experience
Creating separate dedicated watering tools for your sensitive Sarracenia plants is not complicated. It requires organization and discipline. But the results speak for themselves. My plants went from dying to thriving in just two weeks.
I wish someone had told me this when I started. I would have saved three beautiful plants. I would have saved time and money. Most importantly, I would have saved a lot of frustration.
Start with one dedicated watering can. Add a spray bottle. Get proper water storage containers. Label everything clearly. Stick to the routine. Your Sarracenia will reward you with vigorous growth and stunning pitchers.
Remember, these plants are different from everything else you grow. Treat them differently. Give them the pure water they need. Use tools that never touch other plants. Keep everything separate. This is the secret to success with Sarracenia.
I have been using this system for over a year now. My collection has grown to twelve plants. Each one is healthy. Each one produces beautiful pitchers. The system works. I am never going back to shared tools again.





