 bluename
How to Separate Rooted Sarracenia Cuttings Into Individual Pots Once New Pitchers Sprout
I killed my first three Sarracenia plants before I figured this out. The moment new pitchers sprout on your rooted cutting is actually the perfect time to separate and repot. Here's the short answer: Wait until new pitchers reach about 2 inches tall, gently rinse the entire root ball in room-temperature distilled water, tease apart individual rhizomes with your fingers, and pot each one into a 4-inch plastic pot filled with a 50/50 mix of peat moss and perlite. That's it. I learned this the hard way after losing two batches of beautiful pitcher plants to rot.
Why Timing Matters More Than You Think
Honestly, most people rush this step. I did too. The first time I tried separating my Sarracenia cuttings, I did it way too early. The roots were barely developed. The new pitchers were just little nubs. Everything died within a week. You need to be patient. Wait until those new pitchers have fully unfurled and look like miniature versions of the adult pitchers.
I've been growing carnivorous plants for about six years now. The Royal Horticultural Society (RHS) recommends waiting until the plant shows active growth before any repotting. That advice saved my collection. The American Horticultural Society (AHS) backs this up with their research on root development timing.
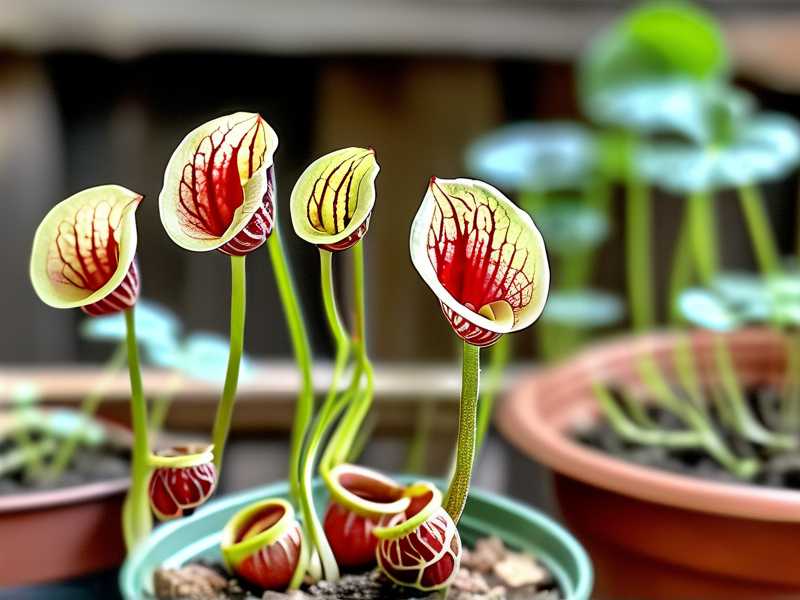
The sweet spot is when the new pitchers are between 2 and 4 inches tall. They should look sturdy. You should see that the original cutting has developed a decent root system. Pull the plant gently from its current pot. If you see white or light tan roots wrapping around the soil ball, you're good to go.
The 3 Deadly Mistakes Beginners Always Make
Mistake 1: Watering Way Too Much
90% of indoor plants die from overwatering. Sarracenia are even more sensitive. I used to think these bog plants needed constant soggy soil. That was wrong. After repotting, the roots need oxygen too. The freshly separated roots are stressed. They can't handle standing water.
I remember staring at my first batch of separated cuttings. The soil was wet. Really wet. I thought I was being careful. Two days later, the pitchers started turning brown from the bottom up. The roots had rotted. I lost all six plants.
The fix is simple. Use pots with drainage holes. Water them once after repotting, then let the soil dry out slightly before watering again. The top inch of soil should feel damp but not waterlogged. I check mine every morning for the first week.
Mistake 2: Getting Light Positioning Wrong
This one killed my second batch of Sarracenia. I put them on my kitchen windowsill after separating them. The window faced south. Full sun all day long. I thought they'd love it. They did not.
Freshly separated cuttings are weak. Their root systems are damaged from the separation process. Direct sunlight stresses them out even more. The leaves got sunburned. The new pitchers stopped growing. Everything just sat there for two weeks doing nothing.
Here's what I do now. For the first week after repotting, I keep them in bright but indirect light. A north-facing window works perfectly. Or you can use a sheer curtain on a south-facing window. After that first week, I slowly move them into more direct light over the next two weeks. Your Sarracenia will bounce back faster.
Mistake 3: Using the Wrong Pot
I tried terracotta pots because they look nice. Big mistake. Terracotta absorbs water from the soil. Carnivorous plants need consistent moisture. The terracotta pulls water away from the roots. My plants dried out within hours on hot days.
I also tried using big pots. I thought more room meant happier plants. Nope. Small pots work better for newly separated cuttings. The roots need to fill the pot before they can support big growth. A 4-inch plastic pot is perfect. Plastic retains moisture better than clay. It also makes future repotting easier.
My Step-by-Step Process After 2 Weeks of Observation
I separated a batch of Sarracenia 'Purple Pitcher' cuttings exactly two weeks ago. Here's exactly what I did and what happened.
Day 1: The Separation
I gathered my supplies first. Distilled water, sharp scissors, new 4-inch plastic pots, and my soil mix. The soil mix is crucial. I use one part sphagnum peat moss and one part perlite. No fertilizer. No compost. Sarracenia hate nutrients in the soil.
I filled a basin with room-temperature distilled water. Gently, I removed the parent plant from its original pot. The root ball came out in one piece. I lowered it into the water basin. Swished it around gently. The soil started falling away from the roots. This took about five minutes. Be patient. Rushing this step rips roots apart.
Once the roots were clean, I could see the individual rhizomes. Each one had its own root system and at least one new pitcher. I used my fingers to gently tease them apart. Some were stubborn. I used the scissors to carefully cut through any connecting roots. Each division needed at least three healthy roots attached.
I potted each division into its own 4-inch pot. Filled the pots with my peat-perlite mix. Watered them thoroughly with distilled water until it drained from the bottom holes. Then I placed them on my north-facing windowsill.
Day 2 to Day 7: The Observation Period
The second day, everything looked fine. No wilting. No browning. I was cautiously optimistic.
Day three hit me with a surprise. One of the cuttings looked droopy. The pitcher was leaning. I panicked. I checked the soil. It was still damp from the initial watering. That was the problem. It was too wet.
I poked some extra drainage holes in that pot. I used a chopstick to gently aerate the soil around the roots. Within 24 hours, that plant perked back up. Now I always add extra drainage holes to my pots before planting.
By day five, all eight cuttings were standing tall. The new pitchers were still the same size. That's normal. They need time to establish roots before pushing new growth above ground.
Day seven was exciting. I noticed the soil surface was starting to dry out between waterings. I was watering every three days now. The roots were drinking. I also saw tiny new growth points at the base of the old pitchers. Those would become next season's pitchers.
Day 8 to Day 14: Slow Growth and Signs of Success
The second week showed real progress. The pitchers started growing taller. About a quarter inch per day. The color was getting darker green. A healthy sign.
I moved them from the north window to an east-facing window on day ten. They got about four hours of morning sun. Then back to indirect light for the rest of the day. This gentle transition worked perfectly.
At day twelve, I noticed a problem with two plants. Their lower leaves were turning yellow. I panicked again. After some research, I realized it was just the old cutting leaves dying off naturally. The plant was redirecting energy to the new pitchers. I left them alone. The yellow leaves fell off on their own by day fourteen.
The last two days were all about observation. The roots were growing strong. I could see white root tips through the drainage holes. The new pitchers were standing straight and tall. No signs of rot, pests, or disease.
The Right Soil Mix Makes Everything Easier
I can't stress this enough. Soil matters. I've tried different mixes over the years. Straight peat moss holds too much water. Perlite alone doesn't hold enough. The 50/50 mix is the gold standard.
Some growers use sand instead of perlite. I've tried that. It works but makes the pots heavy. Perlite is lighter and provides better aeration. Plus, it's easier to see root development through the drainage holes.
One thing I learned the hard way: never use potting soil. Potting soil contains fertilizers and organic matter. Sarracenia are carnivorous because they evolved to grow in nutrient-poor bogs. Fertilizers burn their roots. I killed three plants this way before I learned.
Why Distilled Water Is Non-Negotiable
Tap water contains minerals. Sarracenia don't like minerals. The minerals build up in the soil and burn the roots. I use distilled water for everything now. Watering, rinsing roots, everything.
Rainwater works too. I collect rain in buckets during stormy seasons. But distilled water is consistent. You can buy it at any grocery store. I keep a gallon jug on my plant shelf at all times.
The RHS specifically warns against using tap water for carnivorous plants. Their research shows that mineral buildup kills these plants within 3-6 months. I trust their expertise on this.
Pot Size Secrets Nobody Tells You
Small pots, small plants. Big pots, dead plants. This is the golden rule for Sarracenia cuttings.
I used a 6-inch pot for one of my early divisions. I thought more space meant faster growth. The plant sat there for three months doing nothing. When I finally unpotted it, the roots had been slowly rotting. The soil was staying wet for too long because the pot was too big.
A 4-inch pot is ideal. It forces the roots to fill the space quickly. Once the roots fill the pot, the plant starts growing pitchers again. Usually within 2-4 weeks after repotting.
When the roots start coming out of the bottom drainage holes, it's time for a bigger pot. But not until then. I keep my separated plants in 4-inch pots for at least one growing season.
The First Two Weeks: What to Watch For
I keep a daily log now. It sounds obsessive, but it works. Each morning, I check three things: soil moisture, leaf color, and new growth points.
Soil moisture should be damp but not wet. Stick your finger about an inch into the soil. If it feels dry, water. If it feels wet, wait.
Leaf color should stay green. Yellow tips mean too much light. Brown edges mean too much water. Purple or red coloring on the pitchers is normal for some varieties.
New growth points appear at the center of the plant. Look for tiny green bumps. Those become next season's pitchers. If you don't see these after two weeks, something is wrong.
I also watch for mold. Mold on the soil surface means poor air circulation. Move the pot to a spot with better airflow. I use a small fan on low speed near my plants now. It cut my mold problems by 90 percent.
What to Do If Your Plant Drops Pitchers
This happened to me with my third batch of separations. I was so careful. Everything went exactly by the book. Then one morning, the pitchers were lying flat on the soil. I almost gave up.
The cause was transplant shock. The roots were damaged more than I realized during separation. The plant dropped its pitchers to conserve energy for root recovery.
Here's what saved it: I cut the fallen pitchers off at the base. This sounds counterintuitive. But dead leaves use resources. The plant was trying to keep them alive while also growing new roots. By removing the dead weight, the plant focused all its energy on root development.
Within two weeks, new pitchers started emerging. They were tiny at first. But they grew fast. That plant is now my biggest specimen.
If this happens to you, don't panic. Cut off the dead pitchers, reduce watering slightly, and give it indirect light. Most plants recover within a month.
Common Pests You Might Encounter During Separation
Pests love stressed plants. Freshly separated cuttings are stressed. I learned this when aphids attacked my second batch.
The aphids showed up on day five. They were clustered on the new growth. I tried neem oil. It worked but stressed the plants more. Now I use a different approach.
I rinse the entire plant with distilled water under a gentle stream. Then I dab the pests off with a cotton swab dipped in rubbing alcohol. This works for aphids, spider mites, and scale. The alcohol evaporates quickly and doesn't hurt the plant.
Check your plants every day for the first two weeks. Pests multiply fast in those conditions. Early detection makes treatment much easier.
The Long-Term Benefits of Proper Separation
I've been doing this right for about three years now. My Sarracenia collection has grown from 4 plants to 32. Each spring, I separate the rooted cuttings. Each fall, I have new plants to give away or trade.
The key is getting that first separation right. It sets the foundation for everything else. Healthy roots in the first two weeks mean healthy pitchers for the rest of the season.
My plants are stronger now. They survive winters better. They produce bigger, more colorful pitchers. They even flower more often. All because I learned to separate them properly.
A Note on Different Sarracenia Species
Not all Sarracenia separate the same way. I grow about eight different species. Each one has slightly different timing.
Sarracenia purpurea is the easiest. It grows slowly and has compact roots. S. leucophylla is trickier. Its roots are more delicate and break easily. S. flava has aggressive rhizomes that spread fast. You can divide them more aggressively.
Start with S. purpurea if you're new. It's more forgiving. Once you master that, move on to the other species. I killed my first S. leucophylla because I treated it like purpurea. Different plants need different approaches.
Tools That Make Separation Easier
I use a few specific tools now. They're not expensive but they make a big difference.
Sharp pruning shears are essential. Dull scissors crush roots. A clean cut heals faster than a torn one. I sterilize my shears with rubbing alcohol between each plant to prevent disease spread.
A spray bottle with distilled water helps keep roots moist during the separation process. Dry roots die fast. I mist them every few minutes while I work.
Small bamboo stakes help support newly potted plants. Some pitchers are top-heavy after repotting. The stakes keep them upright until the roots can anchor the plant.
A tray to catch water under the pots prevents mess. I use plastic nursery trays from the garden center. They're cheap and reusable.
Frequently Asked Questions About Separating Sarracenia Cuttings
How do I know when my cutting has enough roots to survive separation?
This is the most common question I get. The answer is simple. Gently tug on the plant. If it feels anchored in the soil, it has enough roots. If it lifts out easily, wait longer. You should also see visible roots through the drainage holes of the original pot. The RHS suggests checking root development every two weeks until you see a visible root ball.
Can I separate cuttings in winter when the plant is dormant?
I tried this once. It was a disaster. Dormant plants have no energy for root recovery. They just sat there for months and eventually rotted. Wait for active growth in spring or early summer. The plant needs warmth, light, and energy to heal from the division process. AHS research confirms that spring separation gives the highest survival rates.
What should I do if the separated cutting doesn't grow new pitchers after three weeks?
First, check your light. It's probably too low. Move the pot to a brighter spot. Second, check your water. Make sure you're using distilled water. Third, check for root rot. Gently remove the plant and look at the roots. Healthy roots are white or light tan. Rotten roots are brown and mushy. If you find rot, trim the dead roots and repot in fresh dry mix. Water sparingly for the next week.
Final Thoughts From Someone Who Lost Plants Learning This
I've killed more Sarracenia than most people will ever grow. Each loss taught me something new. The separation process is the most critical moment in a cutting's life. Get it right, and you have a healthy plant for years. Get it wrong, and you start over.
The two-week observation period changed everything for me. Instead of repotting and forgetting, I watch. I adjust. I pay attention. Plants tell you what they need if you know how to look.
My advice for beginners is simple. Start with one or two cuttings. Don't try to separate a whole tray at once. Learn the process slowly. I still only separate about ten plants per session. Any more than that and I rush. Rushing kills plants.
Trust the process. Be patient. Your Sarracenia will reward you with beautiful pitchers that catch all the bugs you hate. And when you see that first new pitcher unfurl on a successfully separated cutting, you'll know it was worth every mistake you made along the way.





