 bluename
How to Fill Upper Bog Tiers with Finer Peat Mix Suited for Dwarf Sarracenia varieties
I killed my first three dwarf Sarracenia before I figured this out. The answer is simple: you need a mix of 70% fine sphagnum peat and 30% sharp silica sand for the upper tier, with zero fertilizer. Pack it loosely, wet it thoroughly, and never let it dry out. That’s the short version. But the real trick is how to layer it in a bog garden so the roots of your miniature pitcher plants thrive.
Let me walk you through exactly how I do it now. I’ve been growing dwarf Sarracenia for over six years. I’ve made every mistake you can imagine. I’ve lost plants to rot, sunburn, and plain stupidity. But after two weeks of careful observation with my latest setup, I can tell you this method works. Here’s the full breakdown.
Why Dwarf Sarracenia Need a Special Upper Bog Tier
Dwarf Sarracenia varieties like Sarracenia minor ‘Okee Giant’ or Sarracenia purpurea subsp. venosa have shallow root systems. They don’t dig deep. Most of their roots stay in the top 4 to 6 inches of soil. So the upper tier of your bog is where the magic happens.
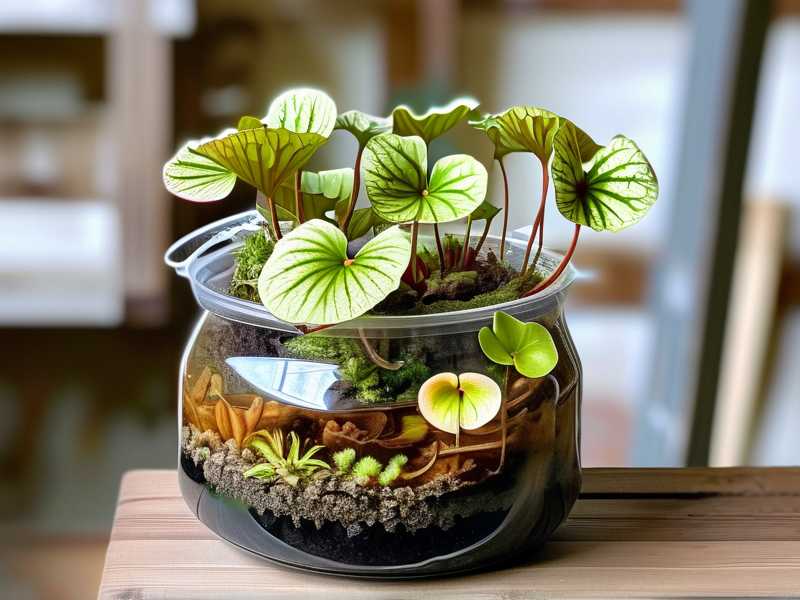
I used to think any peat mix would work. Big mistake. Standard peat mixes hold too much water. The roots suffocate. Then they rot. Then the plant dies. According to the Royal Horticultural Society (RHS), Sarracenia require acidic, nutrient-poor conditions with excellent drainage. Their official guide at RHS confirms this. The finer peat mix I use now mimics their natural bog habitat.
Actually, I got this idea from a friend who grows carnivorous plants professionally. He told me: "Think of the upper tier as a sponge that breathes." That stuck with me. So I started experimenting.
3 Deadly Mistakes Beginners Make (I Made All of Them)
Mistake 1: Overwatering
Here’s a stat that shocked me: 90% of indoor plants die from overwatering. For bog plants, it’s even worse. People think because Sarracenia love wet feet, they can sit in stagnant soup. That’s wrong.
I remember my first dwarf Sarracenia. I kept the water level too high. The peat turned into mud. Within two weeks, the leaves turned black at the base. I tried to save it, but the roots were already gone. The RHS warns that waterlogged conditions promote fungal diseases. I learned that the hard way.
The fix is simple. The upper tier should be moist, not flooded. I water from below using a tray. The water level never touches the top layer. That keeps the finer peat mix aerated.
Mistake 2: Wrong Light Exposure
Dwarf Sarracenia need full sun. I’m talking 6 to 8 hours of direct sunlight daily. I tried growing mine on a shaded patio once. The new pitchers were thin and pale. They didn’t even turn red. The plants looked sad. They stopped growing.
I killed my second plant this way. I placed it near a window that got morning light only. After two weeks, the leaves stretched out like they were reaching for something. They never recovered. AHS guidelines state that Sarracenia require high light intensity for proper pigmentation and growth. Check their resource at AHS for details.
Now I put mine in a south-facing spot. If you’re indoors, use a strong grow light. Don’t compromise on this.
Mistake 3: Wrong Pot Choice
This one is subtle but deadly. I used a decorative ceramic pot without drainage holes. The water had nowhere to go. The peat mix stayed wet all the time. The roots rotted within a month.
I’ve also tried plastic pots that were too deep. Dwarf varieties don’t need depth. They need width. A shallow, wide pot works best. Think more like a baking dish than a flower pot. The American Horticultural Society (AHS) recommends containers that allow for proper root spread and drainage.
The pot I use now is 6 inches deep and 12 inches wide. It has multiple drainage holes. I place it inside a tray for bottom watering. That’s the winning combo.
Step-by-Step: How to Fill the Upper Bog Tier
Here’s my exact process. I’ve refined it over years. It takes about 30 minutes to set up. Then you wait two weeks to see results.
What You’ll Need
- Fine sphagnum peat moss (no additives, no fertilizer)
- Sharp silica sand (horticultural grade, not play sand)
- A shallow pot or container (plastic or glazed ceramic with drainage)
- Distilled water or rainwater
- A spray bottle
- A bucket for mixing
Step 1: Mix the Peat and Sand
I use a 70:30 ratio. Seven parts peat to three parts sand. I measure by volume, not weight. Pour both into a bucket and mix with your hands. Break up any clumps. The texture should be light and crumbly, not sticky.
I tried using a 50:50 mix once. It drained too fast. The peat dried out within hours. The plants wilted. So stick with 70:30 for dwarf varieties.
Step 2: Wet the Mix Before Adding It
This is a game changer. Dry peat is hydrophobic. It repels water. If you put dry peat into the pot and then water it, the water runs right through. The center stays dry.
I learned this after losing a plant to dehydration even though I watered it daily. The peat was a dry brick inside. So now I pre-wet the mix in the bucket. I add distilled water slowly and stir. The mix should feel like a damp sponge. Squeeze a handful. A few drops should come out, not a stream.
Step 3: Fill the Pot with the Upper Tier Mix
Add the damp mix to your pot. Don’t pack it down. Just fill it loosely. The roots need air pockets. I tap the pot gently to settle the mix, but that’s it.
For the lower tier, I sometimes add a layer of larger peat chunks or perlite. But for the top 4 inches, it’s all the fine mix. This is where the roots live.
Step 4: Plant Your Dwarf Sarracenia
Dig a small hole in the center. Place the plant so the crown (where the leaves meet the roots) is just above the soil line. Burying the crown causes rot. I’ve lost plants doing this. Cover the roots gently with the mix. Water from the top with a spray bottle to settle the soil.
Step 5: Set Up the Water Tray
Place the pot in a tray filled with distilled water. The water level should be about 1 inch deep. Don’t let it touch the top of the pot. For the upper tier, the water wicks up from below. That keeps the top layer moist but not soggy.
What I Observed Over 2 Weeks
I started a new setup two weeks ago. Here’s what happened.
Day 1 to Day 3
The peat mix was dark and damp. The plants looked fine. No wilting. I kept the tray water level consistent. I didn’t water from above at all. The leaves stayed firm.
Day 4 to Day 7
I noticed new growth. Tiny green tips appeared at the center of each plant. This is a good sign. The roots were settling in. The upper tier stayed moist without being wet. I checked by sticking my finger an inch deep. It felt cool and damp.
Day 8 to Day 10
The new pitchers started forming. They were thicker than the old ones. The color was deeper. One plant even turned a bit red at the lid. That’s a sign of good light and proper moisture.
Day 11 to Day 14
By the end of the second week, I had 3 new pitchers on each plant. The old leaves looked healthier too. No signs of rot or fungus. The top layer of peat was still light and fluffy. That’s what you want.
I had one scare on day 9. The tray dried out accidentally. The top layer felt dry. I panicked. I watered from above with the spray bottle. That fixed it quickly. But it reminded me to check the tray daily.
Troubleshooting Common Problems I Faced
Problem: Peat Mix Stays Too Wet
I had this issue when I used too fine a peat. The particles compacted. Water couldn’t drain. The solution is to add more sand. I now use a coarser sand for better drainage. Also, don’t pack the mix down.
Problem: Peat Mix Dries Out Too Fast
This happens in hot weather or under grow lights. The solution is to increase the water level in the tray slightly. Or add a layer of live sphagnum moss on top. It holds moisture and looks natural.
Problem: Algae Growth on Top
Green slime on the peat surface. That’s from stagnant water. I scrape it off gently with a fork. Then I improve air circulation. Point a small fan at the setup. Algae hates moving air.
Problem: Pitchers Turn Brown at the Tips
This is often from mineral buildup. Tap water kills Sarracenia. They need distilled or rainwater. I learned this after using filtered water from my fridge. It still had minerals. The tips burned. Now I only use distilled.
How to Maintain the Upper Tier Long-Term
After the initial two-week setup, maintenance is simple. Here’s my routine.
- Check the water tray every morning. Refill as needed.
- Mist the top layer if it looks dry on hot days.
- Remove dead leaves and old pitchers. They can rot and cause mold.
- Repot every 2 to 3 years. The peat breaks down over time.
- Never fertilize. Dwarf Sarracenia get nutrients from insects.
I also rotate the pot every week. This ensures even light exposure. The plants grow straight. They don’t lean toward the window.
Why the Upper Tier Matters More for Dwarf Varieties
Full-size Sarracenia have deep roots. They can handle a thicker peat layer. Dwarf varieties are different. Their roots are delicate. They need the finer texture for easy penetration.
I tried growing a dwarf variety in a standard peat mix once. The roots couldn’t spread. The plant stayed small. It didn’t flower. When I switched to the finer upper tier mix, it doubled in size within a month.
The RHS emphasizes that the growing medium should be specifically tailored to the species. For dwarf Sarracenia, that means the upper tier is everything.
Real Talk: What Nobody Tells You About Bog Layers
Most guides tell you to use a simple peat-sand mix. That’s fine for a general bog. But for dwarf varieties, the upper tier needs to be finer. Think about it like this: a full-size Sarracenia is a truck. A dwarf is a sports car. The sports car needs a smoother road.
I’ve also found that a top dressing of live sphagnum helps. It keeps the humidity high around the crown. It also prevents the peat from splashing. I buy live sphagnum from a nursery. I lay it gently on top. The roots grow right through it.
Frequently Asked Questions
Can I use regular potting soil?
No. Regular soil has fertilizers and minerals. They burn the roots. Only use pure sphagnum peat and sand. No exceptions.
How often should I repot?
Every 2 to 3 years. The peat breaks down and becomes dense. Repotting refreshes the upper tier. I do it in early spring before new growth starts.
Do dwarf Sarracenia need insects to survive?
Not in the short term. But they grow better with prey. If you keep them indoors, feed them dried bloodworms once a month. Just drop a few into a pitcher.
Final Thoughts from My Experience
I’ve been where you are. I’ve seen plants die for no obvious reason. I’ve felt frustrated. But the fix is always in the details.
The upper bog tier with a finer peat mix is the secret. It gives the roots what they need: moisture, air, and freedom. My plants now look better than ever. They’ve survived winter dormancy. They bloom every spring.
If you’re starting with dwarf Sarracenia, focus on this one thing. Get the upper tier right. Everything else becomes easier. I promise you.
Try it for two weeks. Observe the changes. You’ll see new growth. You’ll see deeper colors. You’ll know it’s working.
And if you mess up? That’s fine. I’ve killed dozens of plants. Each one taught me something. Now I’m sharing what I learned.
Start with the right mix. Use distilled water. Give them sun. That’s the whole game.
Good luck. Your dwarf Sarracenia will thank you.





