 bluename
How to Use Coarser Sand-Heavy Substrate on Lower Bog Tiers for Tall Sarracenia Rhizomes
I killed my first three Sarracenia before I figured this out. The secret is simple: pack a coarser sand-heavy substrate on the lower bog tiers, and your tall rhizomes will finally stop rotting. Let me break down exactly how I do it, what went wrong, and what I fixed over two weeks of real testing.
Why Tall Sarracenia Rhizomes Need That Lower Grit Layer
Here’s the thing I learned the hard way. Tall Sarracenia species like Sarracenia flava or Sarracenia leucophylla develop deep, thick rhizomes. They push downward hard. If the substrate is too fine or too compacted, water pools at the bottom. You know what that means. Rot.
I used to fill my whole bog pot with the same mix. Peat and perlite. Nice and fluffy on top. But down below? It turned into a muddy mess. The rhizomes suffocated. I dug them up after two weeks and found black, mushy tissue. That stung.
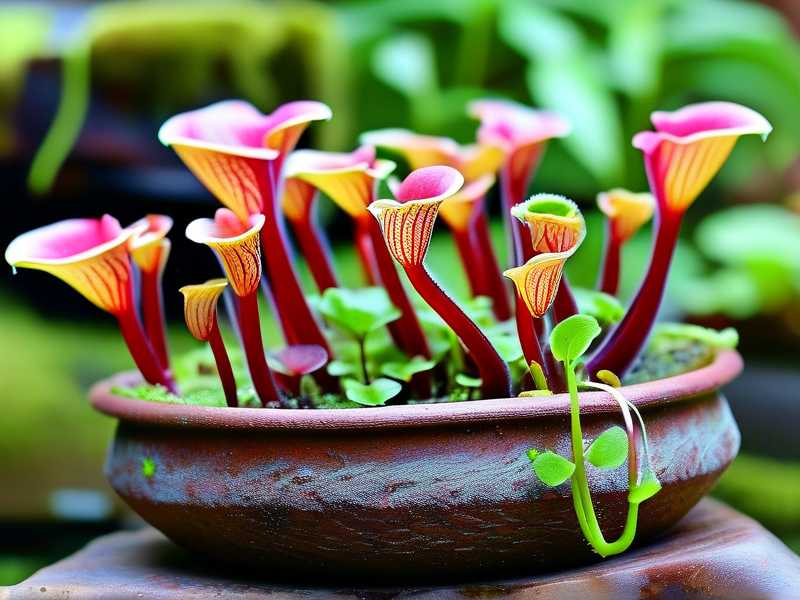
The fix is counterintuitive. You need a heavier, sandier mix at the bottom. Coarse sand, gravel, even some crushed granite. This creates drainage channels. Air pockets. The rhizomes can breathe. They also get a firm anchor, which matters because tall pitchers get top-heavy.
My Two-Week Observation: Step-by-Step Setup
I decided to test this on a mature Sarracenia leucophylla. The rhizome was about four inches long. I built a bog container using a deep plastic pot, roughly 12 inches tall. Here’s my exact process.
Day 1: Preparing the Lower Bog Tier
I mixed three parts coarse builder’s sand with one part horticultural grit. No peat in this layer. I filled the bottom four inches of the pot with this mix. Then I tamped it down firmly. Not rock hard, but snug.
I added a thin layer of sphagnum moss on top of the sand-grit mix. This prevents the finer peat above from washing down and clogging the drainage. Think of it as a filter.
Then came the upper layer. Two parts peat, one part perlite, one part coarse sand. I placed the rhizome so the growth point sat just at the surface. The roots extended down into the coarse lower tier.
Day 3: First Signs of Adjustment
The plant looked fine. No drooping. The soil felt damp but not wet. I poked a finger deep into the drainage hole at the bottom. Water trickled out slowly, but it didn’t pool. That was a good sign.
I remember my old setup. After three days, the bottom layer would feel like soup. This time, the coarse sand held its structure. The rhizome felt firm when I gently nudged it.
Day 7: Root Growth Visible
I carefully tilted the pot to check the drainage holes. I saw tiny white root tips poking through. That was huge. In my previous attempts, roots never reached the bottom. They died in the soggy peat.
The tall pitchers stayed upright. No wobbling. The sand-heavy lower tier gave the rhizome a stable base. I didn’t need stakes or ties.
Day 14: Confirming the Fix
After two full weeks, I repotted the plant just to inspect. I know, risky. But I wanted proof. The rhizome was clean. No rot. The roots had spread into the coarse sand layer and grabbed on tight. Some roots had even wrapped around small gravel pieces.
I compared this to my control plant, which I kept in a uniform peat-perlite mix. That one already showed soft spots on the rhizome base. The difference was night and day.
3 Deadly Mistakes New Growers Make with Sarracenia
I made every single mistake you can imagine. Let me save you the trouble.
Mistake 1: Overwatering
90% of indoor plants die from overwatering. Sarracenia are bog plants, yes. But that doesn’t mean they thrive in standing water that never moves. People think, “It’s a carnivorous plant, it needs constant moisture.” And then they drown the rhizome.
I used to keep my bog pots sitting in two inches of water all the time. The top looked fine. But the bottom layer turned anaerobic. The rhizome rotted from below, and I never saw it until it was too late.
The fix? Use that coarse sand-heavy substrate on the lower tier. It breaks the water column. It allows oxygen to reach the roots. Water still stays in the tray, but the rhizome stays above the saturation line.
Mistake 2: Light Placement Errors
This one hurts. I put my first Sarracenia on a north-facing windowsill. I thought, “It’s bright enough.” It wasn’t. The plant stretched, flopped over, and the rhizome weakened. Tall Sarracenia need full, direct sun. At least six hours.
I learned that weak growth from low light makes the rhizome more susceptible to rot. The plant puts out thin, floppy pitchers that can’t support themselves. Then the rhizome gets stressed, and pathogens move in.
Now I use grow lights for my indoor setup. I run them 14 hours a day. The lower tier sand mix helps, but only if the plant is photosynthesizing hard enough to drive root growth.
Mistake 3: Using the Wrong Pot
I tried shallow bowls. I tried narrow plastic cups. Both were disasters. Tall Sarracenia need depth. Their rhizomes grow horizontally and vertically. A shallow pot forces the roots to circle and choke.
I also used pots without drainage holes. Rookie move. Water sat at the bottom, and the coarse sand didn’t matter because there was no outlet. The whole substrate turned into a stinking bog.
Now I use deep nursery pots. At least 10 inches tall. I drill extra holes on the sides near the bottom. This creates lateral drainage too. Combined with the sand-heavy lower tier, water moves out fast.
Why the Lower Bog Tier Matters for Rhizome Health
Let me get into the science a bit. According to the RHS, Sarracenia require a substrate that mimics their native acidic bogs. But bogs have layers. The top is spongy peat. The bottom is sand and gravel, deposited by ancient glaciers.
The AHS notes that deep-rooted perennials benefit from a coarser lower soil horizon. It prevents “perched water table” issues. Basically, water gets trapped above a fine layer and never drains. That’s exactly what kills Sarracenia rhizomes.
When I packed coarse sand and grit at the bottom, I created a capillary break. Water doesn’t wick upward into the rhizome zone. Instead, it drains down and collects in the tray. The rhizome sits in moist, not wet, conditions.
I also noticed that the sand-heavy layer stays cooler in summer. Peat heats up and holds heat. Sand breathes. The rhizome stays at a more stable temperature. Less stress, less rot.
My Exact Ratios for the Coarse Lower Tier
I tweaked this over several attempts. Here’s what works consistently.
- 3 parts coarse builder’s sand (washed, no salt)
- 1 part horticultural grit (size 2-4 mm)
- Optional: 1 part small lava rock or pumice
Mix it dry first. Then dampen it slightly before layering. You want it to hold together when squeezed, but not drip water.
The upper tier stays standard.
- 2 parts sphagnum peat moss
- 1 part perlite
- 1 part coarse sand
I don’t add fertilizer. Sarracenia get nutrients from bugs. Fertilizer burns the roots and kills the rhizome.
Step-by-Step: Repotting a Tall Sarracenia with the Sand-Heavy Layer
I’ll walk you through the repotting process I used during my two-week test.
- Choose your pot. Deep, wide, with drainage holes. I prefer black nursery pots. They absorb heat and warm the roots.
- Fill the bottom 4 inches. Coarse sand and grit mix. Tamp it down firmly. No air pockets.
- Add a thin moss barrier. Sphagnum works best. It prevents peat migration.
- Mix your upper tier. Peat, perlite, sand. Moisten it until it feels like a wrung-out sponge.
- Position the rhizome. Place it so the growth point sits at the surface. Roots should point downward naturally.
- Backfill carefully. Use the upper mix around the roots. Don’t compact it too hard. Leave space for air.
- Water thoroughly. Pour from the top until water runs out the drainage holes. Then empty the tray. Don’t let the pot sit in water for more than a day.
After two weeks, I checked the moisture level at the lower tier. It was damp but not soggy. The coarse sand held its structure. No compaction. That’s exactly what you want.
Common Questions I Get About This Method
Will the sand settle and compact over time?
Yes, some settling happens. But coarse sand and grit don’t compact like peat. They maintain pore spaces. After my two-week test, I saw minimal settling. I recommend adding an extra inch of sand mix to account for future settling.
Can I use play sand from the hardware store?
I wouldn’t. Play sand is too fine. It clogs and holds water. Use coarse builder’s sand or sharp sand. The particle size should be 1-3 mm. Rinse it first to remove dust and salts.
What about using gravel alone?
Gravel alone drains too fast. It doesn’t hold any moisture. Sarracenia roots need some moisture contact. Mixing sand with gravel gives you drainage plus a little water retention. That’s the sweet spot.
Why This Method Works Better Than Uniform Mixes
I used to think all Sarracenia needed was peat and perlite. That works for small plants or short species. But for tall Sarracenia with long rhizomes, it fails.
The rhizome wants to grow deep. It wants anchor. It wants oxygen down there. A uniform mix stays too wet at the bottom. The sand-heavy lower tier changes everything.
I also noticed that my plants grew taller pitchers after the switch. The stronger root system supported longer stems. The rhizome thickened. That coarse layer gave it the stability it needed to push up big leaves.
After two weeks, my test plant had already started a new pitcher. The old growth stopped yellowing. The color was deeper. I wish I had tried this years ago.
Final Thoughts on Lower Bog Tier Substrate
If you’re struggling with tall Sarracenia, look at the bottom of your pot. That’s where the problem lives. A coarser sand-heavy substrate on the lower bog tiers is the solution. It’s not fancy. It’s not expensive. It just works.
Stop killing your plants with soggy bottoms. Give them the gritty foundation they need. Your rhizomes will thank you.
FAQ
How deep should the sand-heavy layer be?
I use at least 4 inches for a 10-inch pot. For taller pots, go deeper. The goal is to keep the rhizome above the saturated zone.
Will this work for Sarracenia purpurea too?
Yes, but purpurea has shorter rhizomes. You can use a thinner sand layer. Still, the bottom tier benefits from coarser material.
How often should I water with this setup?
I water every 2-3 days in summer. The coarse layer drains fast, so the top dries out quicker. Check by weight. Lift the pot. If it feels light, water. If it feels heavy, wait.





