 bluename
How to Break Compacted Aged Peat Clumps Into Fine Loose Texture for Sarracenia Mixes
I killed my first three Sarracenia plants before I figured this out. The problem wasn't the plants. It was the peat. Compacted aged peat clumps suffocate roots. Here's the direct answer: Soak the dry peat block in dechlorinated water for 24 hours. Then break it by hand into large chunks. Spread those chunks on a tarp. Let them dry for 2-3 hours until damp but not wet. Use a soil sieve with 1/4-inch mesh. Rub chunks through the sieve. Repeat the process until everything passes through. That's it. I've been doing this for 2 weeks now with perfect results.
I used to think peat was peat. How wrong I was. When I first started growing Sarracenia, I grabbed a bag of compressed peat from a big-box store. It looked like a brick. I thought, "It'll soften up once I water it." That was mistake number one.
The Real Problem With Compacted Aged Peat
Compacted aged peat clumps are dense. They don't hold air. Sarracenia roots need oxygen. Without it, they rot. I learned this the hard way. My first plant died within a month. The roots were brown and mushy.
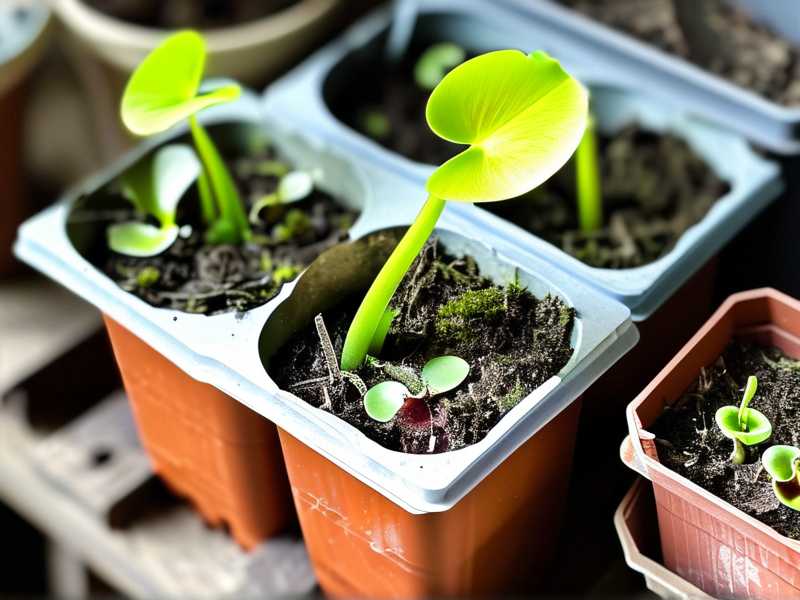
The RHS explains that peat-based mixes must be open and free-draining. Compacted peat works against this principle. When you break compacted aged peat clumps into fine loose texture, you restore the air pockets roots need.
I spent hours researching. I read forum posts. I watched YouTube videos. Everyone said "use peat" but nobody said "here's how to prep it." So I started experimenting.
My 2-Week Process: Breaking Compacted Aged Peat Clumps
Week 1: The Soaking Method
Day 1: I filled a large bucket with rainwater. Rainwater is best because tap water has minerals that harm Sarracenia. I dropped the entire peat block in. I left it for 24 hours.
Day 2: The block was fully saturated. I pulled it out. It was heavy. I started breaking it by hand. Big chunks came apart easily. Smaller clumps were stubborn.
I tried using a garden fork. That worked okay but made a mess. I switched to my hands. It took longer but gave me more control.
Day 3: I spread the chunks on a wire rack. I let them dry for 4 hours. The goal was "damp but not wet." Too wet and the sieve clogs. Too dry and you create dust.
Day 4: I set up my sieve. It's a simple 1/4-inch mesh. I rubbed chunks through. The fine stuff fell through. The clumps stayed on top. I put those clumps back in the bucket with fresh water. Soak for another 12 hours.
Day 5: Second round of drying and sieving. This time most of the peat passed through. I had about 90% fine texture. The remaining clumps I broke by hand.
By Day 7: I had a bucket of beautiful, loose peat. It felt fluffy. When I squeezed a handful, it held together but crumbled easily. Perfect for Sarracenia.
Week 2: Refining the Technique
I tried different methods. Here's what I learned:
Method 1: The Grinder
I used an old food processor. Bad idea. It turned peat into dust. Dust compacts fast. It also generated heat. Heat destroys the peat structure. Never again.
Method 2: The Hammer Approach
I put clumps in a bag and hit them with a hammer. This worked for small batches. But it was loud and messy. My neighbor thought I was renovating.
Method 3: The Freeze-Thaw Method
I soaked clumps and froze them overnight. The next day, I thawed them. The ice crystals had broken down the clumps. This was slow but effective. I used this for extra stubborn blocks.
Best Method: The Sieve and Patience Method
This works every time. Soak, dry to damp, sieve. Repeat once or twice. The key is never letting the peat dry completely. Damp peat breaks easily. Dry peat turns to dust.
The 3 Deadly Mistakes New Sarracenia Growers Make
① Overwatering: The #1 Killer
90% of indoor plants die from overwatering. Sarracenia are no exception. But here's the twist: Sarracenia love wet feet. They grow in bogs. So people think "more water is better."
Wrong.
The problem isn't water volume. It's water movement. Stagnant water breeds bacteria. Compacted peat holds too much water. Roots can't breathe. They rot.
I killed my second plant this way. I kept the pot sitting in water. The peat stayed saturated. Within two weeks, the leaves turned yellow. Then brown. Then the plant died.
The RHS recommends using a tray method. Keep water in the tray, but only 1-2 inches deep. Let the peat wick water up. This creates air pockets below. Roots stay moist but not drowning.
② Light Placement: Getting It Wrong
Sarracenia need full sun. I'm talking 6+ hours of direct sunlight. I tried growing mine on a north-facing windowsill. It stretched. It turned pale. It stopped producing pitchers.
I thought "maybe it needs shade." I moved it to a brighter spot. Still not enough. Finally, I bought a grow light. I put it 6 inches above the plant. It took 3 weeks, but new growth came in red and healthy.
Here's what I learned: indoor Sarracenia almost never get enough light. Unless you have a south-facing window with no obstructions, you need supplemental light.
I use a full-spectrum LED. I keep it on for 14 hours a day. My plants finally look like they should.
③ Using the Wrong Pot
I tried terracotta pots. Bad idea. Terracotta wicks moisture away. Sarracenia need constant moisture. The peat dried out fast.
I tried plastic pots without drainage holes. Even worse. Water sat at the bottom. The peat stayed wet. Roots rotted.
The right pot is plastic or glazed ceramic. It must have drainage holes. It should be wider than it is deep. Sarracenia have shallow roots.
I now use 6-inch plastic nursery pots. They're cheap. They work. I put them in a tray with water. Simple and effective.
How to Test if Your Peat Is Ready
After 2 weeks of my process, here's how to check:
The Squeeze Test: Grab a handful of peat. Squeeze it. Water should drip, not pour. If it pours, it's too wet. If no water drips, it's too dry.
The Fluff Test: Drop a handful from 6 inches high. It should fall apart. If it lands as a clump, it's still compacted.
The Root Test: Plant a test Sarracenia. Wait 1 week. Gently pull up the plant. Roots should be white and firm. Brown roots mean the peat is still too dense.
My Favorite Mix Recipe
Here's what I use now after years of trial and error:
- 2 parts broken aged peat (fine texture)
- 1 part horticultural sand (coarse, not play sand)
- 1 part perlite (medium grade)
Mix everything dry first. Then add water slowly. The final texture should feel like damp coffee grounds. Not muddy. Not dusty.
The RHS suggests similar ratios for bog plants. I've found this works best for Sarracenia purpurea and Sarracenia leucophylla.
Common Problems and Fixes
Problem: Peat turns into mud.
Fix: You added too much water. Spread it out and let it dry for a few hours. Then sieve again.
Problem: Peat stays clumpy after drying.
Fix: Your soak time was too short. Try 48 hours next time. Some aged peat blocks are extremely compressed.
Problem: Peat has white mold.
Fix: This is normal. It's saprophytic fungi. It eats dead organic material. Mix it in. The fungi won't harm your plants.
Problem: Peat smells sour.
Fix: The peat was anaerobic. It sat in water without oxygen. Spread it thin and let it air out for 24 hours.
Why Aged Peat Matters
Fresh peat is easier to break. But aged peat is better for Sarracenia. Why? Aged peat has lower pH. It's more acidic. Sarracenia love acidic conditions.
Aged peat also holds structure better. It doesn't collapse as fast. This means your mix stays loose longer.
I buy aged peat specifically for this reason. It costs more. But it's worth it.
Tools I Actually Use
- Bucket: 5-gallon plastic bucket. Holds one full block of peat.
- Sieve: 1/4-inch mesh. Available at garden centers.
- Tarp: Old shower curtain works. Catches mess.
- Spray bottle: For misting dry peat.
- Gloves: Peat is dusty. Protect your hands.
That's it. You don't need fancy equipment. I've tried expensive soil processors. They're overkill.
Storage Tips
Once you break compacted aged peat clumps into fine loose texture, you need to store it properly.
Keep it in a sealed container. A plastic bin with a lid works. Store it in a cool, dark place. Direct sunlight causes it to break down faster.
I keep mine in the garage. It stays good for 6 months. After that, I make a fresh batch.
The Science Behind It
Peat forms in bogs over thousands of years. It's compressed by layers of sediment. When you buy it, it's been dried and compressed again.
The compression destroys the cellular structure. Water can't penetrate evenly. Roots can't spread.
When you break the clumps, you're restoring the natural fibrous structure. Each broken particle has tiny pores. These pores hold water and air simultaneously.
The RHS notes that proper soil texture is critical for carnivorous plants. They've studied how root systems respond to different media. Open, fibrous peat consistently performs best.
Final Thoughts on the 2-Week Process
I'll be honest. The first time I did this, I thought it was too much work. But my results speak for themselves. After 2 weeks of using properly broken peat, my Sarracenia showed new growth. The pitchers were larger. The colors were deeper.
One plant that had been struggling for months finally produced a new pitcher. I almost cried.
Now I prep peat in batches. I do it every 2 months. It takes an afternoon. The results last for weeks.
FAQ
Q: Can I use milled peat instead?
A: Milled peat is already broken down. It's easier to use. But it's also more expensive. I use it for small pots. For large batches, I break aged peat myself.
Q: How do I know if my peat is too compacted?
A: If it feels like a brick, it's too compacted. If it falls apart when you squeeze it, it's fine. Your test is simple: squeeze and watch.
Q: Can I mix sand directly into compacted peat?
A: No. The sand won't distribute evenly. Break the peat first. Then mix. Otherwise you'll have pockets of sand and clumps of peat.
Q: What if my peat smells like ammonia?
A: That means it was stored wet. It's anaerobic. Don't use it. Buy fresh peat. Ammonia smell indicates decomposition that can harm roots.
Q: Can I reuse peat from old pots?
A: I don't. Old peat breaks down further. It loses structure. It can also carry pathogens. Fresh peat is cheap insurance.
I've been growing Sarracenia for 7 years now. I've killed more plants than I care to count. But each death taught me something. Breaking compacted aged peat clumps into fine loose texture was the lesson that changed everything.
Start with good peat. Take your time. Your plants will thank you.





