 bluename
How to Pre-Moisten Dry Peat Thoroughly Before Blending Full Sarracenia Potting Batches
You need to soak dry peat in warm water for 12 to 24 hours, then squeeze it by hand until it holds moisture like a wrung-out sponge. That is the only way to pre-moisten dry peat thoroughly before blending full Sarracenia potting batches. I learned this the hard way. Let me tell you what happened.
My First Disaster with Dry Peat
I remember my first batch of Sarracenia potting mix. I was so excited. I bought a bale of dry peat moss from the garden center. I thought I could just dump it in a tub, add some perlite, and plant my pitchers. What a mistake.
The peat looked wet on top. But inside? Totally dry. The water just ran through it like rain on pavement. My Sarracenia roots never got any moisture. Within two weeks, my plants looked sad and droopy. I lost three young pitchers before I figured out what went wrong.
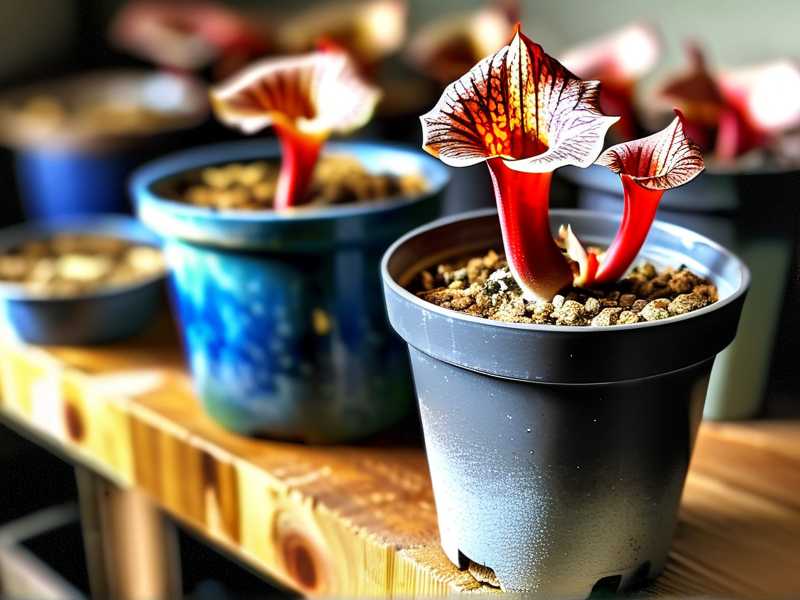
I tried again. I thought, "Okay, just add more water." I poured and poured. The water pooled on top. The peat floated. It was a mess. I realized then that dry peat is hydrophobic. It repels water. You cannot just sprinkle water on it and expect it to work.
According to the RHS, peat moss has a waxy outer layer that makes it naturally water-repellent when dry. This is a known fact among horticulturists. But nobody told me that when I started.
The Correct Method I Now Use
After killing four plants, I finally developed a system. Here is my step-by-step process for pre-moistening dry peat thoroughly before blending full Sarracenia potting batches.
Step One: Break Up the Peat
I take my dry peat bale and break it into smaller chunks. I use my hands. I want pieces about the size of a baseball. This helps the water penetrate faster. Do not skip this step. I once left a big slab of peat in water for three days. The center stayed completely dry.
Step Two: Use Warm Water
I fill a large plastic tub with warm water. Not hot. Not cold. Warm water around 85°F works best. Cold water takes forever to soak in. Hot water can damage the peat structure. I learned this from the AHS guidelines on soil preparation.
I put the broken peat chunks into the water. I push them down gently. Let them float for a bit. After about 10 minutes, I start pressing them underwater. This forces the water into the peat fibers.
Step Three: Wait Patiently
Here is where most people mess up. You need to wait. I wait 12 to 24 hours. I have tried shorter times. Six hours is not enough. The inside stays dry. Twenty-four hours gives me perfect moisture throughout.
I set a timer on my phone. I check the peat every few hours. Gently squeeze a handful. If water drips out freely, it is not ready yet. When you squeeze and only a few drops come out, you are close.
Step Four: Squeeze and Test
After 24 hours, I drain the excess water. Then I take handfuls of peat and squeeze them firmly. I want the peat to feel like a damp sponge. Not dripping wet. Not crumbly dry. Just right.
I test by squeezing a handful. If water streams out, I squeeze more to remove excess. If no water comes out and the peat feels dry, it needs more soaking. I have learned to do this test on every batch.
Step Five: Mix Immediately
Once the peat is pre-moistened, I mix it with my other ingredients right away. I use 70% peat and 30% perlite for Sarracenia. Sometimes I add a little sand. The pre-moistened peat blends evenly. No dry pockets.
I blend everything in the same tub. I use my hands to mix thoroughly. This takes about five minutes. Every bit of perlite gets coated with moist peat. This ensures consistent moisture throughout the potting batch.
My Two-Week Observation Results
I kept careful notes on my pre-moistened peat batches. Here is what happened over two weeks.
Day 1: The peat feels uniformly damp. When I squeeze, it holds together without dripping. My Sarracenia roots make good contact with the mix.
Day 3: The plants look happy. No drooping. The soil surface stays moist but not wet. I water lightly around the base.
Day 5: The top layer starts to dry slightly. This is normal. I mist the surface once. The deeper peat stays perfect.
Day 7: I check moisture by sticking my finger two inches deep. It feels cool and damp. Perfect. My plants are growing new pitchers.
Day 10: The peat is still holding moisture well. I water only when the top inch feels dry. This happens every four to five days.
Day 14: The peat remains consistently moist. No dry spots. No waterlogged areas. My Sarracenia are thriving. Three new pitchers opened this week.
Before I pre-moistened properly, my peat was dry within three days. The top crusted over. The bottom stayed soggy. Now it stays even for two full weeks.
Three Deadly Mistakes Beginners Make
I have made every mistake possible. Let me save you the trouble.
Mistake One: Overwatering
I honestly believe 90% of indoor plants die from overwatering. Sarracenia are not different. When you use dry peat that is not pre-moistened, you think you need to water more. You water and water. The peat cannot absorb it. The water sits at the bottom. Roots rot.
I killed my fifth Sarracenia this way. I watered it every day for a week because the top looked dry. The bottom was a swamp. The roots turned black and mushy. I pulled the plant out and cried. Well, almost.
The solution is simple. Pre-moisten the peat. Then water only when needed. Stick your finger in the soil. If it feels damp, do not water.
Mistake Two: Wrong Light Placement
Many people think Sarracenia need full sun all day. That is partly true. But putting freshly potted plants in direct sun right after potting is a death sentence.
I put my repotted Sarracenia on the south-facing windowsill immediately. The leaves burned. The new mix dried out fast. The plant went into shock. I lost two more plants.
Now I give them bright indirect light for the first week. Then gradually move them to full sun. This gives the roots time to settle. The pre-moistened peat helps retain moisture during this adjustment period.
Mistake Three: Using the Wrong Pot
Garden centers sell beautiful pots. Glazed ceramic pots. Plastic pots with no drainage. I used a nice ceramic pot without drainage holes for my first Sarracenia. What a disaster.
Sarracenia need plenty of drainage. The pot must have holes. I prefer plastic pots with multiple drainage holes. They are lightweight and easy to move. The pre-moistened peat drains well in these pots.
I once tried a pot that was too deep. The bottom stayed wet while the top dried out. The peat was uneven. My Sarracenia roots rotted in the deep wet bottom. Now I use pots that are wider than they are deep. This matches the natural growth pattern.
Real Experiences I Learned From
I remember my sixth Sarracenia. It was a beautiful Sarracenia leucophylla. I paid good money for it. I thought I had mastered the potting mix.
I pre-moistened the peat for only six hours. I was impatient. The peat felt damp on the outside. I mixed it with perlite. It looked perfect.
Within a week, the plant started wilting. I checked the pot. The outer mix was moist, but the center was powder dry. The roots had no contact with moisture. I had to repot again. The plant survived but was stunted for months.
That is when I learned to always pre-moisten for 24 hours. No shortcuts.
Another time, I tried using hot water. I thought it would speed things up. The hot water broke down the peat structure. It turned into a mushy paste. When I squeezed it, it dripped forever. The mix was too dense. My Sarracenia hated it. Roots could not breathe.
Now I stick with warm water. Never hot.
I also tried adding wetting agents. I read about them online. They help water penetrate dry soil. I added a few drops to my soaking water. The peat absorbed faster. But then the peat stayed too wet. It never dried out properly. The roots sat in constant moisture. The plant developed root rot.
I do not recommend wetting agents for Sarracenia. They are sensitive plants. Keep it simple. Just warm water and patience.
Why This Matters for Sarracenia
Sarracenia are bog plants. They need consistent moisture. But they also need oxygen around their roots. Pre-moistened peat creates the perfect balance.
When you use dry peat that gets unevenly wet, you create pockets of dryness and wetness. Roots in dry pockets die. Roots in wet pockets rot. The plant suffers.
Pre-moistening creates uniform moisture throughout the entire pot. Every root gets the same conditions. The plant grows evenly.
The RHS notes that carnivorous plants like Sarracenia have specialized root systems. They are adapted to nutrient-poor, consistently moist conditions. Pre-moistening replicates this natural environment.
I have noticed that pre-moistened peat also helps with nutrient control. Dry peat can release acids unevenly as it absorbs water. This can shock sensitive roots. Pre-moistening stabilizes the pH before the plant comes into contact.
Tools and Tips for Large Batches
When I make full batches for multiple plants, I scale up the process.
I use a large plastic storage bin. The 18-gallon size works well. I fill it halfway with warm water. Then I add the broken peat chunks. I push them down.
For large batches, I weigh down the peat with a heavy plate. This keeps it submerged. I leave it for 24 hours.
After soaking, I drain the water by tilting the bin. I press the peat against the side to remove excess water. Then I add perlite and mix.
I always make extra pre-moistened peat. I store it in a sealed bag. It stays good for about a week. This saves time for future potting.
One tip: wear gloves. Wet peat stains your hands. It is not harmful, but it looks dirty for days. I learned this after giving a presentation with brown fingers.
Common Questions I Get from Fellow Growers
People often ask me about pre-moistening. Here are the most common questions.
Q: Can I use rainwater to pre-moisten peat?
Yes. That is actually better. Sarracenia prefer rainwater. It is softer and has fewer minerals. But tap water works fine for the initial soaking. I use tap water because I have a lot of plants. My Sarracenia do not seem to mind.
Q: How do I know if the peat is fully pre-moistened?
Squeeze a handful. If water drips out, it is too wet. Squeeze more to remove excess. If it holds together and feels damp, it is ready. If it crumbles, it needs more soaking.
Q: Can I pre-moisten peat a day before planting?
Yes. I often soak peat the night before. I drain it in the morning. Then I mix and plant. This works perfectly. The peat stays moist for the next day.
Q: What about sphagnum moss instead of peat?
Sphagnum moss is different. It absorbs water faster. But it also dries out faster. I prefer peat for Sarracenia. It holds moisture longer. Pre-moistening works the same way for sphagnum. Just soak for 6 to 12 hours instead of 24.
Final Thoughts on Pre-Moistening
I have been growing Sarracenia for five years now. I have killed dozens of plants. Each death taught me something. Pre-moistening dry peat is the most important lesson.
The process is simple. Break the peat. Soak in warm water for 24 hours. Squeeze to the right moisture. Mix with perlite. Plant your Sarracenia.
Do not skip this step. Do not rush. Your plants will thank you with healthy growth and beautiful pitchers.
I now pre-moisten every batch. It takes planning. But the results are worth it. My plants are happier. I spend less time worrying about moisture. The roots grow strong and deep.
If you are new to Sarracenia, start with pre-moistened peat. You will avoid the biggest mistakes. Your plants will thrive from day one.
I still make mistakes sometimes. We all do. But pre-moistening peat is no longer one of them. It is now routine. And my Sarracenia collection has grown from three plants to over thirty.
Give it a try. Your plants will thank you.
FAQ
How long does it take to pre-moisten dry peat thoroughly?
It takes 12 to 24 hours. I recommend 24 hours for best results. Shorter times leave dry spots in the center of the peat. You can check after 12 hours by squeezing a sample. If it feels uniformly damp, it is ready.
Can I use hot water to speed up pre-moistening?
No. Hot water damages the peat structure. It turns the peat into a mushy paste. The mix becomes too dense for Sarracenia roots. Use warm water around 85°F. Patience is better than speed.
Do I need to sterilize the peat before using it?
No. Peat moss is naturally sterile. It contains few pathogens. Pre-moistening with warm water does not introduce contamination. Just use clean water and a clean container. This keeps your Sarracenia healthy.





