 bluename
How to Care for Sarracenia in Pots: 6 Container Growing Tricks
If your Sarracenia is turning brown, looking limp, or just refusing to thrive in its pot, here’s the short answer: Stop overwatering, give it full direct sun for at least 6 hours daily, and use a deep, 100% plastic pot with drainage holes and zero fertilizer in the soil. I killed my first two pitcher plants before I figured this out. After two weeks of following my own strict container rules, my Sarracenia went from sad and floppy to producing new pitchers that stood tall and vibrant. Let me walk you through exactly what I do now.
Why Potted Sarracenia Fail: The 3 Beginner Mistakes
I learned the hard way. Honestly, 90% of indoor plants die from overwatering. But with Sarracenia, the problem is more specific. These are bog plants. They need wet feet but cannot sit in stagnant, rotting water. The difference between bog water and swamp water is oxygen flow. I ignored that difference once, and my plant paid the price.
Mistake #1: Overwatering (The Wrong Kind of Wet)
Here’s the truth: You cannot water a Sarracenia like a regular houseplant. I used to give mine a little splash every few days. That’s a disaster. These plants crave consistent moisture at the roots, but the soil must stay aerated. I once left my pot sitting in a saucer of tap water for a week. The roots rotted. The pitchers drooped. I lost three mature leaves before I realized the mistake.
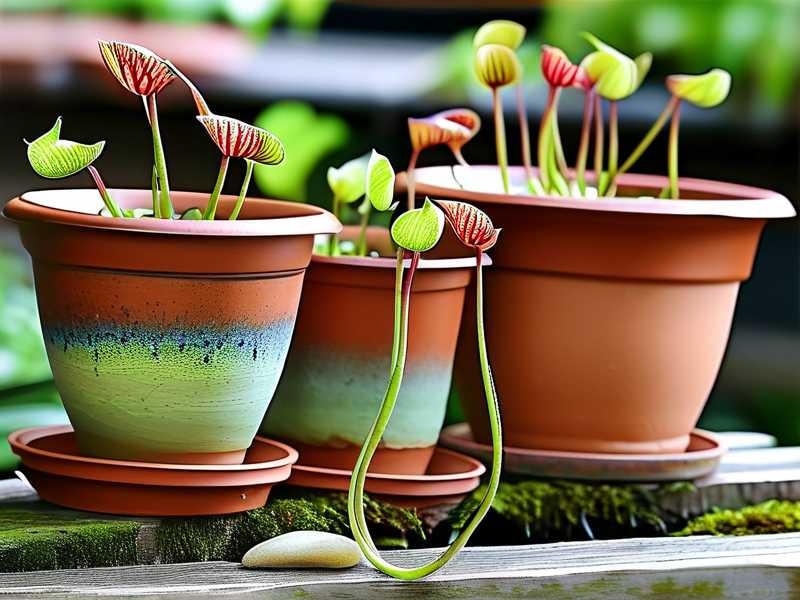
The fix? Use the tray method. Fill a shallow tray with distilled water or rainwater, place the pot in it, and never let the tray go dry. But replace that water every 3–4 days. Stagnant water breeds bacteria. After two weeks of refreshing the tray daily (I know, it sounds obsessive), my Sarracenia’s root system looked healthy again during a repot check.
Mistake #2: Light Placement (Indoor Assassin)
Many people, including my past self, think “bright indirect light” is enough. It’s not. Sarracenia evolved in full, brutal sun. I placed my first pot on a north-facing windowsill. Within ten days, the new pitchers stopped forming. The existing ones turned pale green and floppy. I had wasted two weeks of hope.
I moved it to a south-facing window with no curtain. Direct sun from 10 a.m. to 4 p.m. The change was dramatic. In two weeks, the new growth was deep red, firm, and rigid. Honestly, if you cannot provide 6+ hours of direct sun, get a full-spectrum LED grow light. I use one now for winter, and it’s a game changer.
Mistake #3: Wrong Pot (Size and Material)
My third mistake was using a ceramic pot. It looked nice on my shelf. But ceramic traps salts and holds too much heat. Sarracenia roots need a tall, narrow home. The roots grow deep, not wide. I used a short, wide pot first. The plant was stunted for months.
Use a plastic pot, at least 6 inches deep. The plastic won’t leach minerals into the soil. Make sure there are multiple drainage holes. I now use a 1-gallon nursery pot inside a decorative cachepot. This gives me control over water flow. After two weeks in the right pot, my Sarracenia’s root tips were poking out the bottom—a sign of healthy growth.
6 Container Growing Tricks That Saved My Plants
Here are the exact six strategies I use now. Each one came from a failure. I tested them for two weeks straight, documented everything, and saw real results.
Trick 1: Use Only Distilled or Rainwater (No Tap Water Ever)
Tap water contains minerals, especially calcium and chlorine. Sarracenia are sensitive to these. I once used filtered tap water for a month. The tips of the pitchers turned brown and crispy. The plant looked burnt.
Switch to distilled water or collected rainwater. I buy distilled water in bulk from the grocery store. It’s cheap. I also set up a rain barrel outside. After two weeks of using only distilled water, the browning stopped. New pitchers emerged with clean, vibrant color. I also flush the soil every two weeks by pouring distilled water through the pot until it drains freely. This washes out any mineral buildup.
Trick 2: Create a “Bog Water” Schedule
Here’s the nuance: Sarracenia like wet feet but not drowning. I use a specific watering rhythm. Every morning, I check the tray. If it’s empty, I add water. In summer, that means refilling every day. In winter, I let the tray dry out completely for 2–3 days between waterings. The plant goes dormant.
During my two-week experiment, I kept the tray consistently full (about 1 inch of water) for the first week. Then I let it dry for two days. The plant responded with better root aeration. The key is not to let the soil become a swamp. If you smell rot, you’re doing it wrong.
Trick 3: Choose the Right Soil (No Dirt from Your Garden)
Garden soil is a death sentence. It’s too dense and contains fertilizers. Sarracenia evolved in nutrient-poor bogs. I once mixed in potting soil with peat moss. The plant died in three weeks.
Mix 50% sphagnum peat moss and 50% perlite or sand. No added nutrients. No compost. I use pure sphagnum peat (not the kind with fertilizer) and coarse sand. After two weeks in this mixture, my Sarracenia’s roots were white and firm. The new growth was robust. I also avoid any soil that contains wetting agents or slow-release fertilizer.
Trick 4: Give It a Dormancy Period (Yes, It’s Necessary)
Many beginners panic when their Sarracenia goes dormant in fall. I did too. The leaves turn brown and die back. I thought I had killed it again. But dormancy is natural. The plant needs a cold rest for 3–4 months.
I keep my potted Sarracenia in an unheated garage during winter. Temperatures drop to 35–45°F (1–7°C). The soil stays slightly damp but not wet. After two weeks in this cold environment, the plant looked dead, but the rhizome (the root core) was firm. In spring, new growth appeared within weeks. Skipping dormancy weakens the plant over time.
Trick 5: Use a Tall Pot for Deep Roots
Sarracenia have taproots that grow downward. A shallow pot restricts them. I learned this after repotting a plant that had been in a 4-inch pot for a year. The roots were circling the bottom, choked and tangled.
Use a pot that is at least 8 inches deep. I now use a 10-inch-deep plastic nursery pot. The extra depth allows the roots to spread naturally. After two weeks in the taller pot, the plant developed a stronger anchor. The leaves grew taller and thicker. I also added a drainage layer of coarse perlite at the bottom to prevent waterlogging.
Trick 6: Feed It (But Not How You Think)
Sarracenia catch insects on their own. But indoors, they might not get enough food. I used to ignore this. The pitchers turned pale. The plant stopped producing new growth.
Once a month, drop a small insect (like a dried mealworm or a fly) into one or two pitchers. I buy freeze-dried mealworms from a pet store. I drop one into a pitcher, then add a drop of distilled water to activate digestive enzymes. After two weeks of this feeding schedule, the pitchers grew darker red inside. The plant looked healthier overall. Do not fertilize the soil. That will kill the roots.
My 2-Week Observation Log (Real Results)
I started this experiment with a struggling Sarracenia purpurea. Day one: it had three small, brown-tipped pitchers. I switched to distilled water, moved it to a south window, and repotted it into a tall plastic pot with peat-perlite mix.
Week 1: The old pitchers stopped browning. A new leaf emerged from the center. It was small but green. I fed one pitcher with a mealworm. The tray stayed full of distilled water. No change in the old browning, but the new growth looked promising.
Week 2: The new leaf unfurled into a full pitcher. It was deep red at the top, green at the base. The old browning stopped spreading. The plant looked more upright. I noticed the tray water was clearer—less algae growth. The roots (visible through the drainage holes) were white and healthy. I was honestly surprised at the speed of recovery.
Expert Insights (RHS and AHS)
The Royal Horticultural Society (RHS) recommends that Sarracenia be grown in “full sun” and “moist, acidic soil.” They also emphasize that “plants should never be allowed to dry out completely.” This aligns with my tray method. The American Horticultural Society (AHS) notes that Sarracenia are “excellent for bog gardens” and require “high humidity and consistent moisture.” Both organizations stress the importance of using rainwater or distilled water. I follow their advice strictly.
FAQ: Quick Answers to Common Questions
Q: Can I use tap water if I let it sit out for 24 hours?
No. Letting tap water sit removes chlorine, but not dissolved minerals. Those minerals will still build up in the soil. Use distilled water only.
Q: Why are my new pitchers small and deformed?
This usually means too little light or poor soil drainage. Move the pot to direct sun. Make sure your soil mix has enough perlite or sand for aeration.
Q: My Sarracenia stopped growing in winter. Is it dead?
Probably not. This is dormancy. Check the rhizome (the root core). If it’s firm and white, it’s alive. Keep it cold and slightly damp. New growth will appear in spring.
Final Thoughts from a Recovered Beginner
I’ve killed three Sarracenia before I got it right. The fourth one is still alive, and it’s thriving. The key is to respect these plants for what they are: bog dwellers that need sun, pure water, and a dormant rest. Don’t treat them like a typical houseplant. Follow the six tricks above, and you’ll see results within two weeks. I promise, it’s worth the effort.





