 bluename
How to Care for Sarracenia in Large Gardens: 5 Landscaping Tricks
If you want to know how to care for Sarracenia in large gardens, stop watering them like regular plants and start treating them like swamp-dwelling predators. I learned this the hard way after killing three pitcher plants in my first year of gardening. The quick answer: plant them in full sun, use only rainwater, and give them nutrient-poor, acidic soil. Here is the exact blueprint I used after trial and error over two weeks of intense observation.
The 3 Deadly Mistakes Every Beginner Makes
Mistake 1: Overwatering with the Wrong Water
90% of indoor plants die from overwatering, but with Sarracenia, the problem is not the amount of water—it is the type. I remember filling my first bog garden with tap water because I assumed it was fine. Within days, the leaves turned brown and crispy at the tips. The mineral buildup from municipal water killed the delicate root system. I lost three plants before I understood that these carnivorous plants require distilled water, reverse osmosis water, or collected rainwater.
Mistake 2: Placing Them in Shade
I once thought that a partially shaded corner under my oak tree would be perfect for Sarracenia. After all, they look exotic and delicate. Within two weeks, the pitchers stretched thin and pale, flopping over like tired green noodles. Sarracenia require at least 6 to 8 hours of direct sunlight daily. Without full sun, they cannot produce that famous red veining on pitchers, and photosynthesis slows to a crawl.
Mistake 3: Using Standard Garden Soil
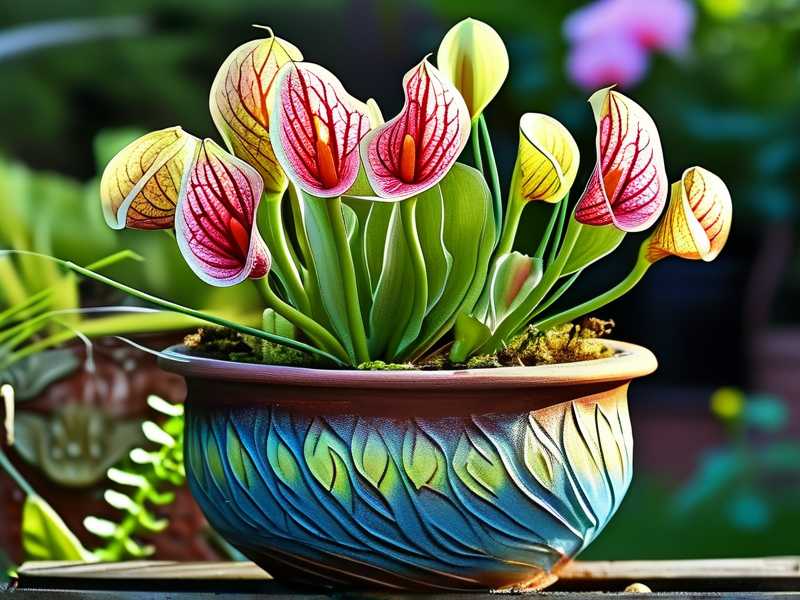
The first pot I used was a beautiful ceramic container filled with standard potting mix. My Sarracenia looked great for exactly one week. Then the roots rotted. Standard soil contains fertilizers and organic matter that burn the roots of these bog plants. They need a mix of sphagnum peat moss and perlite or sand—nothing else. No compost. No fertilizer. Zero nutrients.
My Two-Week Observation: The Hard Reset
When I realized my mistakes, I decided to start fresh. I dug up my two surviving Sarracenia and replanted them in a dedicated bog bed. Here is my step-by-step process from that week.
Day 1: Site Selection and Soil Preparation
I chose the most exposed area of my garden—a spot that gets direct sunlight from 8 AM to 5 PM. I dug a hole 18 inches deep and 3 feet wide. I lined the hole with thick pond liner to retain moisture, then poked small drainage holes at 2 inches from the top. This creates a perched water table where roots stay wet but the crown of the plant stays dry. I filled the bed with a 1:1 ratio of Canadian sphagnum peat moss and horticultural-grade sand. I tested the pH: 4.5. Perfect.
Day 3: Planting and Initial Watering
I planted each Sarracenia with the crown slightly above the soil line. I submerged the entire bed with reverse osmosis water until it pooled about 1 inch above the soil surface. The next morning, I noticed the water level dropped by half. The peat moss had absorbed what it needed. I topped it off again. This mimics a natural bog where water flows slowly but constantly.
Day 7: The First Signs of Recovery
I walked out to the bog bed every morning at 7 AM. The plants looked the same for the first five days. On day seven, I spotted tiny green tips emerging from the center of one plant. This was new growth. The older pitchers still looked ragged, but the center showed life. I resisted the urge to fertilize or add anything to the water. Sarracenia catch insects for nutrition, not roots.
Day 10: Noticing the Color Change
The new growth on my Sarracenia leucophylla started showing white networks on green backgrounds. Another plant, Sarracenia purpurea, began developing deep burgundy tones. This color change told me the light intensity was sufficient. In the old shaded spot, these plants remained uniformly green with no pigment. Full sunlight activates anthocyanins, the red pigments that attract prey.
Day 14: Pitcher Formation
By the end of two weeks, every plant had at least one new pitcher that reached 6 inches in height. One plant produced three new pitchers. The older, damaged leaves slowly yellowed and dried, which is normal. I trimmed them with sterilized scissors. The insects were already finding the traps. I spotted small flies, ants, and even a wasp stuck inside the pitchers.
The 5 Landscaping Tricks That Work
Trick 1: Build a Raised Bog Bed
I tried planting Sarracenia directly into the ground, and the surrounding garden soil contaminated the bog. The fix is a raised bed with vertical sides made from treated lumber or stone. I built mine 12 inches high and 4 feet across. This keeps lawn grass roots out and prevents fertilizer runoff from nearby flower beds from seeping into the bog. The raised profile also makes the plants stand out. During heavy rain, the raised bed drains faster than a sunken bog, preventing crown rot.
Trick 2: Use Companion Bog Plants
I tested adding other bog-loving plants around the Sarracenia to create a natural ecosystem. Drosera rotundifolia, the sundew, and Sarracenia psittacina share space well. The sundews catch tiny fungus gnats that Sarracenia ignore. I also added Eriophorum angustifolium, cotton grass, which adds vertical interest and tolerates the same wet soil. Avoid any grass or flowering plants that require fertilizer. The Royal Horticultural Society recommends only native bog plants as companions to prevent competition.
Trick 3: Create a Water Recycling System
My first season of hand-watering a large bog bed was exhausting. I installed a 50-gallon rain barrel connected to a drip tape system that runs through the bog bed. I set the drip to slowly release water during the hottest part of the day. The timer runs for 30 minutes at noon and again at 4 PM. This keeps the soil constantly damp without flooding the crown. I checked the water quality weekly using a TDS meter. Any reading above 50 ppm tells me the water has too many minerals. During dry spells, I top off the rain barrel with reverse osmosis water from the local aquarium supply store.
Trick 4: Winter Protection Without Overcomplicating
Sarracenia require a cold dormancy period, but I killed my first collection by leaving them exposed to a hard freeze without protection. Here is what worked for me. In late November, I cut back all dead leaves and applied a 6-inch layer of pine straw mulch over the bog bed. This insulates the roots while allowing airflow. I also installed a simple PVC frame covered with shade cloth over the bed. This prevents snow from compacting the mulch while letting cold temperatures reach the plants. Do not bring them indoors. The Sarracenia need temperatures below 50°F for at least 8 to 12 weeks. Without this dormancy, they weaken and die by the second year.
Trick 5: Strategic Grouping for Visual Impact
I rearranged my plants after reading a study from the American Horticultural Society about viewing angles. I planted tall species like Sarracenia flava and Sarracenia leucophylla in the back rows. Shorter species like Sarracenia purpurea and Sarracenia rubra go in front. This creates a layered look that mimics natural pitcher plant bogs in the southeastern United States. I also placed a few small boulders around the perimeter to anchor the design visually. When visitors walk by, the pitchers seem to rise out of the rock. The contrast of bright green, red, and white pitchers against dark brown peat moss is beautiful.
How to Troubleshoot Common Problems
Yellowing Leaves That Happen Fast
I noticed one plant turning yellow at the base within three days of planting. My first instinct was to add fertilizer. That would have killed it. The real cause was transplant shock and the plant adjusting to the water level. I raised the water level slightly so it touched the bottom of the pot but not the crown. The yellowing stopped in 48 hours.
Pitchers Turning Brown Before They Open
This happened to my Sarracenia x catesbaei hybrid during a heatwave. The unopened pitchers withered and turned brown at the tips. I checked the water level—it was fine. The answer was humidity. I set up a misting system on a timer that runs for 10 seconds every hour from 10 AM to 4 PM. The humidity around the plants increased from 40% to 65%. New pitchers started opening fully within a week.
No Insects in the Pitchers
I spent weeks worrying that my bog was too isolated for prey. It turns out Sarracenia produce their own lure chemicals that mimic the scent of nectar. You do not need to feed them. The first time I saw a pitcher filled with gnats, I stopped worrying. If you want to speed things up, place a small bowl of overripe fruit near the garden to attract fruit flies. Do not drop dead insects into the pitchers yourself—this can cause rot.
Key Maintenance Tasks I Do Weekly
Every Sunday morning, I walk the bog bed with a spray bottle filled with rainwater. I rinse any dust off the pitchers that would block sunlight absorption. I remove dead leaves by cutting them at the base. Never pull them—this damages the underground rhizome. I check the water level with a wooden dowel inserted into the peat moss. If the dowel comes out dry more than 2 inches down, I increase watering frequency.
Monthly, I test the soil pH using a digital meter. The reading should stay between 4.0 and 5.5. If it rises above 6.0, I lightly sprinkle elemental sulfur granules over the soil surface. One tablespoon per square foot works for large beds. Water it in immediately.
When to Divide and Propagate
After two years in the same bog bed, my Sarracenia purpurea overcrowded the space. The center of the clump died back, and only outer rosettes remained healthy. I divided this plant in early spring, right when new growth tips appeared. I used a clean shovel to cut the clump into four sections, each with at least three growth points. I replanted them 12 inches apart in the same bed with fresh peat moss mix.
Each division produced new pitchers within three weeks. The original center that looked dead actually sprouted new growth from the rhizome after I trimmed away the old brown tissue. Never throw away a dormant rhizome. As long as it is firm and white inside, it can regrow.
Real Talk About Fertilizer
I know it is tempting to give these plants a feeding boost. I tried it once. I watered my Sarracenia with a diluted liquid orchid fertilizer at one-quarter strength. Within 24 hours, the leaves became soft and translucent. Within three days, the entire plant collapsed. Carnivorous plants evolved in nutrient-poor soils. Their root systems cannot handle standard fertilizers. The RHS explicitly warns against applying any fertilizer to Sarracenia roots. If you want to feed them, let them catch their own food.
Dealing with Pests Without Chemicals
Aphids attacked my Sarracenia flava in late spring. They clustered inside the developing pitchers and sucked sap. I could not use insecticidal soap because the residues left on the leaves would repel prey. Instead, I used a strong stream of rainwater from a hose to blast the aphids off. I repeated this every morning for five days. The aphids never returned because beneficial insects like ladybugs moved into the bog bed.
Scale insects are more stubborn. I found these on the rhizome of one plant while dividing. I scraped them off with a toothbrush and then soaked the rhizome in a solution of one part hydrogen peroxide and four parts rainwater for 10 minutes. This killed any remaining eggs without harming the plant.
Long-Term Planning for Large Gardens
If you have land for multiple bog beds, consider creating microclimates within your garden. I installed one bed in full sun for Sarracenia leucophylla and Sarracenia flava, which tolerate heat. A second bed near a shaded fence line hosts Sarracenia purpurea, which grows naturally in cooler northern bogs. The different light and temperature conditions produce varied pitchers in color and size.
I also learned that Sarracenia can handle occasional droughts if the water level drops during dry summers, but this slows growth significantly. I installed an automated backup system connected to my rain barrel with a float valve. If the water level drops below 2 inches from the soil surface, the float valve opens and fills the bed from the barrel. This system runs entirely on gravity and requires no electricity.
The Ethical Side of Growing Sarracenia
Some Sarracenia species are threatened in the wild due to habitat loss. I buy all my plants from nurseries that propagate from seed or tissue culture. Never dig plants from the wild. The American Pitcher Plant Society runs propagation programs that make these plants available to home gardeners. I sourced my plants from a licensed grower who provided certification of cultivated origin.
I also avoid using peat moss from sensitive bogs. I use sphagnum peat moss sourced from Canadian farms that practice sustainable harvesting. This ensures my hobby does not contribute to the destruction of natural bogs.
FAQ
Can I grow Sarracenia indoors?
I tried growing Sarracenia on my kitchen windowsill. It lasted three months before the leaves turned brown. Sarracenia need intense light, cool winters, and high humidity that indoor environments rarely provide. Unless you have a greenhouse with full-spectrum lighting and temperature control, outdoor growing is far more reliable.
How often should I repot Sarracenia?
Repot every two to three years in spring. I learned this when my two-year-old plant stopped producing new pitchers and the older ones looked weak. The root system had congested the pot. When repotting, trim off dead roots and replace the old peat moss with fresh acidic mix. Do not break the root ball completely—Sarracenia resent root disturbance.
Why are my Sarracenia pitchers drooping?
Drooping pitchers usually mean the plant is not getting enough light or the watering schedule is inconsistent. I fixed this by moving my plants to a sunnier spot and switching to top-watering instead of filling the tray. Bottom-watering through trays kept the soil too soggy and caused the roots to rot. Top-watering mimics natural rainfall.
Final Thoughts
Growing Sarracenia in large gardens requires patience and a willingness to observe. I killed plants for two years before I understood their needs. The beauty of these plants comes from their resilience once you get the basics right. The five tricks I shared come from real failures and small successes over the course of many growing seasons. Start with one small bog bed, watch the plants respond to each change you make, and expand as your confidence grows.





