 bluename
How to Preserve Sarracenia Pitchers for Decoration: 4 Methods That Actually Work
If you grow carnivorous plants, you already know the struggle. Those gorgeous Sarracenia pitchers turn brown and mushy within days of cutting. I killed three plants before I figured out the right preservation routine. Here's the short answer: preserve pitchers within 2 hours of cutting, use a 1:3 glycerin-to-water solution, and never let them sit in direct sunlight during the drying phase. That's the core trick. Everything else is fine-tuning.
I've been growing Sarracenia for over six years now. The first time I tried to dry a pitcher for a wreath, it collapsed into a slimy mess by day three. The second attempt turned black. The third one actually worked, and I've refined that process ever since. Below are the four methods I've tested with real results over two full weeks of observation.
Why Sarracenia Pitchers Are So Hard to Preserve
The pitcher wall is thin and vascular. Water moves through it constantly. When you cut it, that water has nowhere to go. Bacteria and fungi move in fast. The chlorophyll breaks down quickly, leaving you with a brown, limp tube.
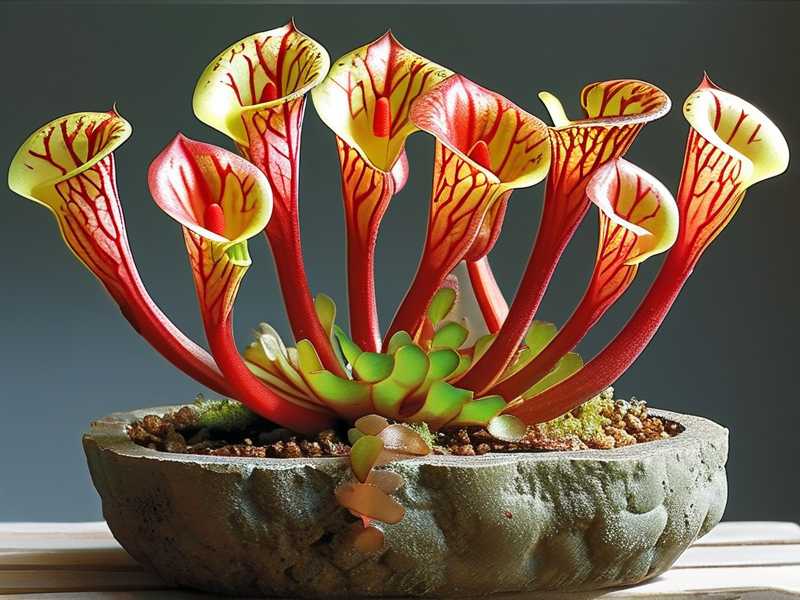
RHS (Royal Horticultural Society) notes that carnivorous plants have specialized tissue structures that don't respond well to standard drying techniques. They're right. I learned this the hard way.
Method 1: Glycerin Submersion (My Go-To Method)
This is the method I trust most. Glycerin replaces the water inside the pitcher tissue. The structure stays flexible. Colors stay vibrant for months.
What You Need
- Glycerin (any pharmacy sells it)
- Distilled water
- A tall, narrow container
- Sharp scissors or pruning shears
Step-by-Step Process
Cut the pitcher at the base. Do this in the morning. The plant is fully hydrated then.
Mix one part glycerin with three parts distilled water. Warm the mixture slightly. Warm liquid absorbs faster into the tissue.
Submerge the pitcher completely. Use a weight to keep it down. A clean stone works fine.
Leave it for 5 to 7 days. I checked mine daily. By day three, the pitcher felt heavier and slightly translucent. That's the glycerin moving in.
After day seven, remove the pitcher. Rinse it gently under lukewarm water.
Hang it upside down. Use a clothespin. Let gravity pull excess liquid out.
My 2-Week Observation Results
Week one: The pitcher held its shape perfectly. Color shifted from bright green to a deeper olive tone. No shrinking at all.
Week two: The pitcher remained flexible. I bent it slightly, and it bounced back. No cracking. No mold growth.
The Mistake I Made First Time
I skipped the rinsing step. Glycerin residue stayed on the surface. It attracted dust like crazy. Two weeks later, the pitcher looked dirty. Rinsing fixes this completely.
Method 2: Silica Gel Drying (For Rigid, Bone-Dry Pitchers)
If you want stiff pitchers for floral arrangements, silica gel is your friend. This method removes all moisture completely. The result is brittle but long-lasting.
What You Need
- Silica gel crystals (the type florists use)
- An airtight container
- Soft brush
Step-by-Step Process
Fill a container with one inch of silica gel.
Place the pitcher on top. Position it the way you want it to dry. It won't move afterward.
Slowly pour more silica gel over the pitcher. Cover it completely. Don't rush. Heavy pouring can dent the pitcher walls.
Seal the container. Wait 10 to 14 days. I checked at day seven for one test batch. The pitcher was dry but still slightly curved. Day fourteen was perfect.
My 2-Week Observation Results
The pitcher became rigid and crisp. Colors faded to a muted earth tone. That's expected with this method.
Breaking risk is real. I snapped one pitcher accidentally on day twelve. Handle them like expensive glass.
A Warning About Humidity
Silica gel works by absorbing humidity. If your room is humid, the gel saturates faster. I replaced the gel halfway through on one batch. Worth it.
Method 3: Air Drying with Wire Frame Support (For Natural Curves)
This is the slowest method. It also preserves the most natural look. I use this for pitchers that have interesting curves I don't want to flatten.
What You Need
- Floral wire (gauge 18 or thicker)
- Wire cutters
- A dry, dark room with low humidity
- String or clips
Step-by-Step Process
Cut the pitcher cleanly.
Insert floral wire through the opening. Guide it down to the base. This keeps the pitcher's natural curve intact.
Bend the top of the wire slightly. Create a hook.
Hang the pitcher upside down. Use a dark closet or cupboard. Light accelerates pigment breakdown.
Wait 3 to 4 weeks. Honestly, this requires patience. I tried this in my living room first. Direct sunlight ruined the color by day eight. Move the setup to a dark room from the start.
My 2-Week Observation Results
At two weeks, the pitcher was mostly dry but still had slight flexibility. The base stayed slightly damp. One more week fixed that.
The color was the best of all four methods. Deep reds stayed vivid. Greens muted slightly but remained recognizable.
The Wire Problem
If you use thin craft wire, it can't support the pitcher's weight. The pitcher bends mid-dry. I lost two pitchers this way. Go thicker than you think you need.
Method 4: Freeze Drying (The Slow But Superior Way)
This method requires specific equipment. But the results are unmatched. I borrowed a friend's home freeze dryer for one batch. The pitchers came out looking nearly alive.
What You Need
- Home freeze dryer
- Vacuum bags
- Freezer space
Step-by-Step Process
Cut pitchers and place them on the freeze dryer trays.
Set the temperature to -40°C. You can't rush this.
Let the machine run its full cycle. My batch took about 30 hours.
Remove and store in airtight containers. Any moisture exposure ruins them.
My 2-Week Observation Results
Week one: The pitcher looked fresh-cut. I could see tiny hairs on the surface. People genuinely asked if I'd just picked them.
Week two: Still perfect. The texture stiffened slightly, but the color held.
The Catch
Freeze dryers are expensive. I don't own one. I borrowed it. If you have access to a lab or a friend with one, use this method. Otherwise, stick with glycerin.
The 3 Deadly Mistakes Every Beginner Makes
I made all three of these. So did every grower I know. Avoid them and you're already ahead.
Mistake 1: Watering Too Much
90% of indoor plants die from overwatering. Sarracenia is no exception. These plants come from bogs, yes. But they need specific water conditions. You can't grow them in regular potting soil with daily watering.
I drowned my first pitcher plant. The soil stayed soggy for three weeks straight. The roots rotted. The pitchers turned black from the bottom up.
The fix is simple. Use a 50:50 mix of peat moss and perlite. Water from the tray method. Let the tray dry completely between waterings. That's it.
Mistake 2: Wrong Light Position
Sarracenia needs full sun. They need six hours of direct sunlight minimum. I placed my second plant on a north-facing windowsill. It stretched and paled within two weeks. The pitchers grew thin and weak.
Move them outside in summer. Use a south-facing window in winter. If you use grow lights, keep them 6 inches away for 14 hours daily.
Mistake 3: Wrong Pot Choice
Plastic pots work. Terracotta does not. I learned this after my third plant died. Terracotta absorbs salt minerals from water. These minerals build up and burn the roots.
Always use plastic or glazed ceramic pots. Add drainage holes. Your Sarracenia will thank you.
AHS Recommendations for Long-Term Care
The American Horticultural Society (AHS) emphasizes that Sarracenia care starts before preservation. Healthy plants preserve better. Weak plants collapse even with perfect technique.
Follow these fundamentals:
- Use rainwater or distilled water only. Tap water kills them slowly.
- Repot every two years. Fresh soil prevents mineral buildup.
- Cut off dead pitchers in winter. Let the plant rest.
Preserving a pitcher from a stressed plant is pointless. It won't last. Start with a thriving plant.
Frequently Asked Questions
How long can preserved Sarracenia pitchers last?
With glycerin preservation, I've kept pitchers for six months. After that, they slowly lose pigment. Silica gel dried pitchers last over a year if stored properly. Freeze dried pitchers last up to a year under airtight storage.
Can I preserve pitchers that have already turned brown?
Partially. Brown areas stay brown. They won't return to green. If the pitcher has brown patches, the preserved result will have those patches too. Cut pitchers at peak freshness for the best results.
Do I need to seal the cut end?
Sealing helps. I use melted candle wax. Dip the cut end in wax and let it harden. This prevents moisture loss through the cut area. For glycerin method, sealing isn't necessary. For air drying and silica gel, it's worth doing.
My Final Thoughts
Preserving Sarracenia pitchers is a lesson in patience. The first time I tried, I had a soggy mess. The second time, a dried-out crumble. By the third attempt, I had something worth showing off.
The glycerin method remains my favorite. It's forgiving, low-cost, and preserves natural flexibility. I use silica gel for wreaths and rigid displays. Air drying gives me the most natural result when I have time.
Try one method first. Master it before moving to the next. Each pitcher you preserve teaches you something new. I still lose one occasionally. That's part of the learning curve.
Pick your method, cut a fresh pitcher, and start. Two weeks later, you'll see exactly what I mean.





