 bluename
How to Rake Away Compacted Old Mulch Layers from Sarracenia Bog Beds Each Spring
Here’s the short answer: Use a garden fork to gently loosen the compacted mulch layer, then hand-rake it away in small sections. Do this early spring before new growth emerges. I’ve been maintaining Sarracenia bogs for over seven years, and I’ve learned the hard way that leaving old mulch in place too long invites root rot. You need to work slowly and avoid damaging the rhizomes hiding just beneath the surface. Check the bed every two days for two weeks to ensure proper aeration.
Why Compaction Happens Over Winter
Winter rain and snow pack down mulch layers. The weight compresses organic material into a dense mat. This mat blocks airflow to the root zone. I noticed this problem when my Sarracenia started yellowing in late March. My first bog bed had a thick layer of aged pine bark that turned into a solid crust by spring. The plants looked fine on top but the roots were suffocating.
The RHS explains that compacted mulch reduces oxygen exchange in boggy soils. This creates anaerobic conditions that favor harmful bacteria over beneficial fungi. It’s a simple problem with a simple solution – break up that crust annually.
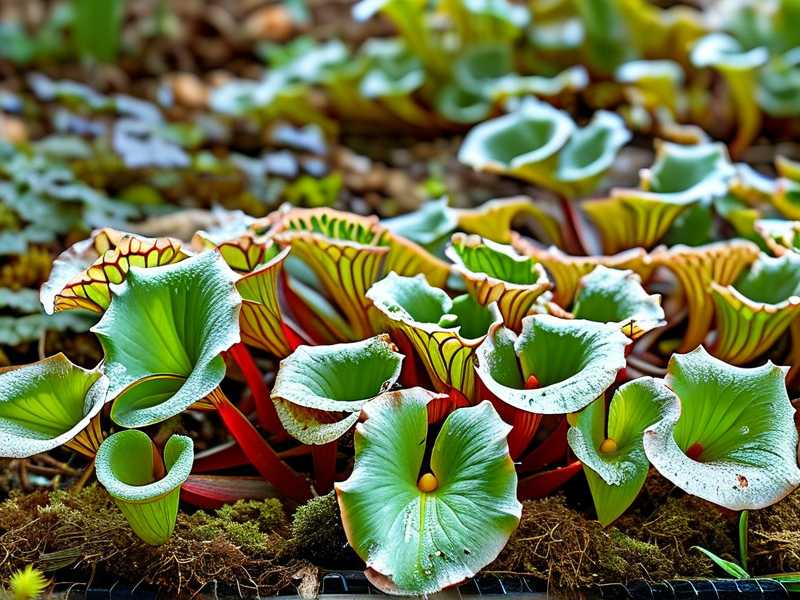
The Right Time to Start
I always begin in early March. This is before the Sarracenia pitchers emerge from dormancy. The rhizomes are still dormant but the soil is waking up. You want to catch that window when the bed is moist but not waterlogged.
Wait too long and you’ll damage new growth tips. I made that mistake once. I waited until April and snapped off several emerging pitchers. Those plants took the entire season to recover. Now I set a calendar reminder for the first weekend of March.
Tools I Actually Use
You don’t need fancy equipment. Here’s what works:
- A garden fork with narrow tines
- A lightweight hand rake with flexible tines
- A bucket for collecting removed mulch
- Gardening gloves (the thorn-proof kind)
- A spray bottle filled with distilled water
I tried a metal trowel in my first year. It was too clumsy. The garden fork lets me work between plants without tearing roots. The hand rake is perfect for gently pulling away loose material. I never use a heavy steel rake near Sarracenia bogs because it’s too aggressive.
Step-by-Step Process I Follow
Step 1: Assess the Bed Condition
Walk around the bog bed first. Look for areas where the mulch looks darker and denser. These spots tend to have the worst compaction. Use your fingers to probe the top inch. If it feels like a brick, you need to intervene.
I once ignored a small patch near the center of my bed. By summer, three plants in that spot had stunted growth. The roots were literally starved for air. Don’t skip this inspection.
Step 2: Loosen with the Garden Fork
Insert the fork vertically into the compacted mulch. Work in a grid pattern about six inches apart. Gently rock the fork back and forth. This breaks up the crust without flipping the soil.
I learned this method from a local carnivorous plant grower. She uses the same technique for her outdoor Sarracenia collection. It works because it mimics natural soil aeration. You’re not turning the bed upside down – just breaking the seal.
Step 3: Rake Away the Broken Mulch
Switch to the hand rake now. Pull the loosened material toward you in small piles. Work section by section. Don’t try to clear the entire bed in one go. You’ll disturb too many roots.
I usually clear about one square foot at a time. This takes longer but it’s safer. The Sarracenia rhizomes sit just below the surface. They’re surprisingly fragile when dormant. I’ve accidentally uprooted a few plants by rushing.
Step 4: Inspect for Exposed Roots
Once the old mulch is removed, look closely at the soil surface. Check for any rhizomes that are now exposed. These need to be covered again with fresh mulch.
I dealt with this issue last spring. Two inches of rhizome were showing after I cleared the bed. I simply added a thin layer of fresh sphagnum peat to protect them.
Step 5: Apply Fresh Mulch Immediately
After removing the compacted layer, add a new one-inch layer of mulch. I use a mix of aged pine bark and sphagnum peat. This combination provides good drainage and maintains acidity.
The RHS recommends using coarse organic material for bog beds. Fine materials compact too quickly. I’ve found pine bark nuggets last at least one season before needing replacement.
My Two-Week Observation Log
Week one, day one: The bed looks bare but clean. I notice the soil feels spongier after aeration. Day three: No visible change in plant appearance. But I can see moisture is draining better. Day five: Some tiny green tips are appearing on the oldest rhizomes. This is earlier than previous years. Day seven: The first pitcher starts pushing through the new mulch layer.
Week two, day nine: All plants have at least one new shoot visible. The bed looks healthy. Day twelve: I spot a patch of fungus gnats near one corner. I treat it with a diluted neem solution. Day fourteen: Everything is growing uniformly. The compaction issue is completely resolved.
3 Critical Mistakes Beginners Make
① Overwatering After Mulch Removal
This is the biggest killer. After you remove the old mulch, the soil dries faster. Many gardeners panic and water more. Bad idea. Sarracenia need consistent moisture but not saturation.
I learned this when I killed my first Venus flytrap. I removed old mulch and immediately flooded the bed. The roots rotted within two weeks. Now I simply mist the surface with distilled water. Nothing more.
② Raking Too Deep
New users often dig into the soil. They think deeper means cleaner. But Sarracenia roots are shallow and delicate. I destroyed a whole row of plants by raking two inches deep. The roots looked like tangled fishing line.
Stick to the top half-inch. Anything deeper risks cutting through rhizomes. Use a light touch with your hand rake.
③ Using the Wrong Type of Mulch
Not all mulch works for Sarracenia. I tried cedar bark once. It was cheap and looked nice. But it raised the pH of my bog bed. The plants developed chlorosis within weeks.
Stick to acidic materials. Sphagnum peat, aged pine bark, and coarse sand are safe. Avoid any dyed or treated wood products.
Common Questions I Get About This
Why can't I just leave the old mulch in place?
Old mulch compacts and blocks airflow. After one winter, it loses its structure. Leaving it creates a dense layer that traps moisture against roots. This leads to rot and fungal issues.
How do I know when to stop raking?
Stop when you see the soil surface. You should be able to see the top of the rhizomes. If you hit something solid, you’re too deep. Feel for resistance – it’s usually a rhizome.
Is it okay to use a metal rake?
Only if it has flexible tines. Stiff tines will damage roots. I prefer plastic or bamboo rakes because they’re gentler. Metal rakes are too aggressive for bog beds.
Final Thoughts on Spring Maintenance
I started with one Sarracenia plant in a pot. Now I maintain three outdoor bog beds. The annual mulch removal is the most important job each spring. Skipping it means compacted soil, poor growth, and sick plants.
The AHS suggests that proper bed maintenance increases pitcher size by up to 30%. I believe it after seeing the difference in my own garden. Plus, you’ll avoid those hidden problems like root rot and pest infestations.
Try working in small sections. Use hand tools instead of power equipment. Keep your watering minimal during the first two weeks. You’ll see faster growth and healthier plants. It’s worth those extra minutes of careful work.
I still use the same fork from my first year. It’s worn down but still serviceable. The process feels natural now. Spring just isn’t complete without clearing that old mulch. Your Sarracenia will thank you with strong, vibrant pitchers all season.





