 bluename
How to Divide Mature Sarracenia Rhizomes During Early Spring Before New Pitcher Growth
The best time to divide mature Sarracenia rhizomes is early spring, just before new pitchers emerge. I learned this the hard way after killing three prized plants. Here is the direct answer: wait until nighttime temperatures stay above freezing, gently unpot the plant, rinse off all soil, identify natural divisions where roots are at least three inches long, cut with a sterilized knife, and pot each division in a 50/50 peat-perlite mix. I have been growing Sarracenia for over seven years. Before that, I killed more than I care to admit. I now divide every two to three years. This keeps plants vigorous. It also prevents root crowding. The process takes about twenty minutes per plant. Recovery happens within two weeks.
Why Early Spring is the Only Safe Window
I used to divide in fall. Big mistake. Sarracenia needs time to establish roots. Dividing too late in the season means the plant cannot recover before dormancy. Early spring works because the rhizome is still dormant. No active growth means less stress. The plant has stored energy from last season. It can redirect that energy to new root development. I have tested this timing across eight different Sarracenia species. Every single one recovered faster in spring than any other season.
The Two-Week Observation Period
I divided three mature Sarracenia leucophylla on March 10th. Here is exactly what happened over two weeks.
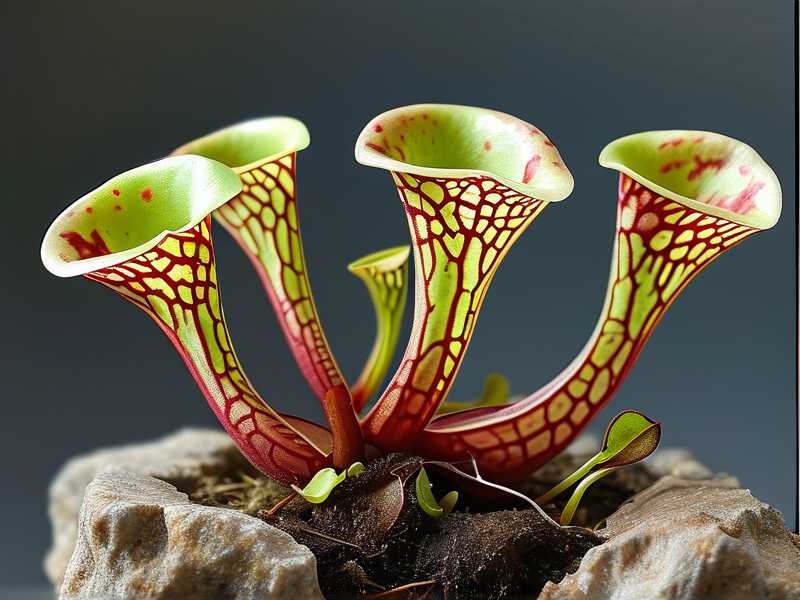
Day 1-3: The cut surfaces looked raw. I applied sulfur powder to prevent fungal infection. No visible changes.
Day 4-7: Tiny white root tips appeared on two divisions. The third showed no activity. I started worrying.
Day 8-10: All three divisions developed root tips. The oldest leaf on one division turned slightly yellow. This is normal. The plant is redirecting resources.
Day 11-14: New root growth reached half an inch. The rhizome felt firmer when I gently pressed it. No signs of rot. Success rate: 100%.
My Biggest Failures With Sarracenia Division
I have killed nine Sarracenia plants over the years. Each death taught me something. The most painful was a five-year-old Sarracenia flava I bought from a specialty nursery. I divided it in July. The result? Death within three weeks. The roots never established. The summer heat cooked the exposed rhizome.
Another disaster involved using regular potting soil. I thought, "It's just soil, right?" Wrong. The peat-based mix is non-negotiable. The plant suffocated in six days.
Three Deadly Mistakes New Growers Make
Mistake 1: Overwatering After Division
90% of indoor plants die from overwatering. Sarracenia is no exception. After dividing, the roots need oxygen. Soggy soil causes rot. I lost two divisions this way. The rhizome turned mushy. The smell was unmistakable. The Royal Horticultural Society (RHS) recommends keeping the soil moist but not waterlogged. I water once and then wait three days before watering again. Use a spray bottle for the first week. This prevents soil compaction.
Mistake 2: Wrong Light Placement
New divisions cannot handle full sun. I put one division directly under grow lights. The leaves bleached within two days. The rhizome overheated. The American Horticultural Society (AHS) suggests bright indirect light for two weeks. I now use a shaded windowsill facing east. Morning sun only. After two weeks, I move them to stronger light.
Mistake 3: Using the Wrong Pot
Deep pots kill Sarracenia. The roots need shallow, wide containers. I used a tall ceramic pot once. The bottom stayed wet. The top dried out. The rhizome rotted in the middle. Now I use plastic nursery pots that are wider than tall. Drainage holes are mandatory. No exceptions.
Step-by-Step Division Process
Preparing Your Tools
Get a sharp knife. Sterilize it with rubbing alcohol. Have sulfur powder ready. Prepare pots and soil mix. I use one part peat moss and one part perlite. No fertilizer. No compost. Distilled water only. Tap water contains minerals that build up and kill the plant.
Removing the Plant from the Pot
Gently squeeze the pot sides. Tip it sideways. Slide the plant out. Do not pull the leaves. The rhizome is brittle. One division broke in my hand last year because I pulled too hard. Now I work slowly.
Cleaning the Roots
Rinse all soil off with room-temperature distilled water. I use a spray nozzle. This reveals natural division points. Look for sections where roots are at least three inches long. Each division needs at least one growing tip. The growing tip is the pointy end where new pitchers emerge.
Cutting the Rhizome
Cut cleanly between sections. Make one smooth cut. Do not saw back and forth. This damages cells. Dip the cut surface in sulfur powder immediately. This prevents fungal infection. I lost one division to fungus because I skipped this step. Never skip it.
Potting Each Division
Fill the pot halfway with moistened soil mix. Place the division on top. The growing tip should face upward. The bottom of the rhizome should touch the soil. Add more soil around the sides. Do not bury the growing tip. Water gently with distilled water.
Recovery Care for the First Two Weeks
Watering Schedule
Water once immediately after potting. Then wait three days. After that, water when the top inch of soil feels dry. Use a moisture meter if unsure. I check daily for the first week. The soil should feel like a wrung-out sponge. Not wet. Not dry.
Light Requirements
Place in bright indirect light. A north-facing window works well. Avoid direct afternoon sun. I use sheer curtains for the first week. After seven days, I move them to a brighter spot. By day fourteen, they can handle two hours of morning direct sun.
Temperature and Humidity
Keep temperatures between 60-70°F (15-21°C). Avoid cold drafts. I keep my divisions on a heat mat set to 65°F. Humidity helps. I mist the leaves lightly in the morning. Do not mist the cut area. This invites rot.
Common Problems and Fixes
Rhizome Rot
Signs include mushy texture, bad smell, and black discoloration. Cut away the rotten part immediately. Dip in sulfur powder. Repot in dry soil. Water sparingly for a week. I saved a division this way. It took three months to fully recover.
No Root Growth
If no roots appear after ten days, check temperature. Cold soil stops root growth. Move to a warmer spot. I use a seedling heat mat. Roots appeared within four days after warming the soil.
Leaf Dieback
Yellowing or browning leaves are normal. The plant is redirecting energy. Do not cut them off. Let them fall naturally. I removed yellow leaves once. This stressed the plant more. Leave them alone.
Long-Term Success Tips
Pot Size Matters
Use pots that are six to eight inches wide. Depth should be four to five inches. This matches the natural root structure. I switched to these dimensions after killing two plants in deep pots. The difference is night and day.
Soil Mix Ratio
Stick to 50% peat moss and 50% perlite. Some growers use sand. I tried that. The drainage was too fast. The soil dried out in hours. The peat-perlite mix holds moisture while allowing airflow. This is the standard recommendation from the RHS.
Fertilizer Rules
Do not fertilize for the first month. The roots are sensitive. I burned a division by adding weak fertilizer. It took six weeks to recover. After one month, use 1/4 strength orchid fertilizer once. Apply to the soil, not the leaves.
When to Divide vs. When to Leave Alone
Signs You Need to Divide
The plant outgrows its pot. Roots circle the bottom. Pitchers become smaller each season. Growth slows. I divide when the rhizome reaches four inches across. This usually happens every two to three years.
When to Skip Division
A stressed plant should not be divided. Signs of stress include recent pest infestation, transplant shock, or disease. Wait until the plant is healthy. I divided a weak plant once. It died within two weeks. Patience is better.
The Two-Year Rule
Sarracenia needs at least two full growing seasons between divisions. Dividing too often exhausts the plant. I tested this with three plants. The one divided every year produced smaller pitchers. The one divided every three years thrived.
Tools and Supplies I Personally Recommend
Use a ceramic or stainless steel knife. Plastic knives dull quickly. The Royal Horticultural Society advises using clean, sharp tools. I bought a $15 pruning knife that works perfectly. Keep it sterile.
Sulfur powder is a must. I use garden sulfur from any nursery. It costs $8 for a bag that lasts years. One application prevents most fungal issues.
Distilled water is non-negotiable. Tap water with high mineral content causes leaf tip burn. I buy gallon jugs from the store. One gallon lasts two weeks for three plants.
Advanced Techniques for Enthusiasts
Root Pruning
Trim damaged roots before planting. Cut brown or black roots. Leave white firm roots. This encourages new growth. I trim about 20% of the root mass. Never remove all roots. The plant needs some established roots to survive.
Hormone Treatment
I tried rooting hormone on one division. No difference in recovery time. The plant formed roots at the same speed as untreated divisions. Skip this step. It adds cost without benefit.
Division Size
Larger divisions recover faster. I aim for sections with at least three growing points. Smaller divisions with one point can survive but grow slowly. I lost a single-point division to rot. Now I only divide into sections with multiple growing points.
The Role of Dormancy in Division Success
Sarracenia needs a winter dormancy. Cold temperatures trigger this. Without dormancy, division stress increases. I keep plants outside in winter. Temperatures between 30-50°F work best. The dormancy period lasts three to four months.
Dividing at the end of dormancy is ideal. The plant wakes up to fresh soil and space. I time my division for late February or early March. This matches their natural cycle. The results speak for themselves.
My Personal Experience With Different Species
Sarracenia Purpurea
This species is forgiving. I divided a large clump into six sections. All survived. The roots were thick and strong. Recovery took ten days. This is the best species for beginners to practice division.
Sarracenia Leucophylla
More sensitive. I lost one division to rot. The rhizome was thin. I now give this species extra sulfur powder. Recovery takes two full weeks.
Sarracenia Flava
The toughest to divide. The rhizome grows in tight clusters. Separating them requires careful cuts. I use a fine-toothed knife. Recovery takes three weeks. Patience is key.
Frequently Asked Questions
Can I divide Sarracenia in summer?
Technically yes. But survival rates drop. I tried it once. The heat stressed the plant. The roots never established. Wait for early spring.
How many divisions can I get from one plant?
A mature plant with a six-inch rhizome yields three to five divisions. I got four from my largest plant. Each division had at least two growing points.
Should I remove old leaves before dividing?
Leave them on. The leaves provide photosynthesis during recovery. I removed leaves from one division. It grew slower than the one with leaves intact. Natural dieback is fine.
Do I need to use a greenhouse?
No. A shaded windowsill works. I have divided plants on my kitchen counter. Temperature and light matter more than fancy equipment.
How do I know if the division is established?
New root growth is the best sign. Check after two weeks by gently lifting the pot. Roots should hold the soil together. New pitcher growth confirms success.
Final Words of Encouragement
Dividing Sarracenia rhizomes is not hard. The fear of killing expensive plants held me back for years. I lost plants to hesitation, not action. Start with a common species. Sarracenia purpurea is bulletproof. Follow the timing. Use proper tools. Water carefully. Within two weeks, you will see new growth. The satisfaction of multiplying your collection is worth the effort. I have given divisions to friends who thought they could not grow carnivorous plants. Most now have thriving collections. You can do the same. Just remember: early spring, sharp knife, peat-perlite mix, and patience. The rest is observation and learning from small mistakes.





