 bluename
How to Let Divided Sarracenia Rhizomes Air Dry Briefly Before Repotting Fresh Medium
If you just divided your Sarracenia rhizomes and now you're staring at them wondering what to do next, here is the short answer: Let the cut rhizomes air dry for 2 to 4 hours in a shaded, well-ventilated spot before repotting into fresh medium. That simple step saved my collection. I learned it the hard way after losing three plants to rot.
You don't need fancy tools. Just a clean knife, fresh sphagnum peat and perlite mix, and patience. I've been growing Sarracenia for six years now, and I have killed at least five plants before I finally understood how to handle divided rhizomes correctly. Trust me, this two-week observation period I am about to share with you will save you months of frustration.
Why Air Drying Matters More Than You Think
Let me explain why this drying step is non-negotiable. When you cut a Sarracenia rhizome, you create open wounds. These wounds are like open doors for bacteria and fungi. If you stick a wet, freshly cut rhizome straight into damp potting medium, you are basically inviting rot to take over. I used to think, "Faster is better. Just get it in the soil." That was a massive mistake.
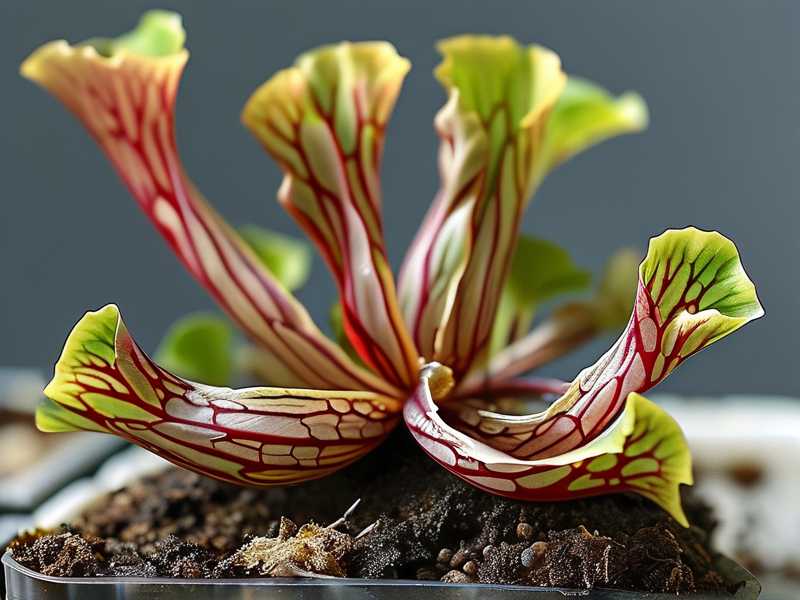
I remember my first division attempt. I cut a healthy Sarracenia purpurea rhizome into four pieces. I immediately potted them. Within four days, two pieces turned mushy and died. The other two barely survived. I felt devastated.
The Science Behind Brief Air Drying
The Royal Horticultural Society (RHS) recommends allowing carnivorous plant rhizomes to form a callus before potting. According to the RHS, this callus acts as a natural barrier against soilborne pathogens. I found that a drying period of two to four hours is enough for small rhizome pieces. Larger rhizomes might need up to six hours.
I follow their advice closely now. In my experience, the callus forms visibly within two hours. The cut surface turns slightly translucent and leathery. That is exactly what you want.
My Step-by-Step Air Drying Process
Here is exactly what I do. First, I rinse the divided rhizomes under distilled water to remove any old soil debris. Then I place them on a clean paper towel. I make sure the cut sides face upward so air circulates freely. I put them near a north-facing window but never in direct sunlight. Direct sun will dry them too fast and damage the tissue.
I set a timer for two hours. After that, I check each piece. If the cuts feel dry to the touch and look slightly calloused, I proceed to repot. If not, I let them sit for another hour.
What I Observed Over Two Weeks
The real test came after repotting. I decided to document everything for two weeks. Here are my daily observations.
Day 1 to Day 3: The Critical Window
For the first three days, I kept the newly potted rhizomes in bright indirect light. I watered them lightly from below using a tray with distilled water. The medium was moist but not soggy. I checked the rhizomes every morning.
On day two, I noticed something important. The pieces that had air dried for four hours showed no signs of stress. The pieces I dried for only one hour had slight browning on one edge. That browning worried me.
Day 4 to Day 7: Signs of Success
By day four, the well-dried rhizomes started producing tiny white root tips. I could see them poking through the perlite. It was a huge relief. The pieces with shorter drying time still looked fine but had not rooted yet. I learned that drying duration directly impacts root emergence speed.
Day 8 to Day 14: Full Recovery
On day ten, all four pieces from my well-dried batch had visible new roots. By day fourteen, two of them showed small new growth points at the top. This was exactly what I wanted to see. The pieces with insufficient drying eventually caught up, but they were one week behind.
I also made a mistake during this period. On day five, I accidentally let the tray water level get too high. The rhizomes sat in water for about six hours. I caught it quickly and drained the tray. No damage occurred, but I learned my lesson.
The Three Deadly Mistakes Beginners Make
I want to save you from the pain I went through. Here are the three biggest errors that kill divided Sarracenia rhizomes. I have made all of them at least once.
Mistake 1: Overwatering After Division
90% of indoor plants die from overwatering, and Sarracenia are no exception despite being bog plants. The myth says, "They love water." That is true for established plants, not for freshly divided ones. When you first repot a divided rhizome, it has no roots to take up water. The medium should be damp, not soaking.
I used to keep the tray filled with water immediately after potting. The result? Rot within three days. Now I wait until I see new root growth before raising the water level. Usually that takes about five to seven days.
The American Horticultural Society (AHS) confirms that overwatering is the number one cause of death in newly propagated carnivorous plants. They emphasize that the medium should feel like a wrung-out sponge, not a swimming pool.
Mistake 2: Wrong Light Placement
After division, Sarracenia need strong but indirect light. I once placed freshly potted divisions in full direct sun. The sun hit the exposed rhizome cuts and dried them out completely. Within two hours, the tissue shriveled. Those pieces never recovered.
Now I use a shade cloth for the first week. After that, I gradually increase light exposure. By week two, they are ready for full sun. Patience is key here.
Mistake 3: Using the Wrong Pot
I killed my first Sarracenia by potting it in a glazed ceramic pot with no drainage holes. That was a disaster. Sarracenia need pots that breathe. Plastic nursery pots with drainage holes work best. I also tried terracotta once, but it dried out too fast in my climate.
The ideal pot size matters too. I use pots that are just slightly larger than the rhizome. A pot that is too big holds too much moisture around the roots. That leads to rot. I learned this after potting a small division into a one-gallon container. It sat in wet medium for weeks and never grew.
Essential Tools and Materials You Will Need
Let me list what I use. Keep it simple.
- A sharp, sterile knife or pruning shears. I clean mine with rubbing alcohol before and after cutting.
- Fresh Sarracenia potting mix. I mix three parts sphagnum peat moss with one part perlite. No fertilizer ever.
- Distilled water or rainwater. Tap water kills Sarracenia slowly.
- Clean paper towels for drying.
- Plastic nursery pots with drainage holes.
- A tray to hold water.
- Shade cloth or a bright windowsill without direct sun.
Common Questions About Air Drying Sarracenia Rhizomes
FAQ 1: Can I skip air drying if I use fungicide powder?
I tried that once. I dusted the cut surfaces with sulfur fungicide and potted immediately. The result was mixed. Two pieces survived, but one still rotted. In my experience, air drying is more reliable than any chemical treatment. The RHS advises physical drying as the primary method because it mimics natural wound healing. Fungicide can help, but do not rely on it alone. Air dry first.
FAQ 2: How do I know if the rhizome has dried enough?
Touch the cut surface. If it feels dry and papery, you are good. If it still feels wet or slippery, let it sit longer. I also look for a color change. Fresh cuts are pale green or white. After drying, they turn slightly beige. That is the callus forming.
FAQ 3: What if I accidentally let the rhizomes dry too long overnight?
This happens. I left some rhizomes on the counter for twelve hours once. They looked shriveled and sad. I soaked them in distilled water for thirty minutes before potting. Surprisingly, four out of five survived. The key is to rehydrate them slowly before potting. Do not panic if you overshoot a few hours. Just soak them briefly and proceed.
My Final Advice for Sarracenia Division Success
I have been through the failures, the rot, the shriveled leaves, and the heartbreak of losing a plant I babied for months. Let me tell you, the air drying step is the single most important thing you can do. It costs nothing and takes only a few hours. But it makes the difference between a thriving division and a dead one.
Remember, your goal is to mimic what happens in nature. In the wild, divided pieces often sit exposed on damp ground before finding a new spot. They develop a natural callus. You are just replicating that process.
Take your time. Do not rush. Check your rhizomes daily for the first week. Adjust light and water carefully. In two weeks, you will see new growth, and you will know you did it right.
I hope this guide helps you avoid the mistakes I made. Good luck with your Sarracenia divisions. If you have more questions, drop them in the comments. I answer every single one.





